Schedule
Makalu Traffic is the planning/scheduling component included in Makalu. Its planning concept is based on playlists, shows and clips. The following table summarizes the characteristics of these and other elements that are used in the planning concept:
Element | Characteristics |
|---|---|
Asset |
|
Primary event |
|
Secondary event |
|
Clip |
|
Show |
|
Playlist |
|
Rundown |
|
Accessing Makalu Traffic
To access Makalu Traffic, proceed as follows:
-
Open the following URL in your browser:
https://traffic.customer-identifier.makalu.live.Notice
Replace
customer-identifierwith your actual customer identifier, e.g.exampletv. -
Log in with your Makalu credentials.
The Makalu Traffic user interface is opened. In the sidebar on the left the Playlists entry is pre-selected and available playlists are listed on the right.
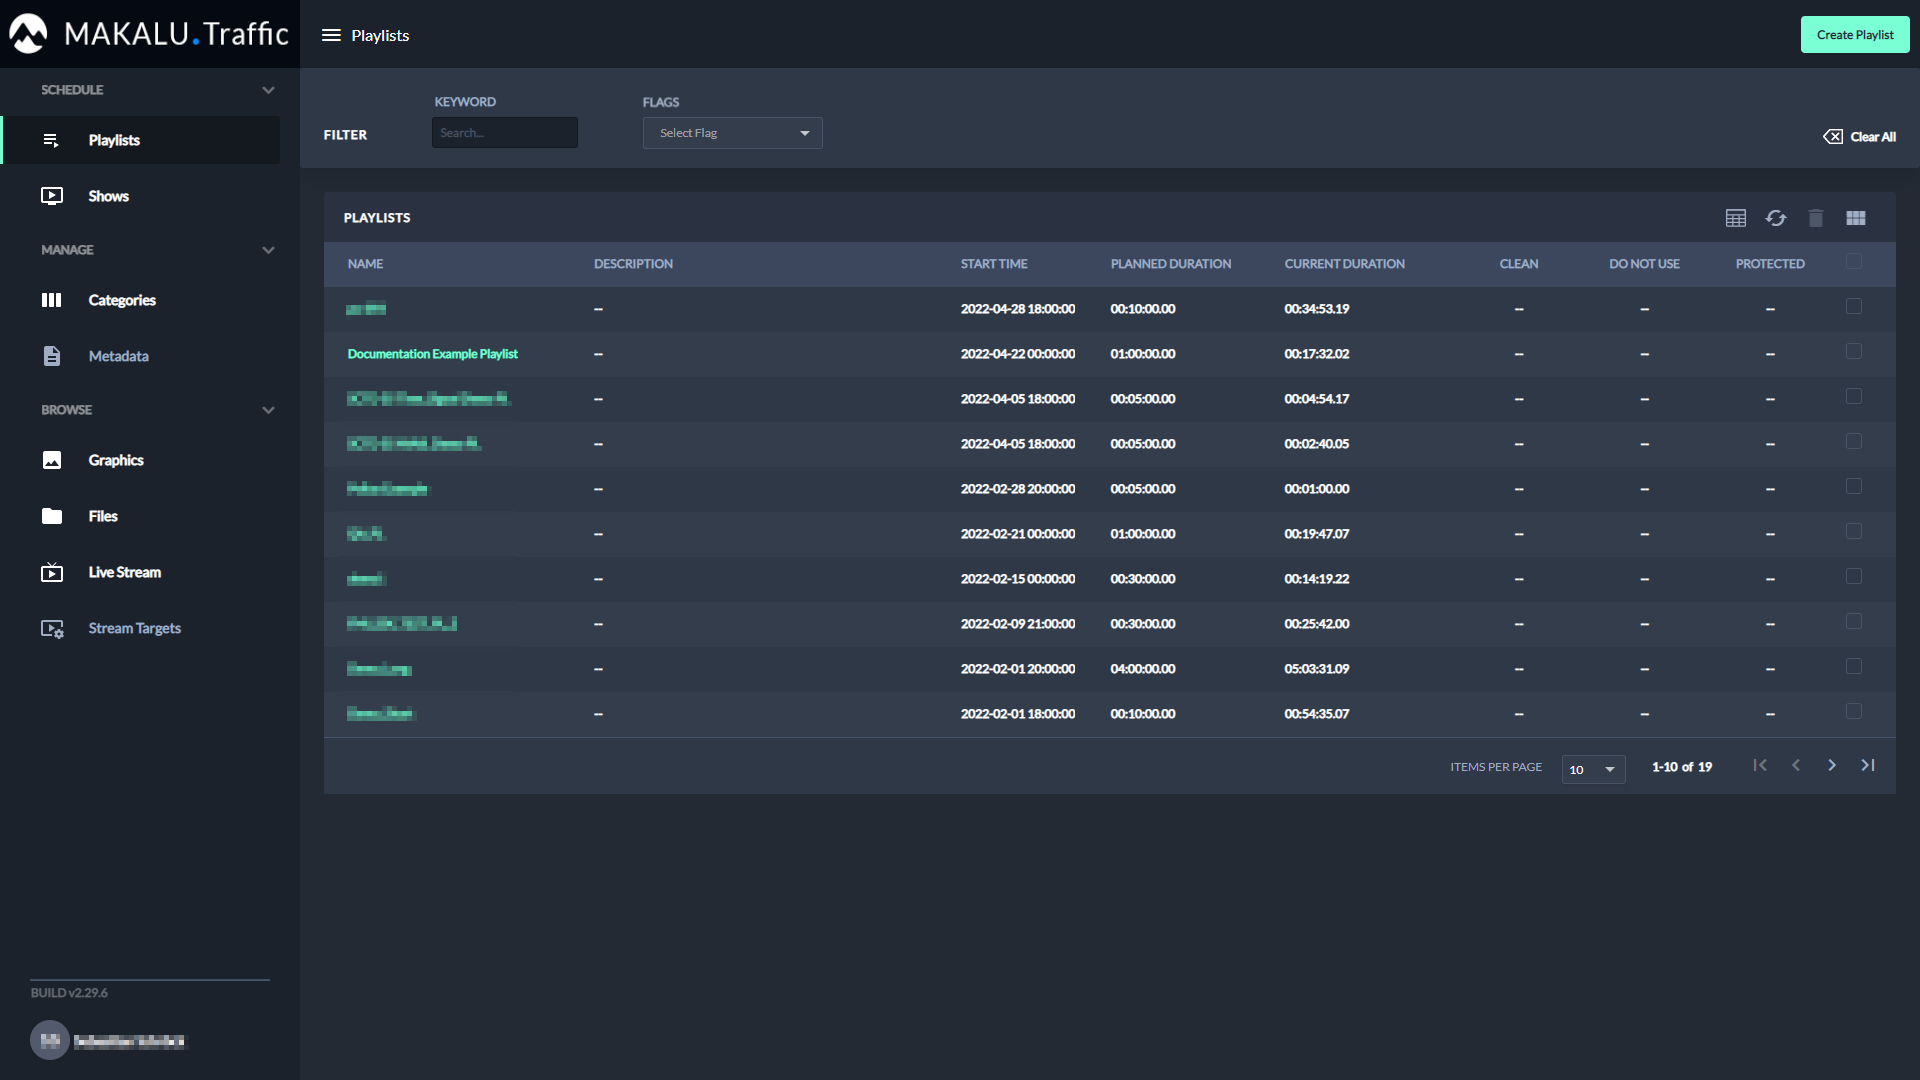
Figure: Makalu Traffic user interface
Using shows
Creating a show
To create a show, proceed as follows:
-
In the sidebar on the left, select Shows.
All available shows are listed on the right side.
-
In the top right click Create Show.
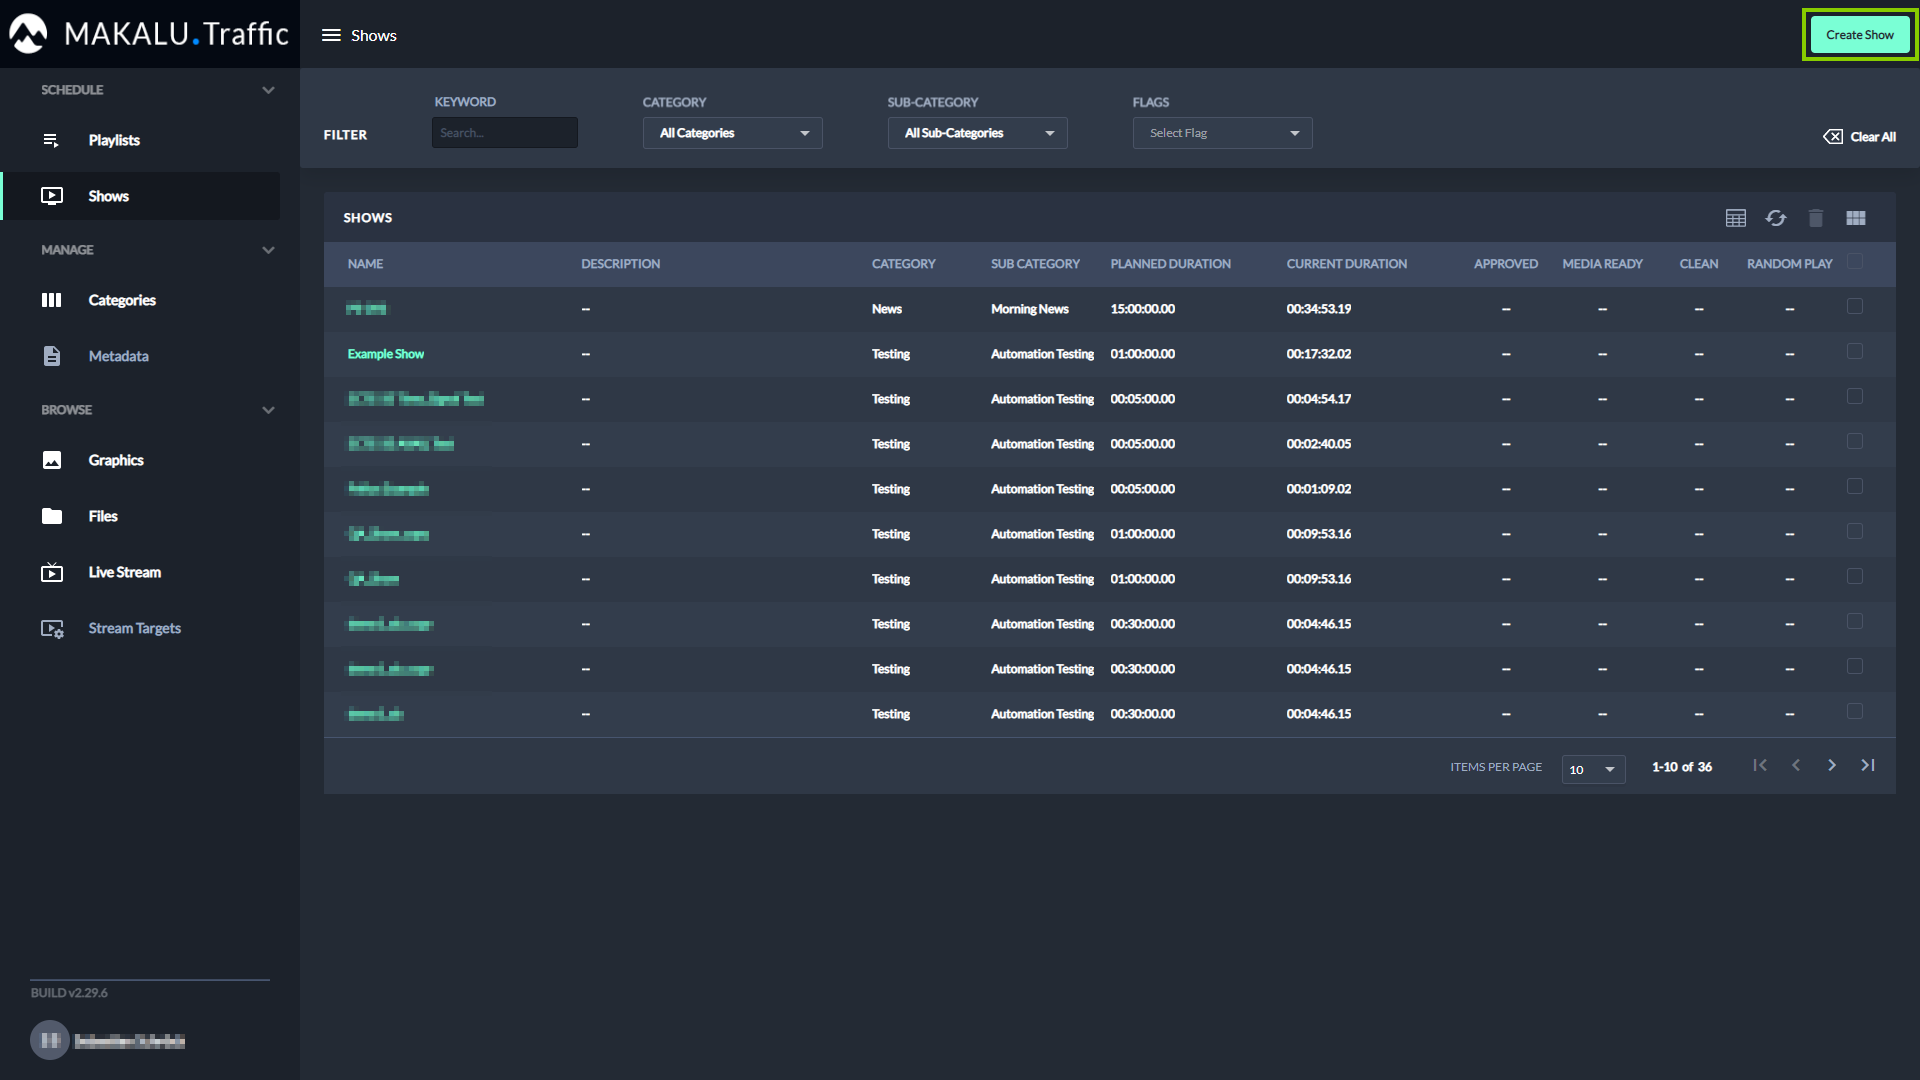
Figure: Makalu Traffic - Create show
A dialog is displayed that allows you to define the basic show properties.
-
Set the basic show properties.
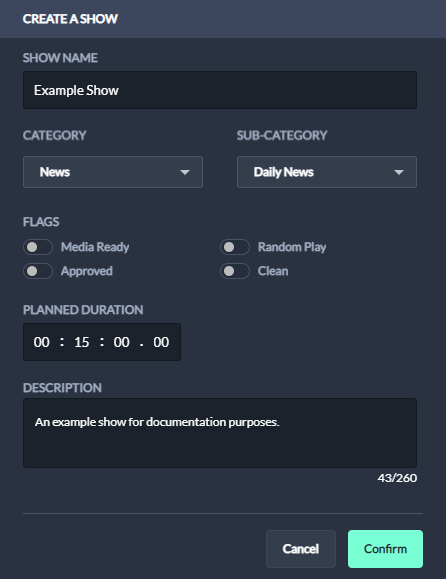
Figure: Makalu Traffic - Define basic show properties
Notice
To create a new show, at least the following properties must be set:
- Show name
- Category
- Sub-category
- Planned duration
-
To create the show with the selected properties, click Confirm.
The show is created, and the list of available shows is displayed again.
Since the newly created show is initially empty, the next step is to add content (primary and secondary events) to the show.
To add content to the show, proceed as follows:
-
Open the show, by clicking on the name of the show in the list of available shows.
The show is opened.
-
(Optional) In the Show properties area, edit the basic show properties.
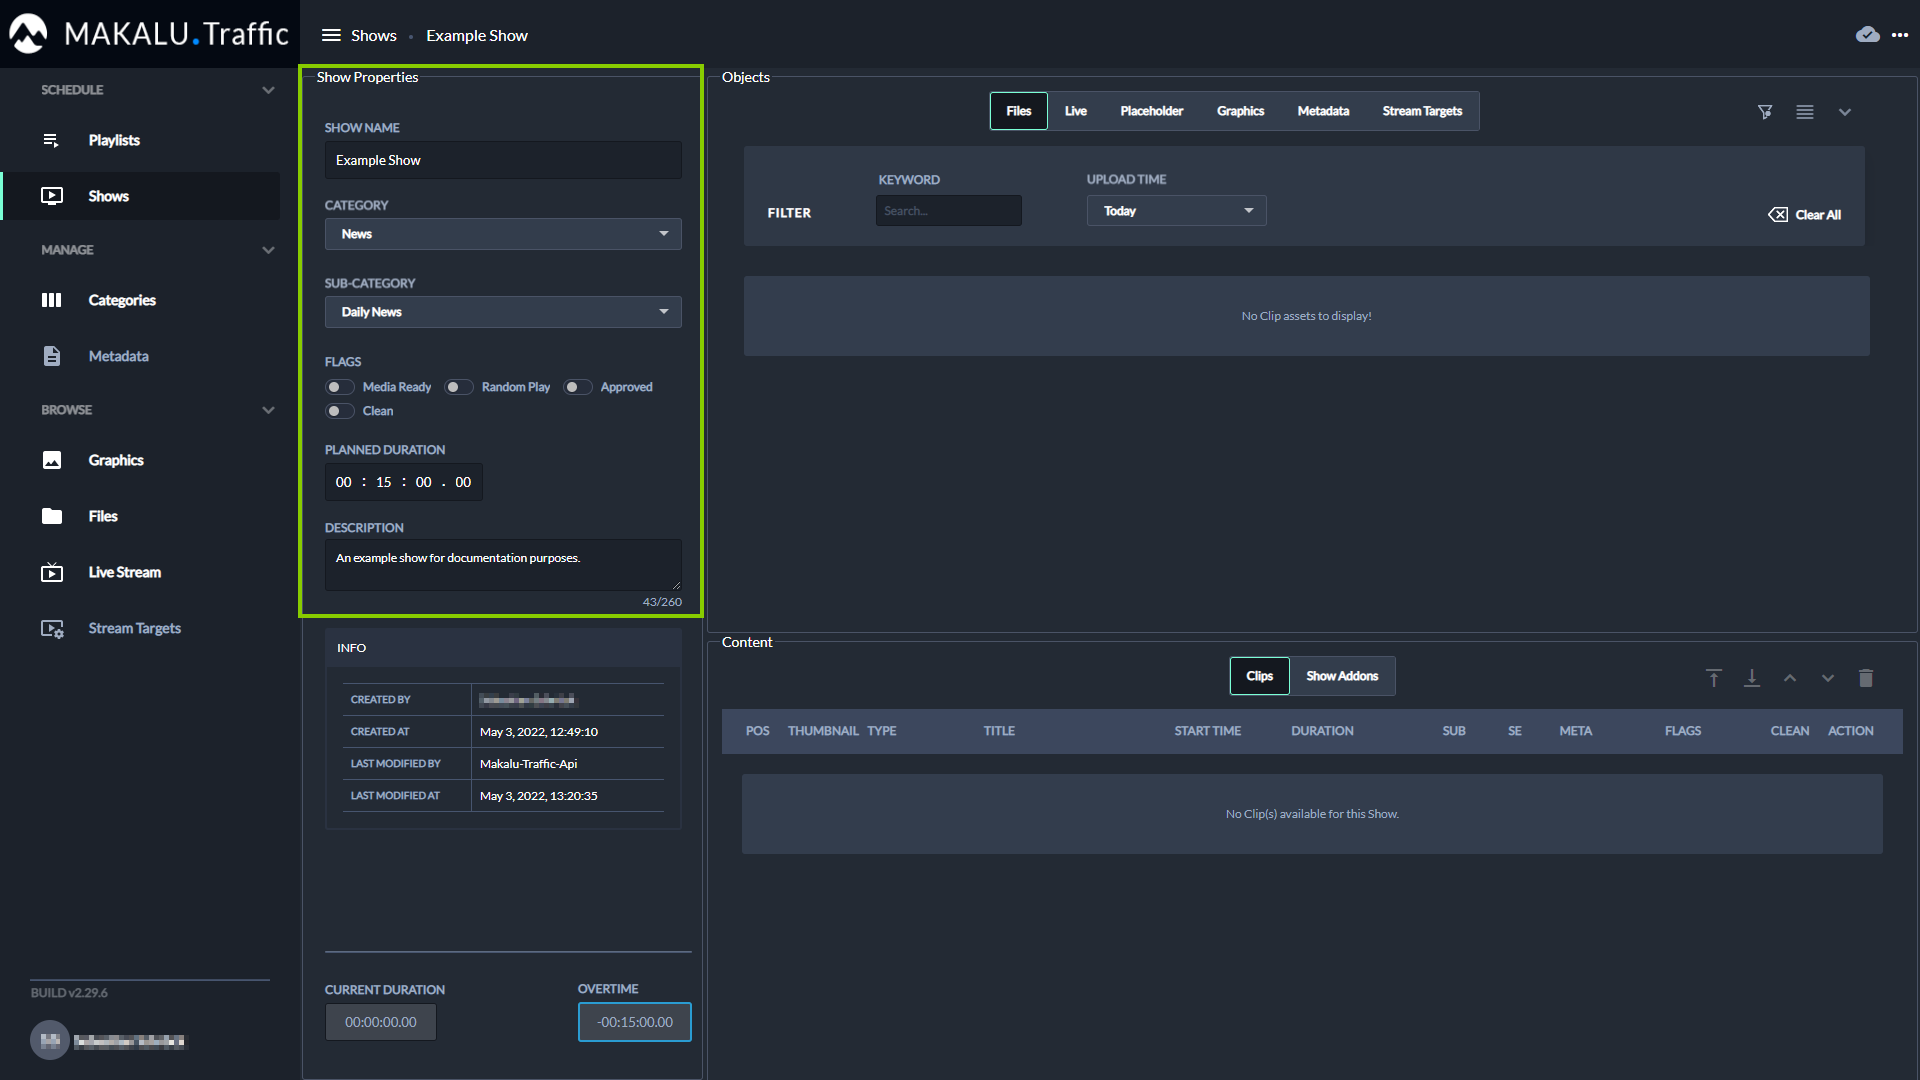
Figure: Makalu Traffic - Edit basic show properties
Notice
Any changes you make to the show are saved automatically.
-
Add a primary event to the show.
-
On the right in the Objects area select the type of primary event you want to add (either Files, Live or Placeholder).
Depending on your selection, either available files, live sources or placeholders are listed in the corresponding area below.
-
To filter the available primary events, either use the Keyword search field (if you want to search for a specific file name) and/or use the Upload Time dropdown menu (if you want to select a specific time period when the file was uploaded/created).
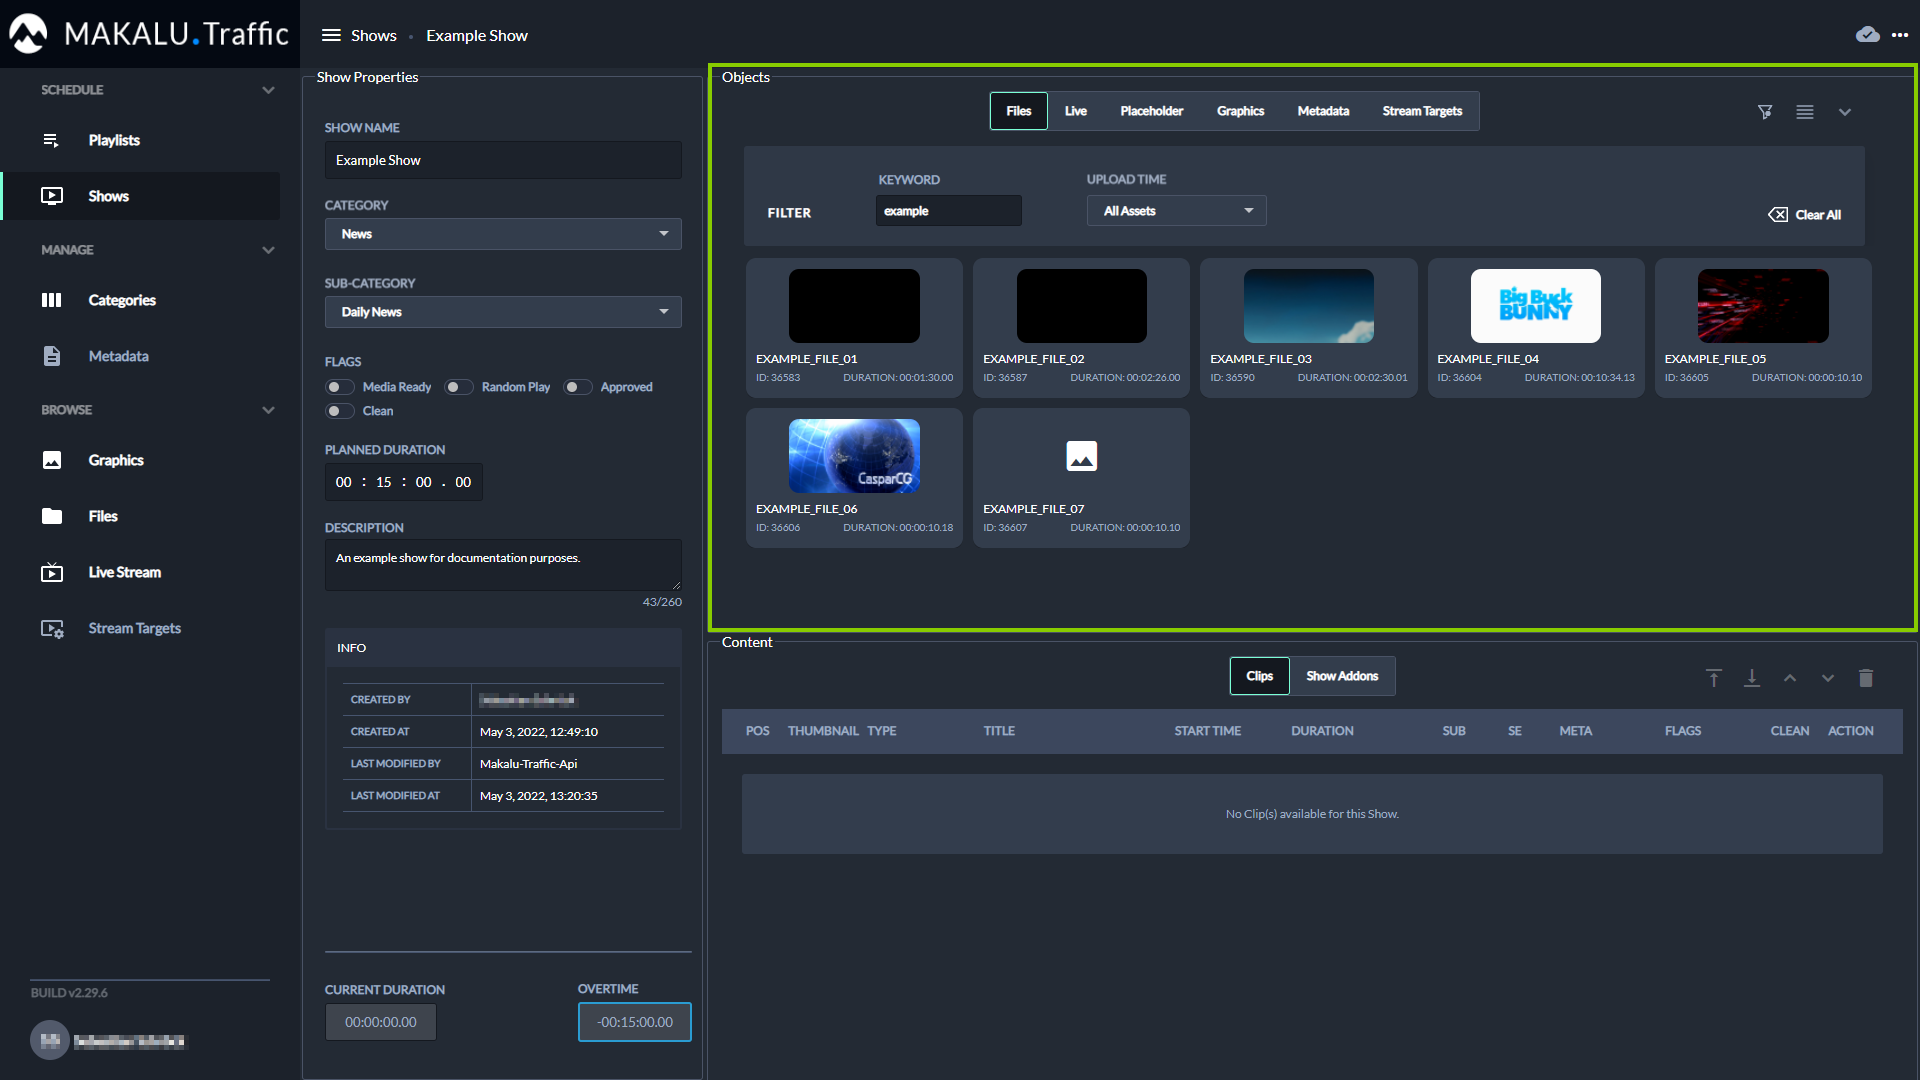
Figure: Makalu Traffic - Filtered primary events
Tip
You can switch between a presentation as card or list view, by clicking the Enable card view icon
 or Enable list view icon
  in the top right.
 -
Select one or more primary events and drag them on the clip list in the Content area below.
Notice
If you drag a file, it is directly added to the show’s clip list.
If you drag a live event, a dialog is displayed where you must set the planned duration for the event.
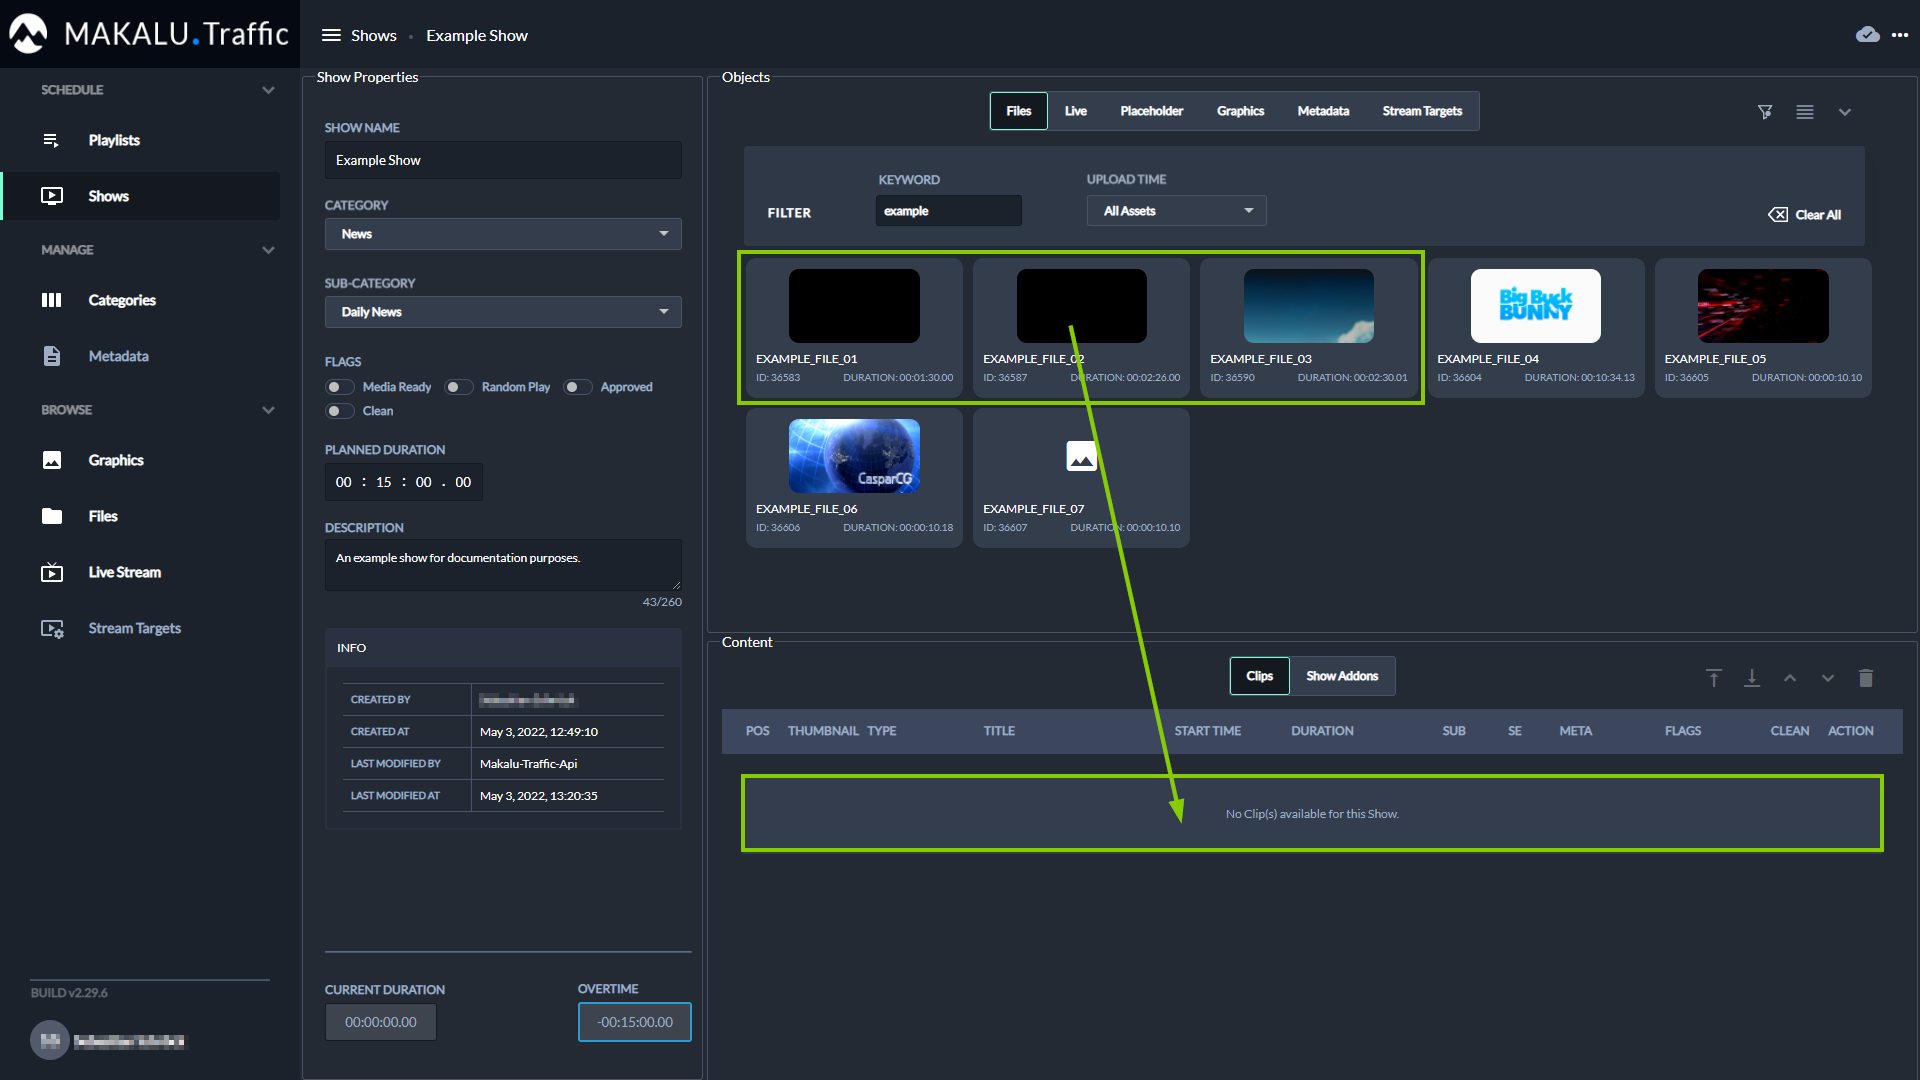
Figure: Makalu Traffic - Add primary events to a show
The primary events are added to the show’s clip list.
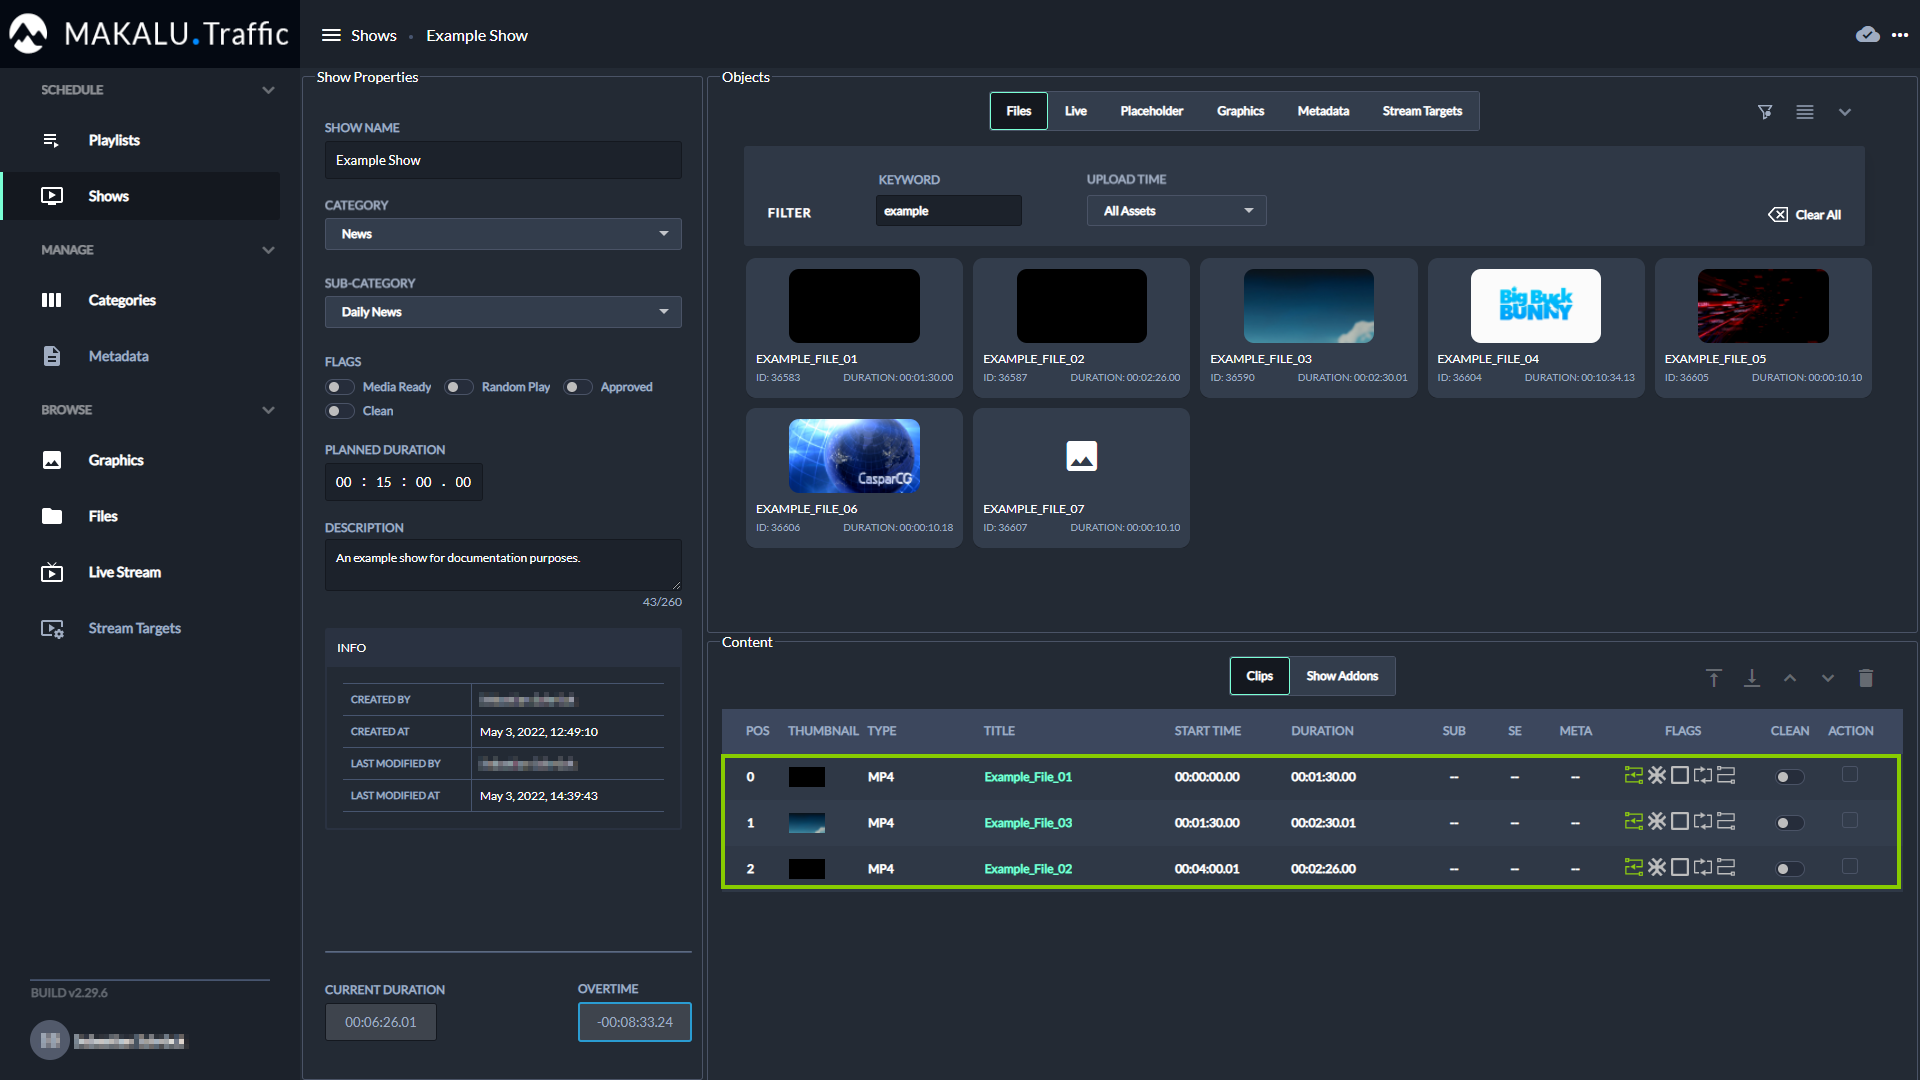
Figure: Makalu Traffic - Primary events added to a show
Notice
The fields Current duration and Overtime are updated accordingly.
-
(Optional) Repeat steps a to c to add more primary events to the show.
The primary events are added to the show’s clip list. The start time of each added clip is calculated accordingly, depending on the duration of the previously added clips.
Tip
To delete a clip from the clip list, proceed as follows:
1 - Select one or more clips to be deleted, by activating the corresponding Action checkbox(es) in the clip list.
2 - Click the Delete Clip icon
 .
.3 - In the subsequently displayed dialog click Confirm.
-
-
(Optional) Change the order of the clip list.
-
Select one or more clips, by activating the checkbox in the Action column.
-
Use the arrow icons (move up/down, move to top/bottom)
 above the clip list to change the order.
-
-
(Optional) Edit the clip flags.
Notice
By default, the Auto Follow flag is activated for all added primary events.
-
(Optional) Add secondary events to the show.
-
On the right in the Objects area select the type of secondary event you want to add (either Graphics, Metadata or Stream Targets).
Available secondary events of the selected type are displayed below.
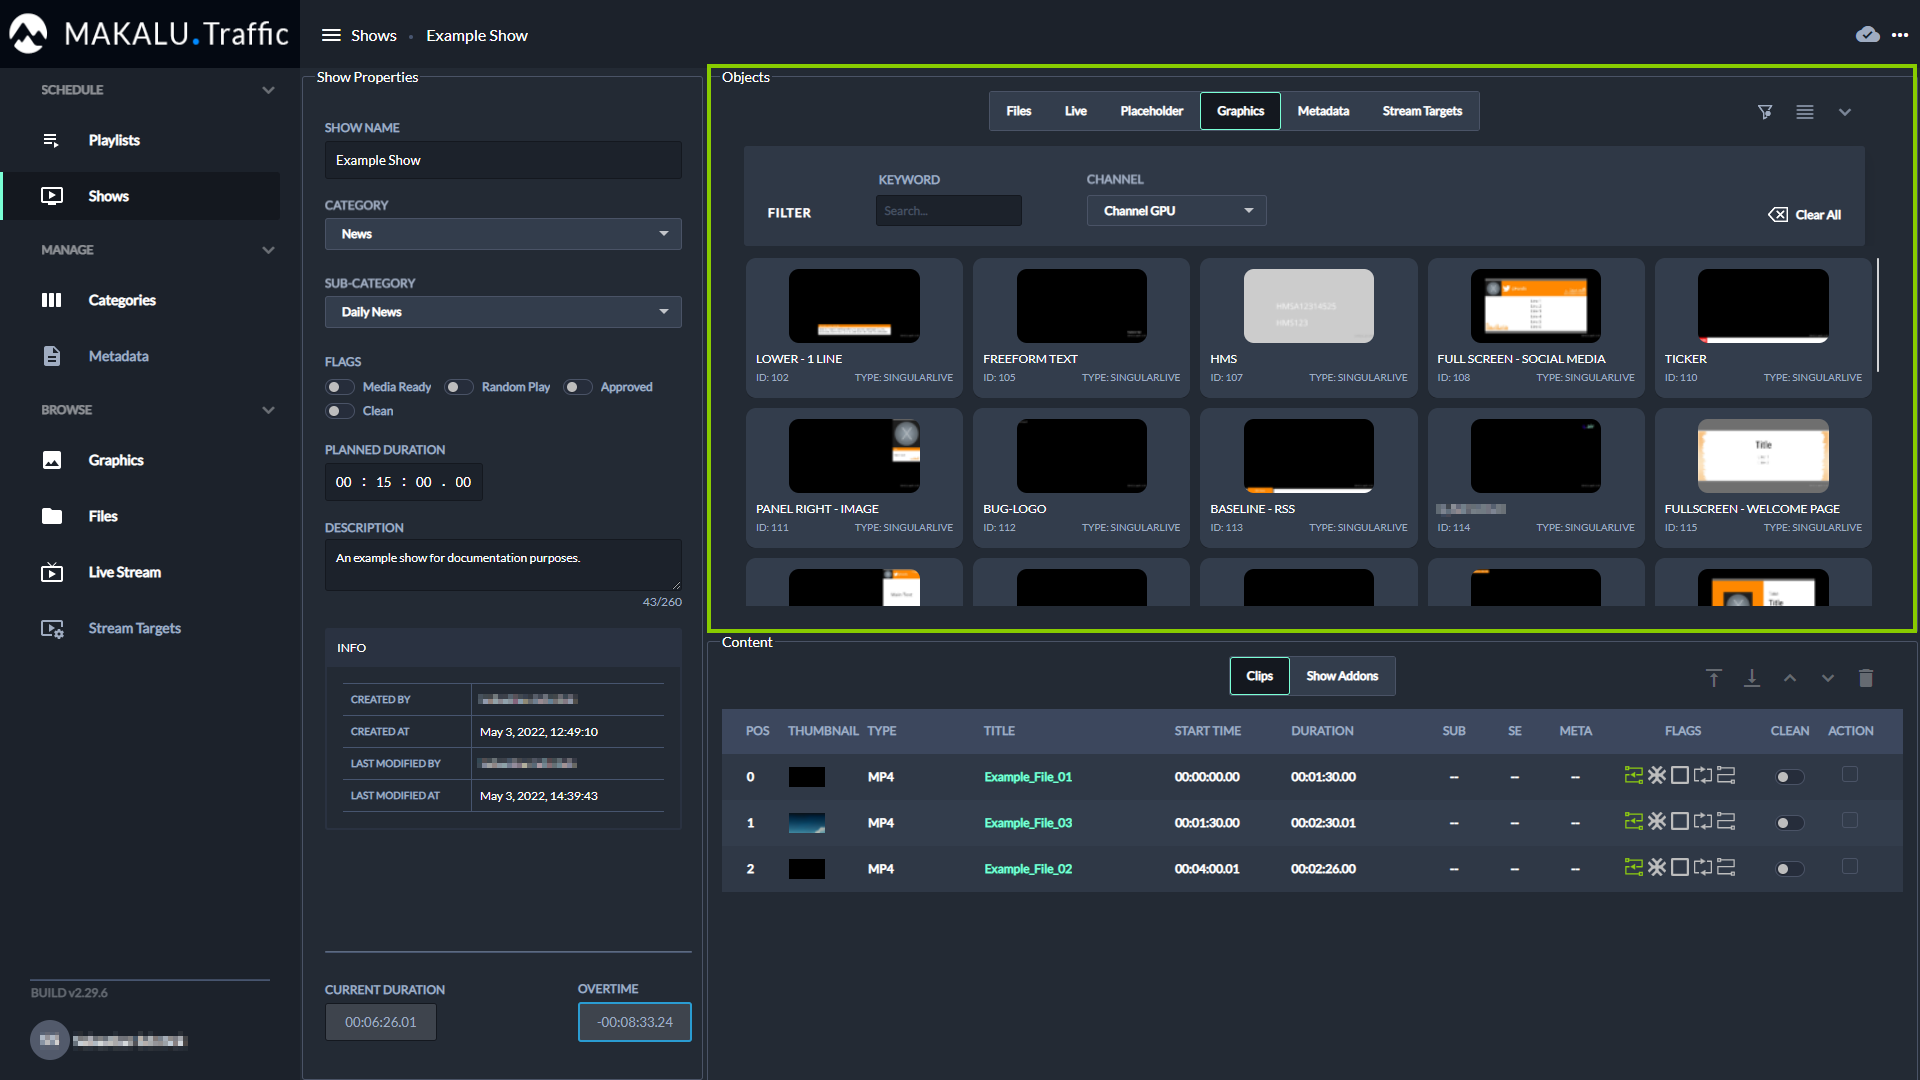
Figure: Makalu Traffic - Secondary events
Tip
You can switch between a presentation as card or list view, by clicking the Enable card view icon
or Enable list view icon in the top right. -
(Optional) To search for secondary events based on the event name, use the Keyword search field.
-
(Optional) To search for graphics based on the channel they are assigned to, select a channel in the Channel dropdown menu right to the search field.
Warning
If you add multiple graphics to a show, only add graphics that are all assigned to the same channel. Otherwise, you cannot send a playlist to playout that includes this show.
-
To add a secondary event to a single clip in the show, select a secondary event and drag it into the Content area on the corresponding clip.
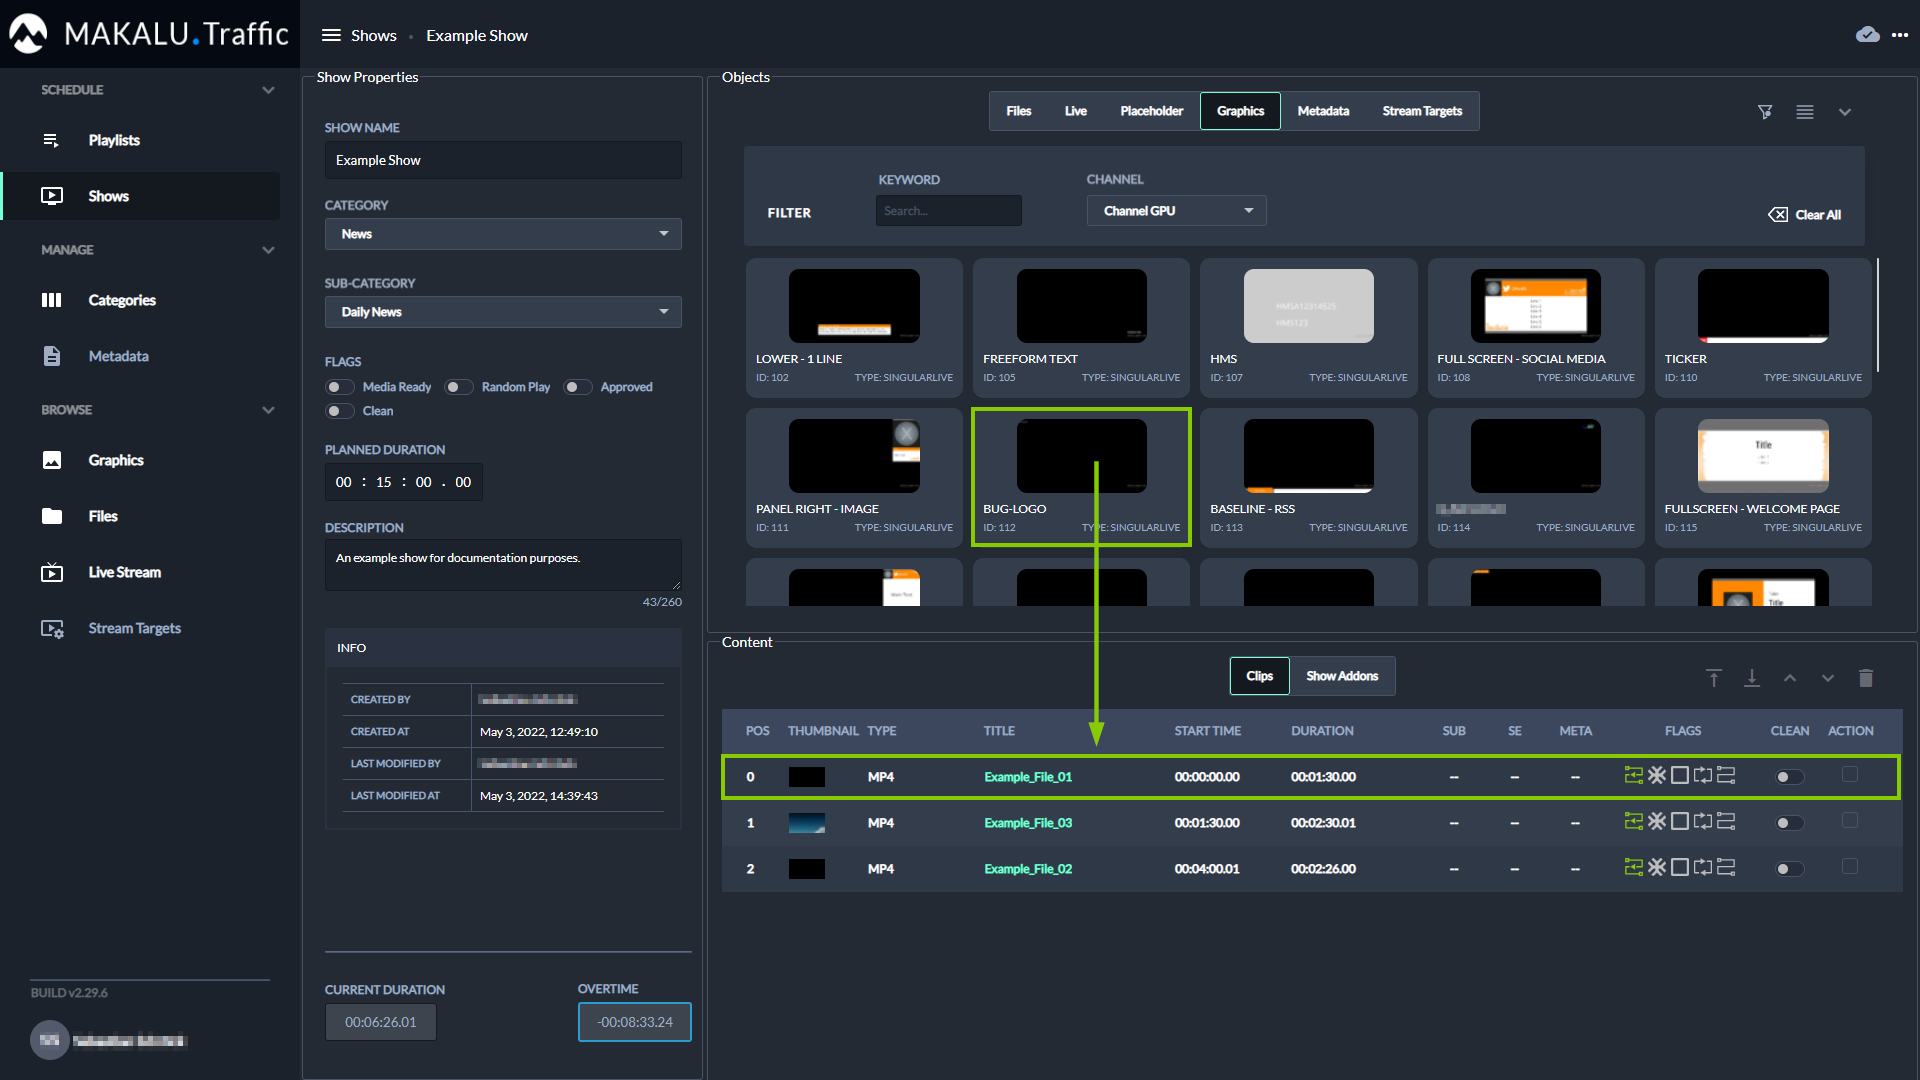
Figure: Makalu Traffic - Add secondary event to a clip
The secondary event is added to the clip.
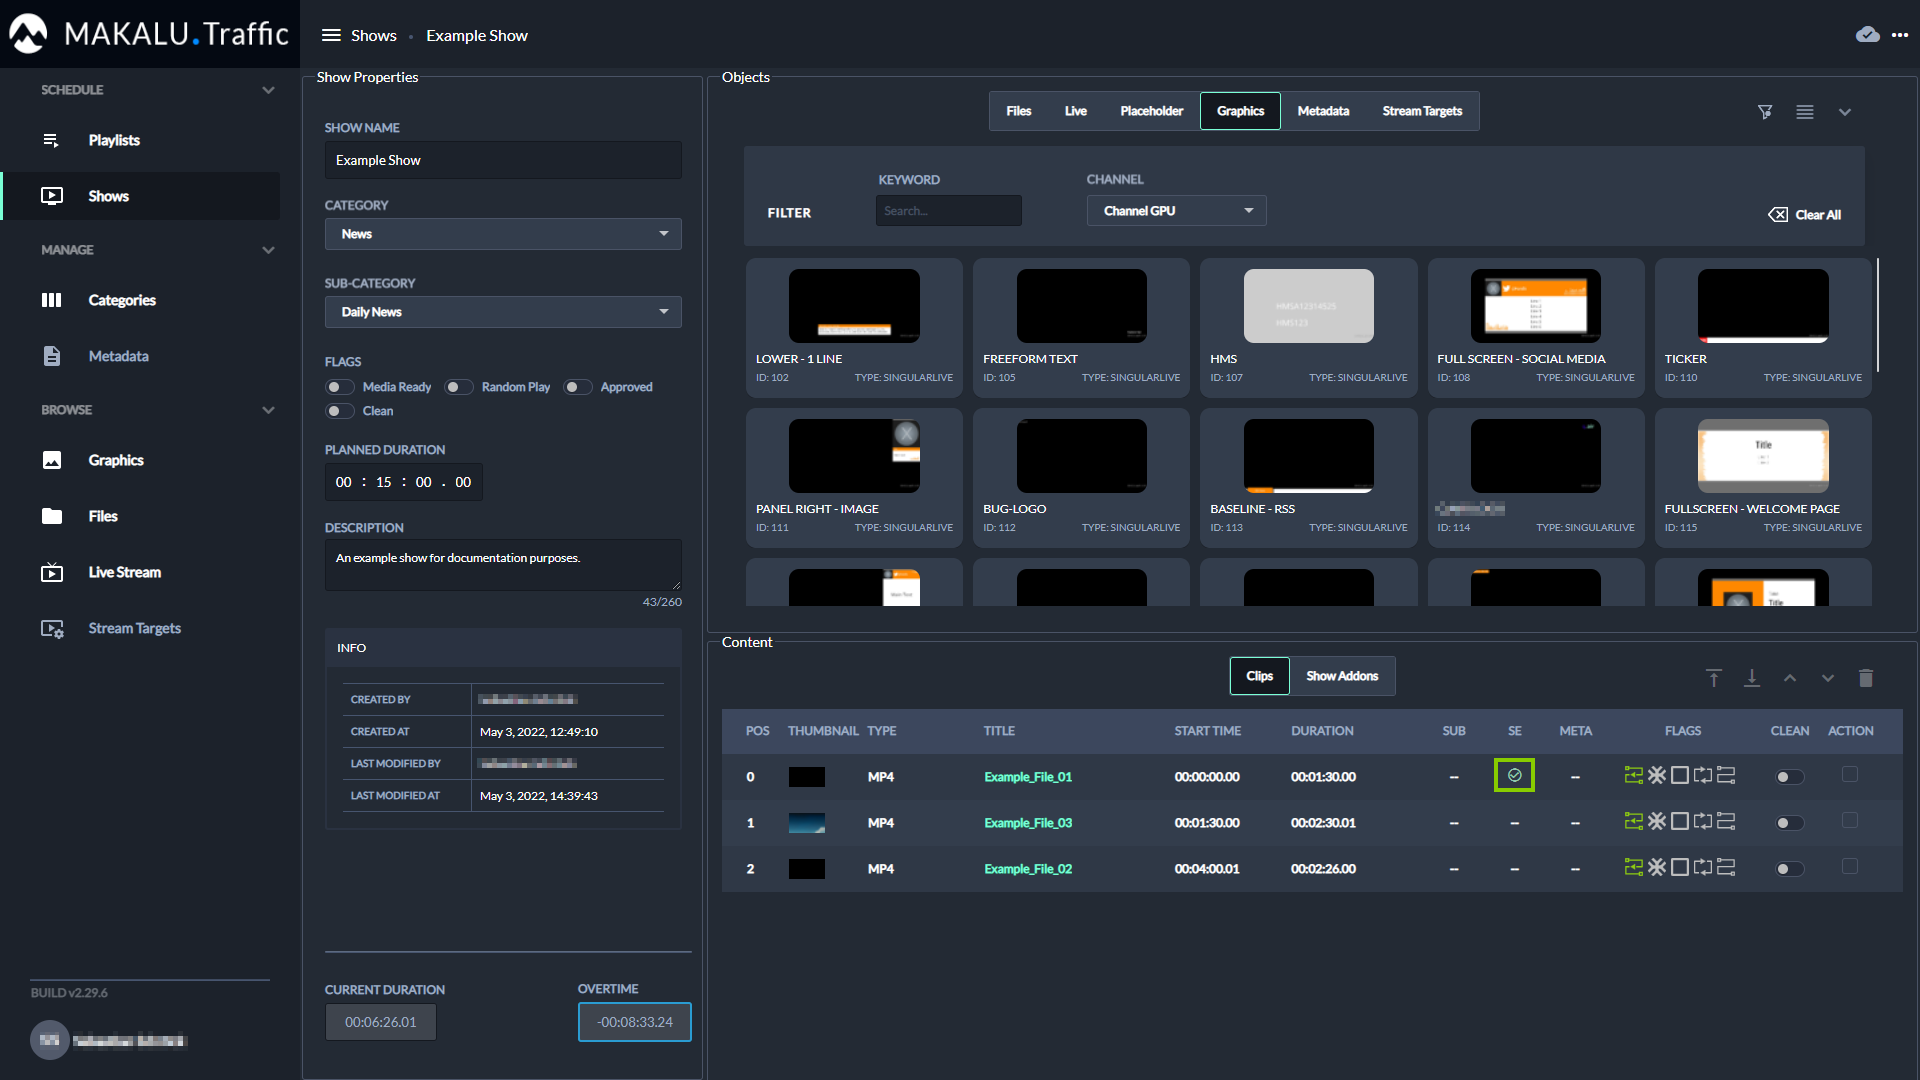
Figure: Makalu Traffic - Secondary event added to a clip
Notice
The check marks in the columns Sub, SE and Meta in the clip list indicate, if there are additional elements (subtitles, graphics and/or metadata) assigned to the clip.
-
To add a secondary event to the show, in the Content area select Show Addons, then select a secondary event and drag it on the show addons list.
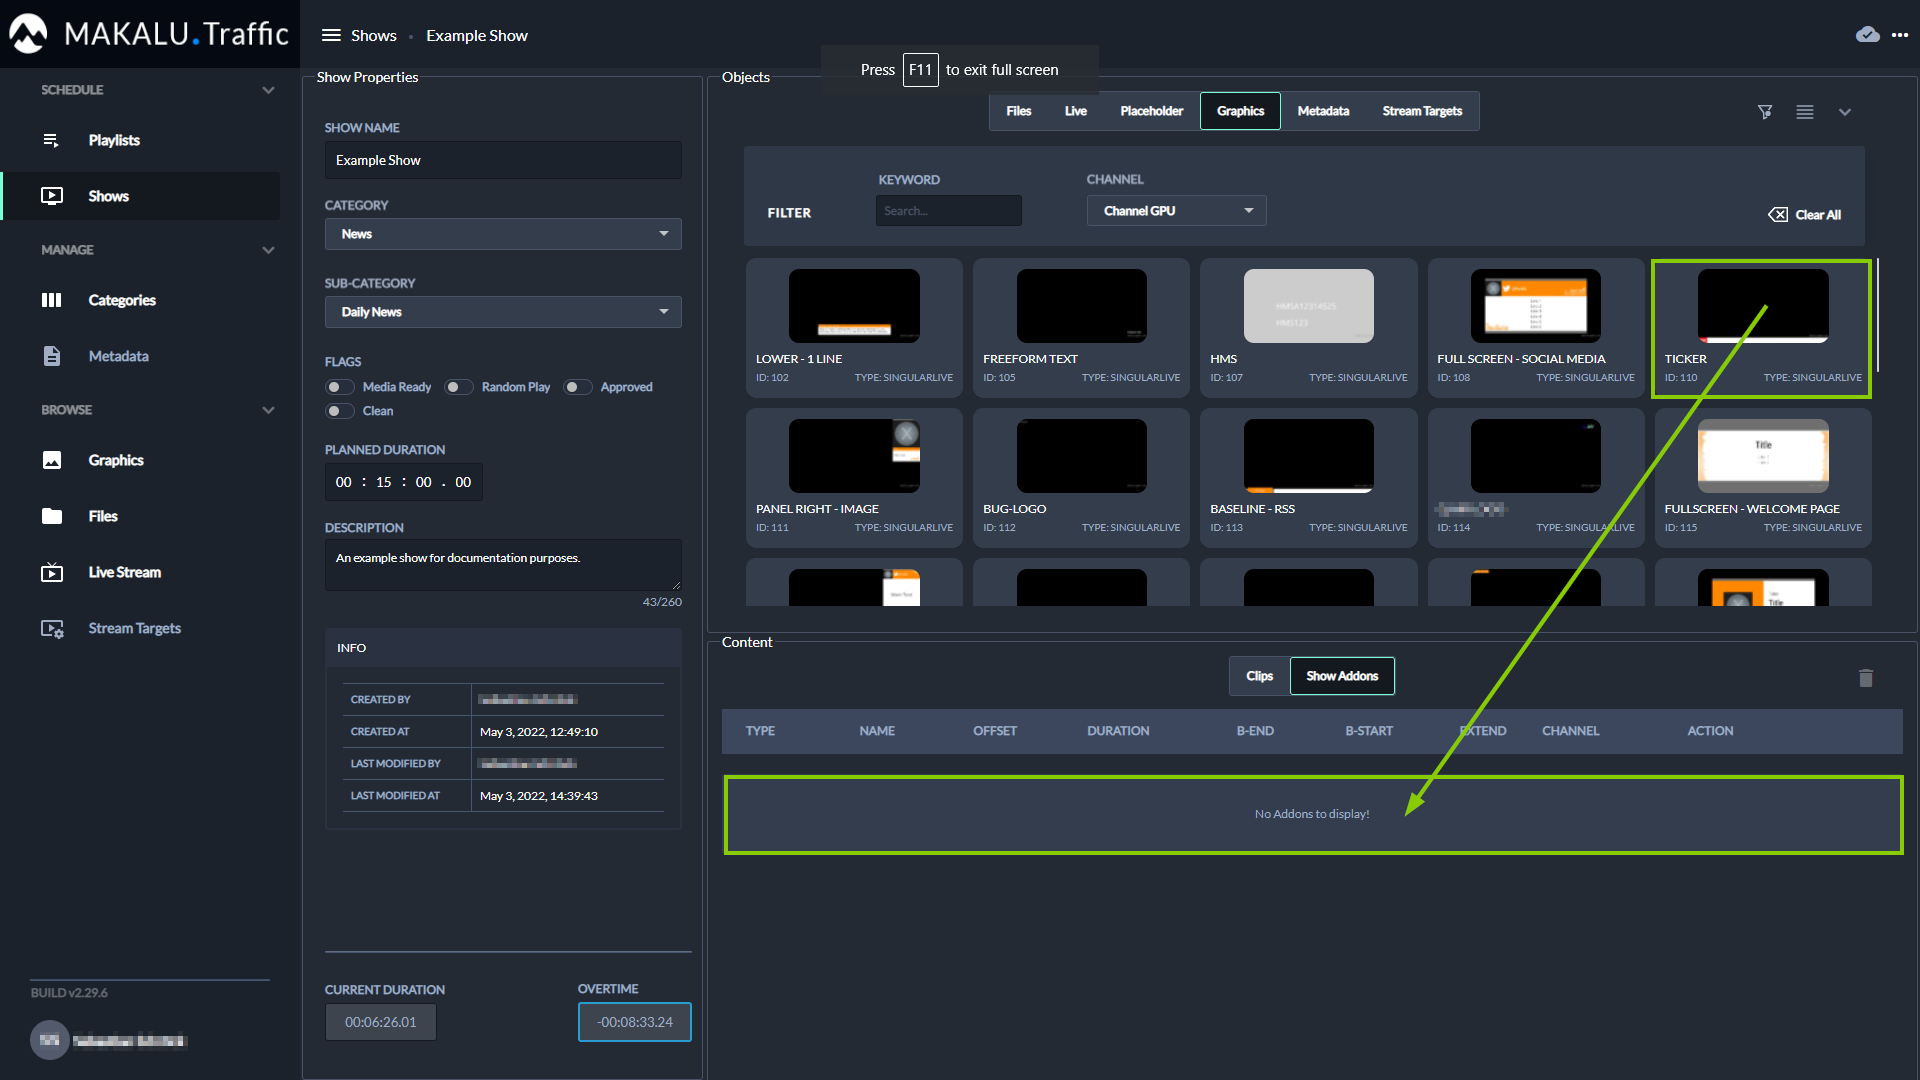
Figure: Makalu Traffic - Add secondary event to a show
The secondary event is added to the show addons list.
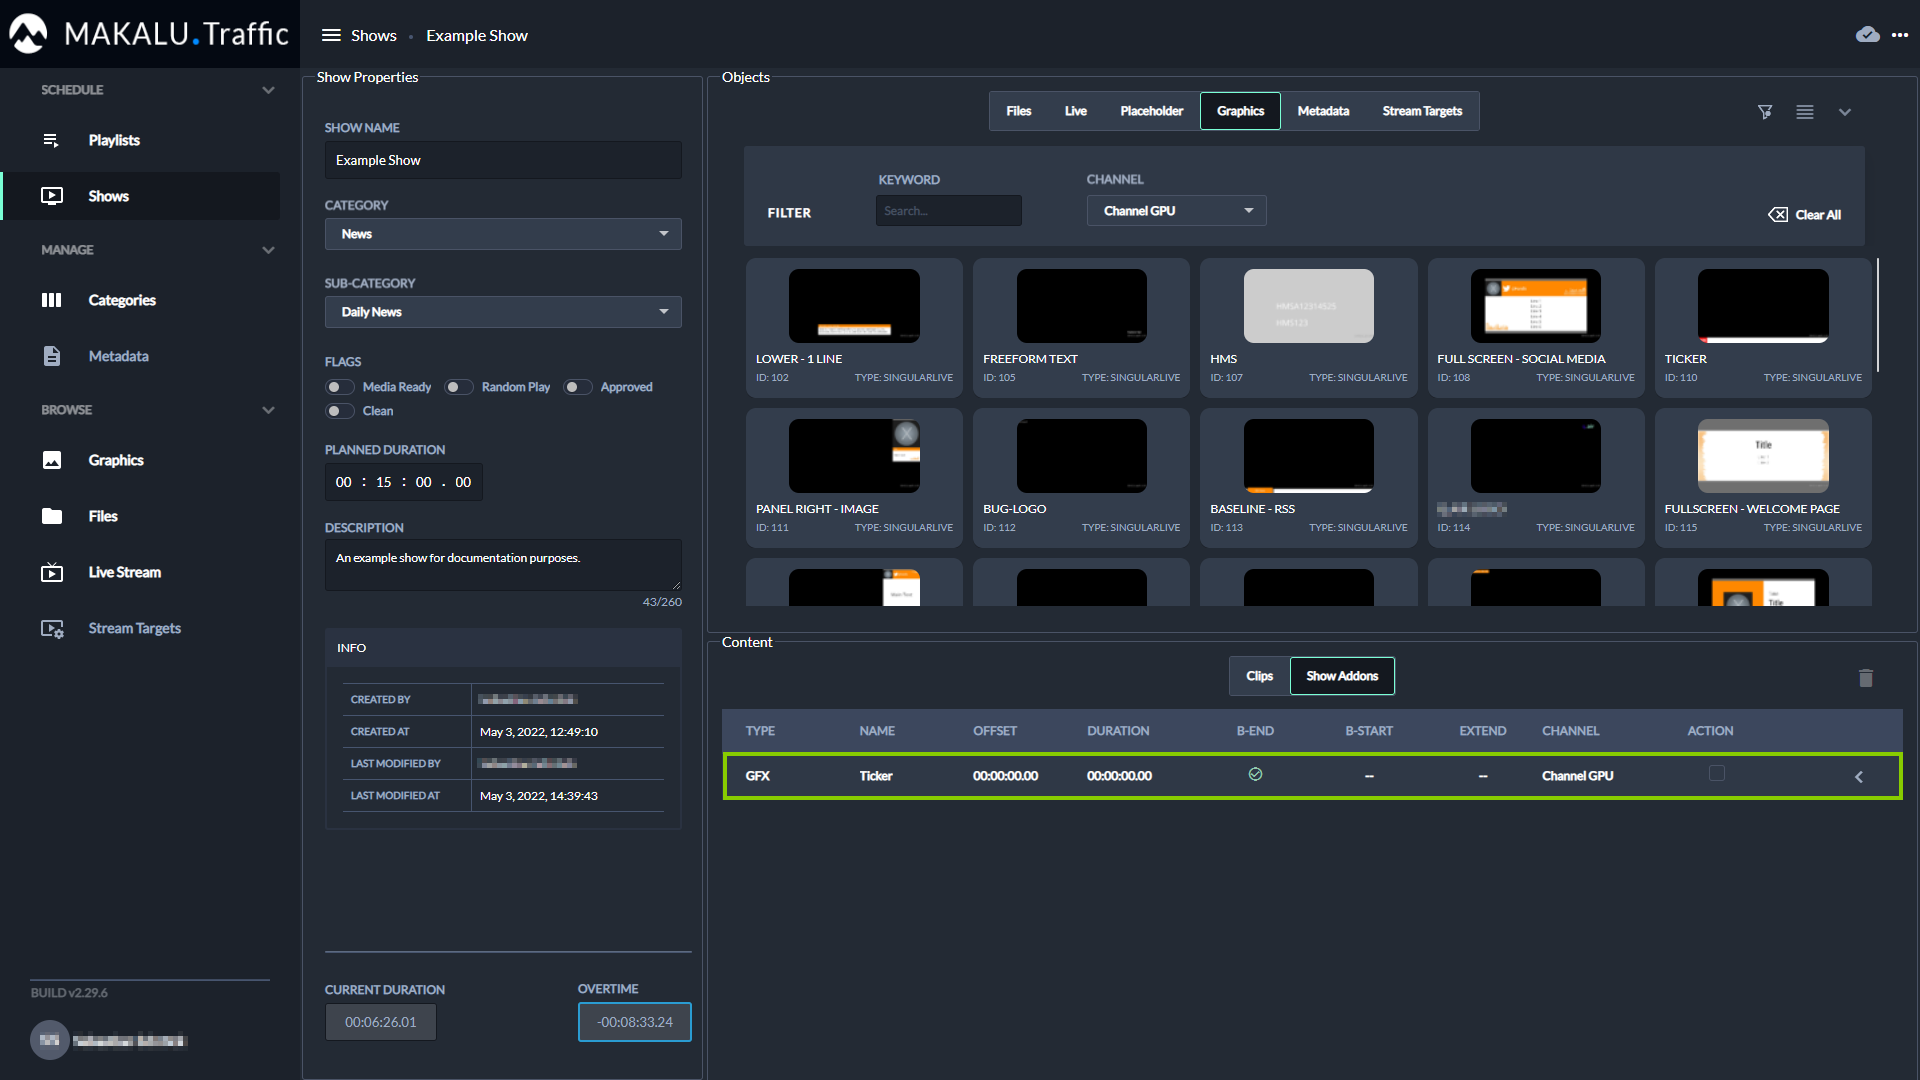
Figure: Makalu Traffic - Secondary event added to a show
-
(Optional) Repeat the previous two steps to add more secondary events.
-
(Optional) Edit the properties of an added secondary event, by either Editing a clip or by editing the show addons. To edit the show addons, select the Show Addons tab and click the Expand icon
 on the right.
The addon properties are displayed in the Addon Details area below.
Tip
You can expand and collapse the Objects area via the Expand
and Collapse  icons in the top right. This is useful if you want to display an extensive list of addon properties. Collapsing the Objects area allows you to use most of the right side for displaying the details of an addon.
Tip
To delete an added secondary event, proceed as follows:
1 - Select one or more secondary events to be deleted, by activating the corresponding Action checkbox(es).
2 - Click the Delete Addon icon
.3 - In the subsequently displayed dialog, click Confirm.
The show's properties and contents are saved. It can be added to a playlist, sent to playout and used in a rundown.
-
Editing a show
To edit a show, proceed as follows:
-
In the sidebar on the left select Shows.
All available shows are listed on the right side.
-
(Optional) To narrow the listed shows, use the filters above the list of available shows.(e.g. select a content category, flags, or enter a name).
-
click the name of the show to be edited.
The show details are opened.
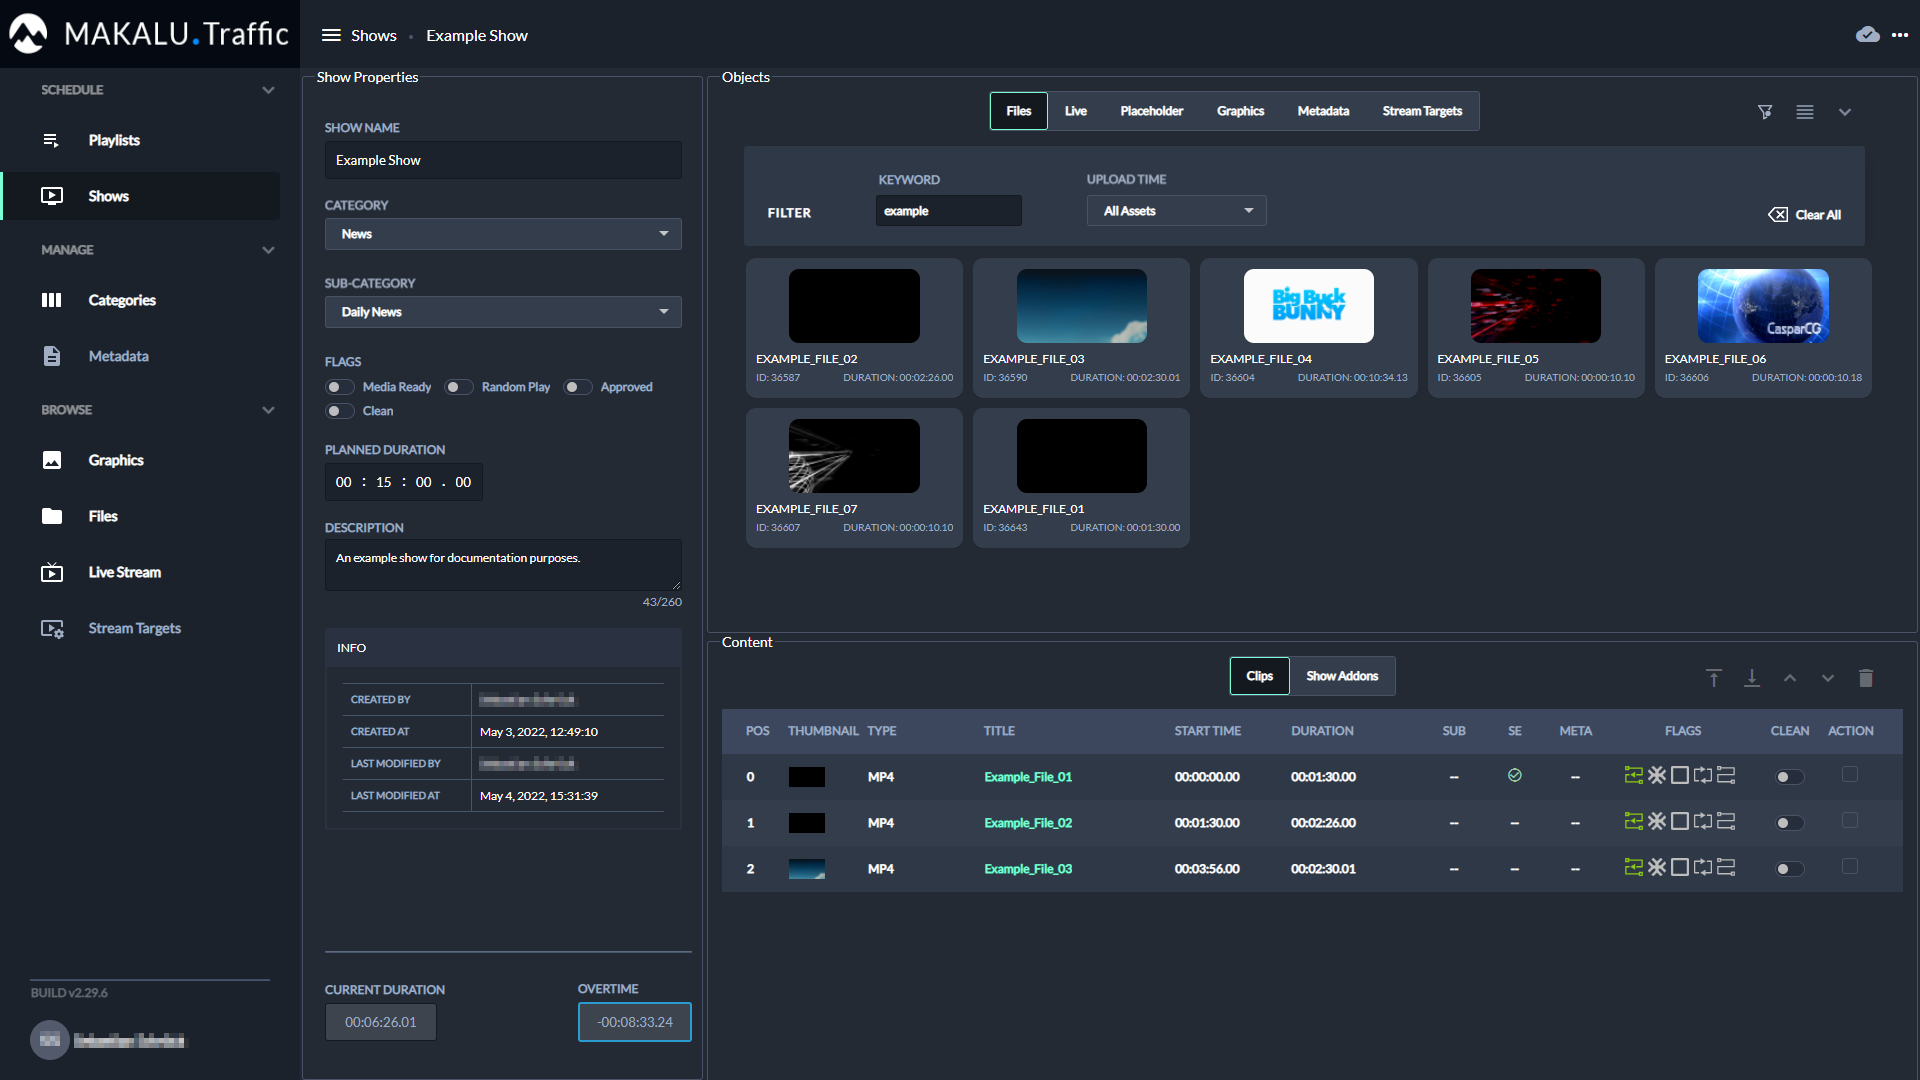
Figure: Makalu Traffic - Show details
Notice
When a user opens a show for editing, the show is locked. Until the editing user closes the show, other users only have read access to the show.
-
Edit show properties, primary and/or secondary events as described in section Creating a show.
The edited show is saved automatically.
Editing a clip
To edit a clip, proceed as follows:
-
In the left sidebar, select Shows and click the name of a show that contains the clip to be edited.
The show details are opened.

Figure: Makalu Traffic - Show details
-
In the clip list select a clip to be edited, by clicking on the clip title.
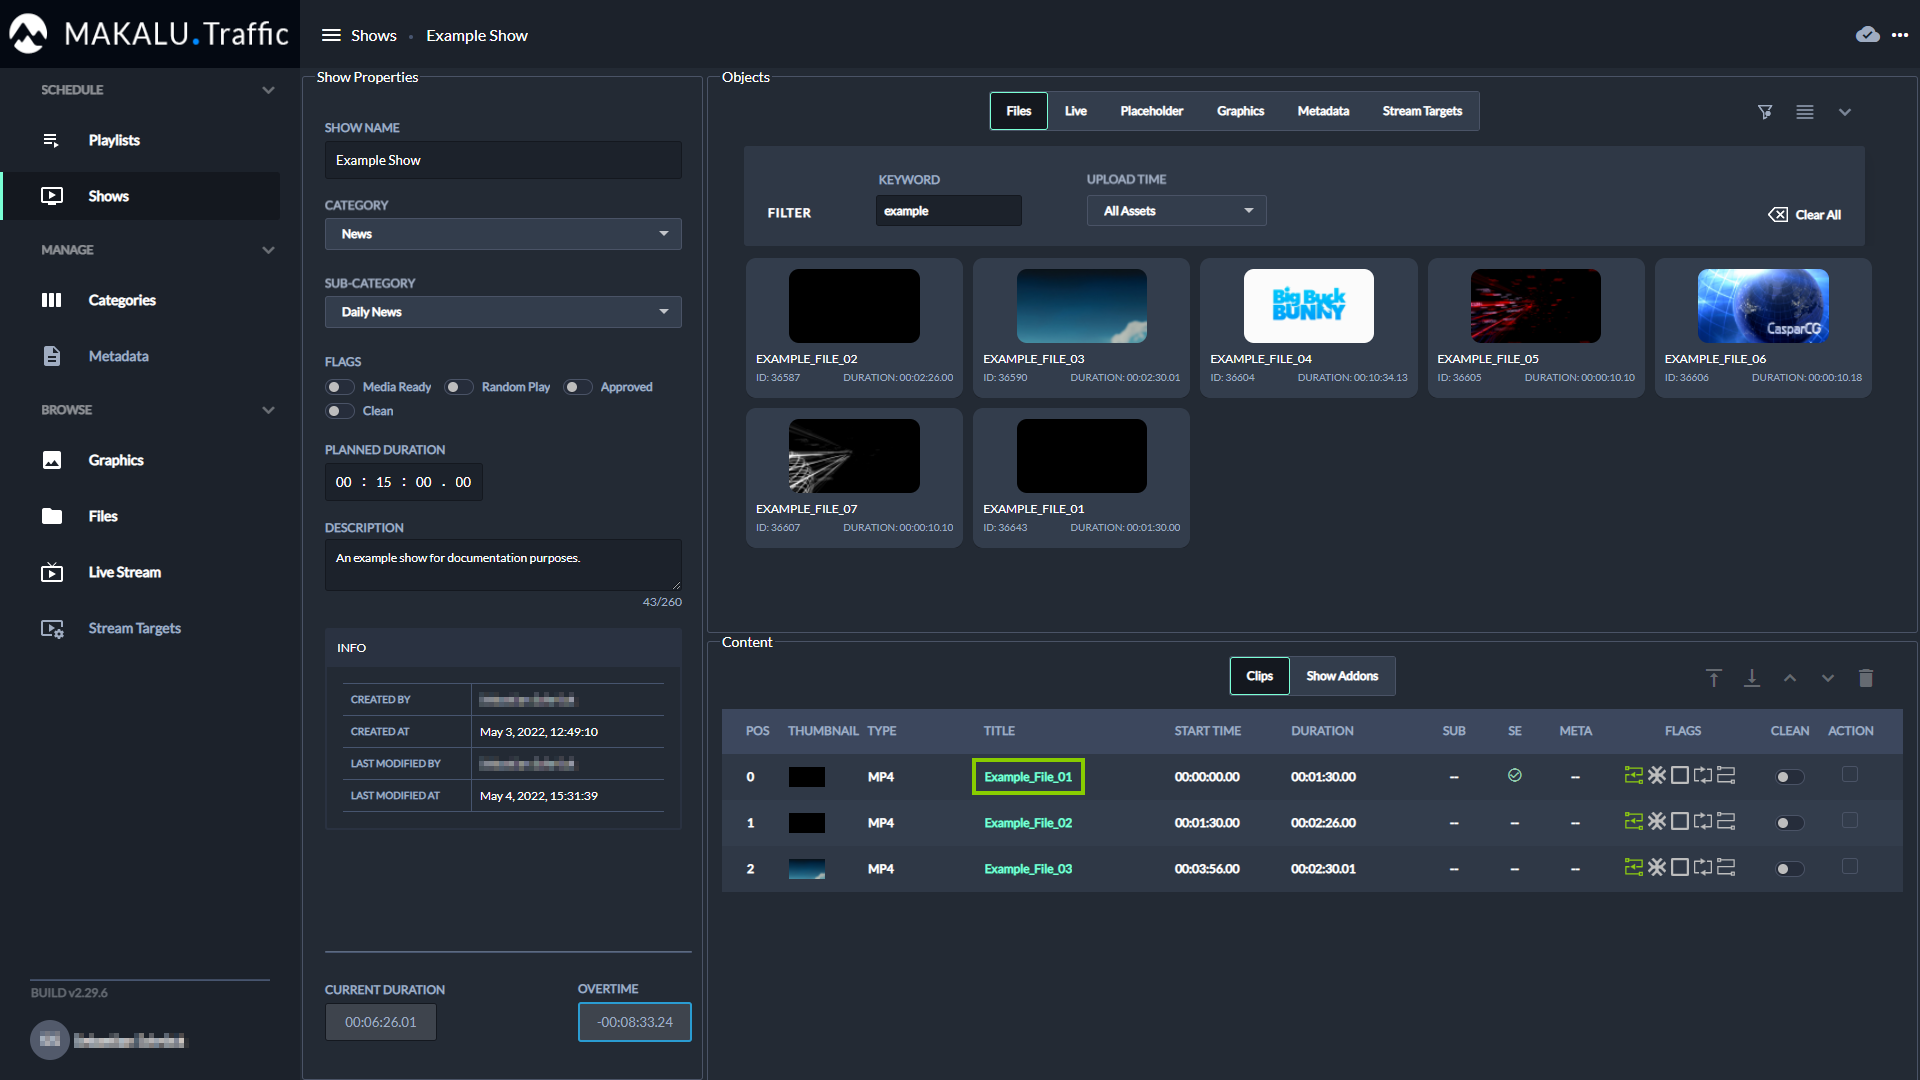
Figure: Makalu Traffic - Select clip
The clip details are opened.
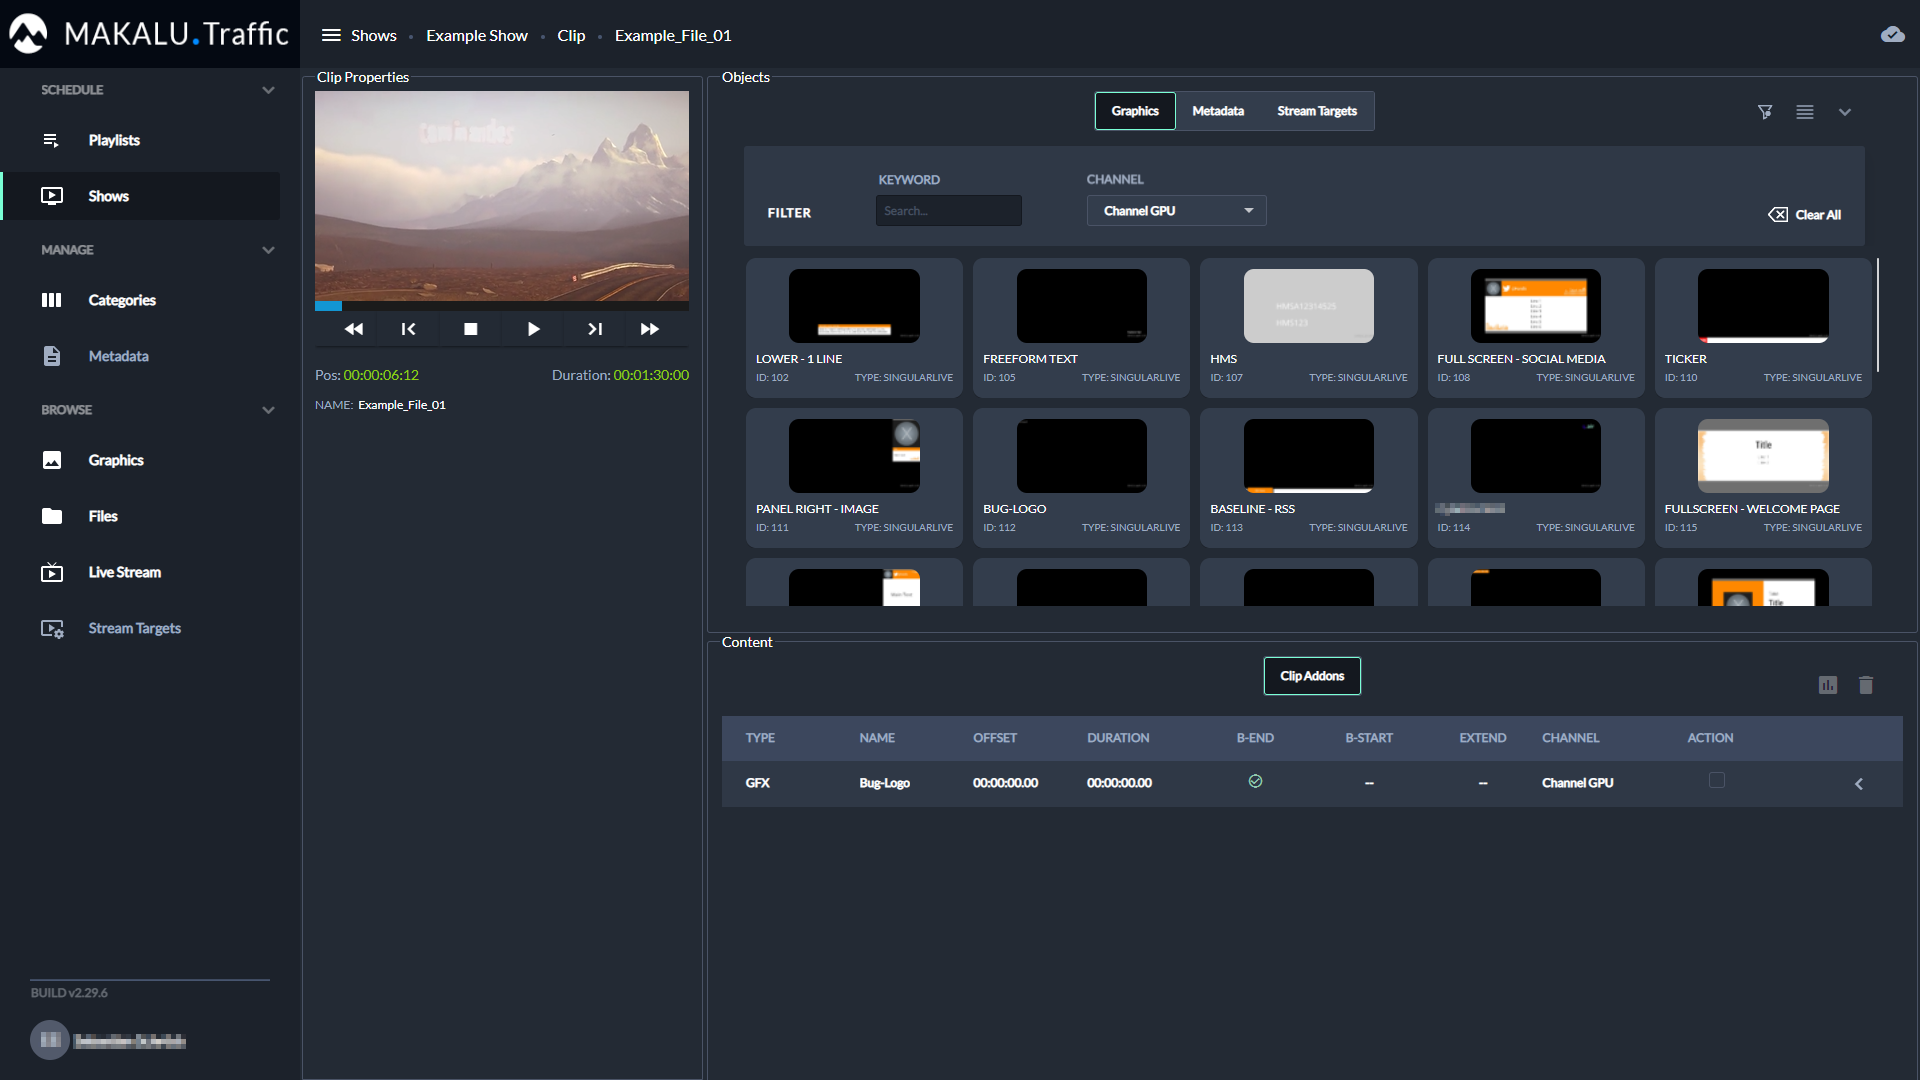
Figure: Makalu Traffic - Clip details
-
(Optional) Add secondary events to the clip.
-
On the right in the Objects area select the type of secondary event you want to add (either Graphics, Metadata or Stream Targets).
Available secondary events of the selected type are displayed below.
-
To search for secondary events based on the event name, use the Keyword search field.
-
To search for graphics based on the channel they are assigned to, select a channel in the Channel dropdown menu right to the search field.
Warning
If you add multiple graphics to a clip, only add graphics that are all assigned to the same channel. Otherwise, you cannot send a playlist to playout that includes a show with this clip.
-
Drag an element on the Clip Addons area.
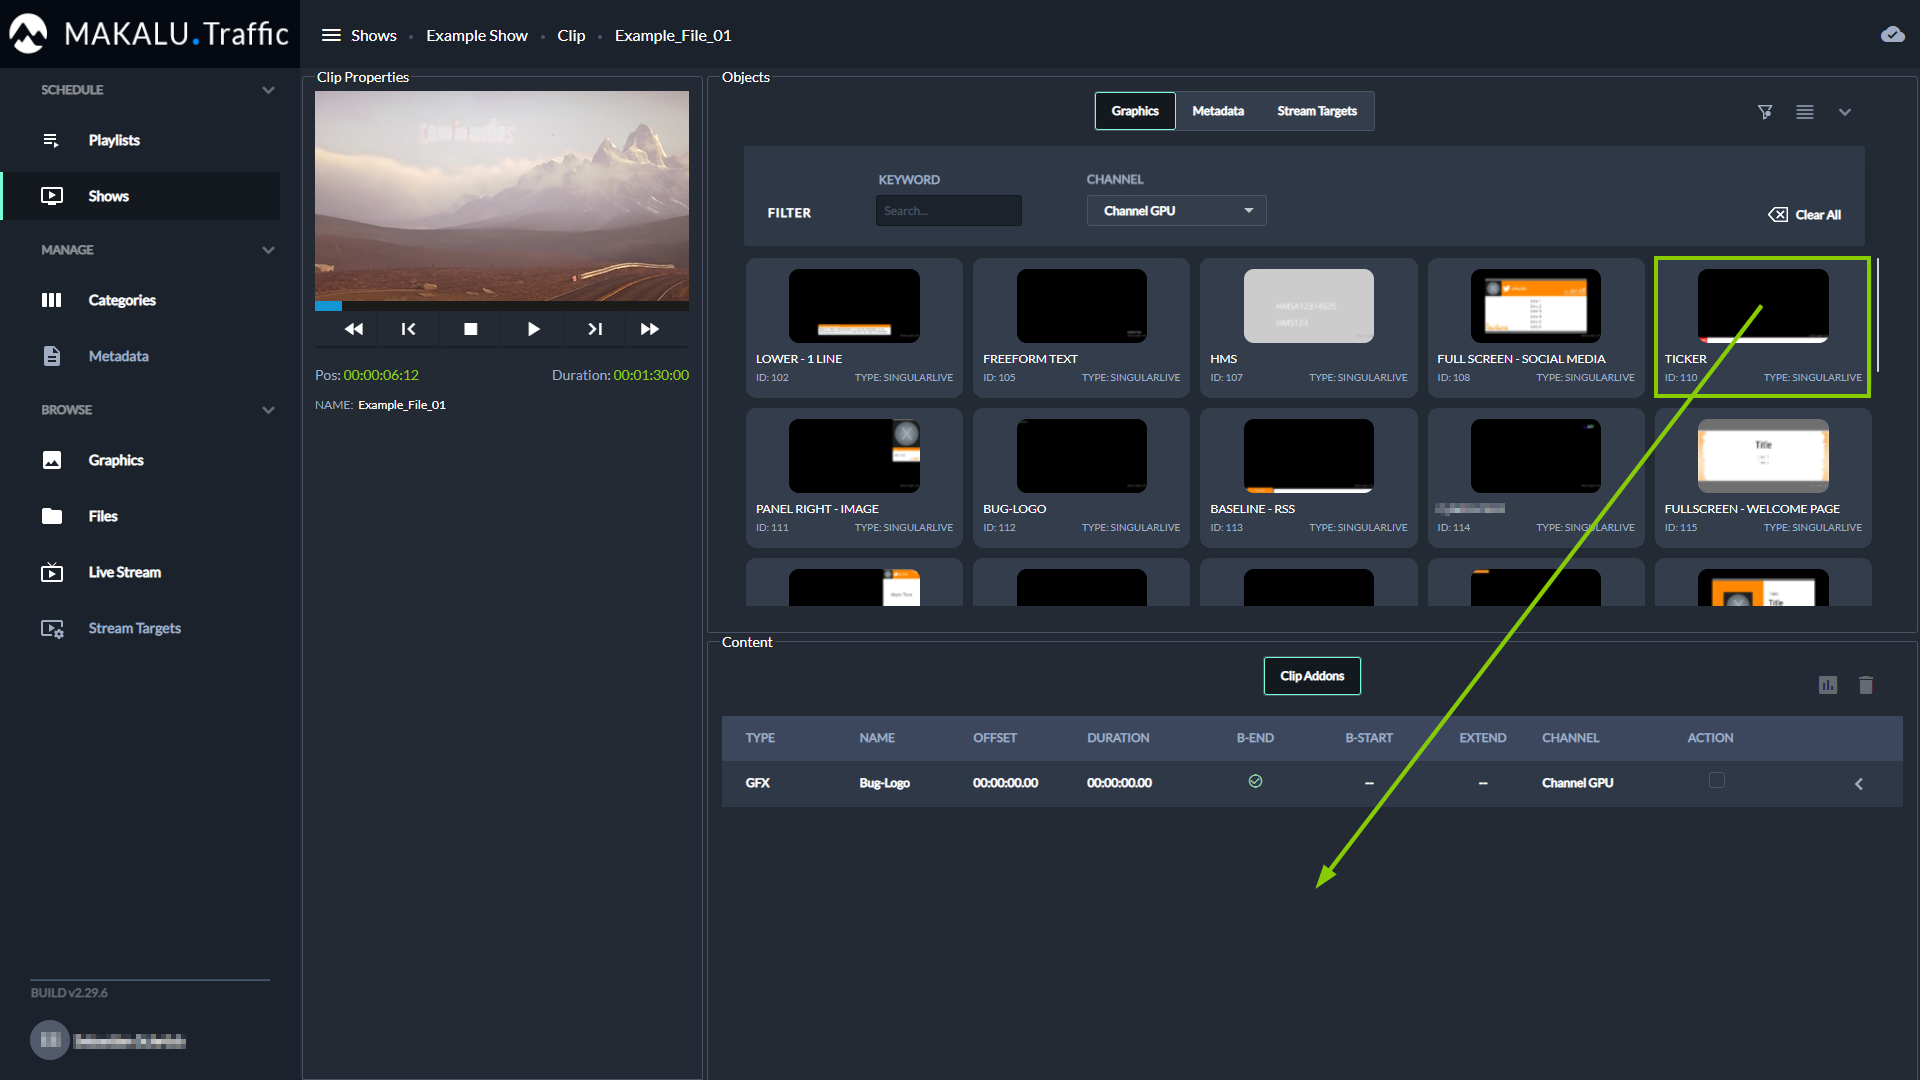
Figure: Makalu Traffic - Add secondary event to clip
The element is added to the Clip Addons list.
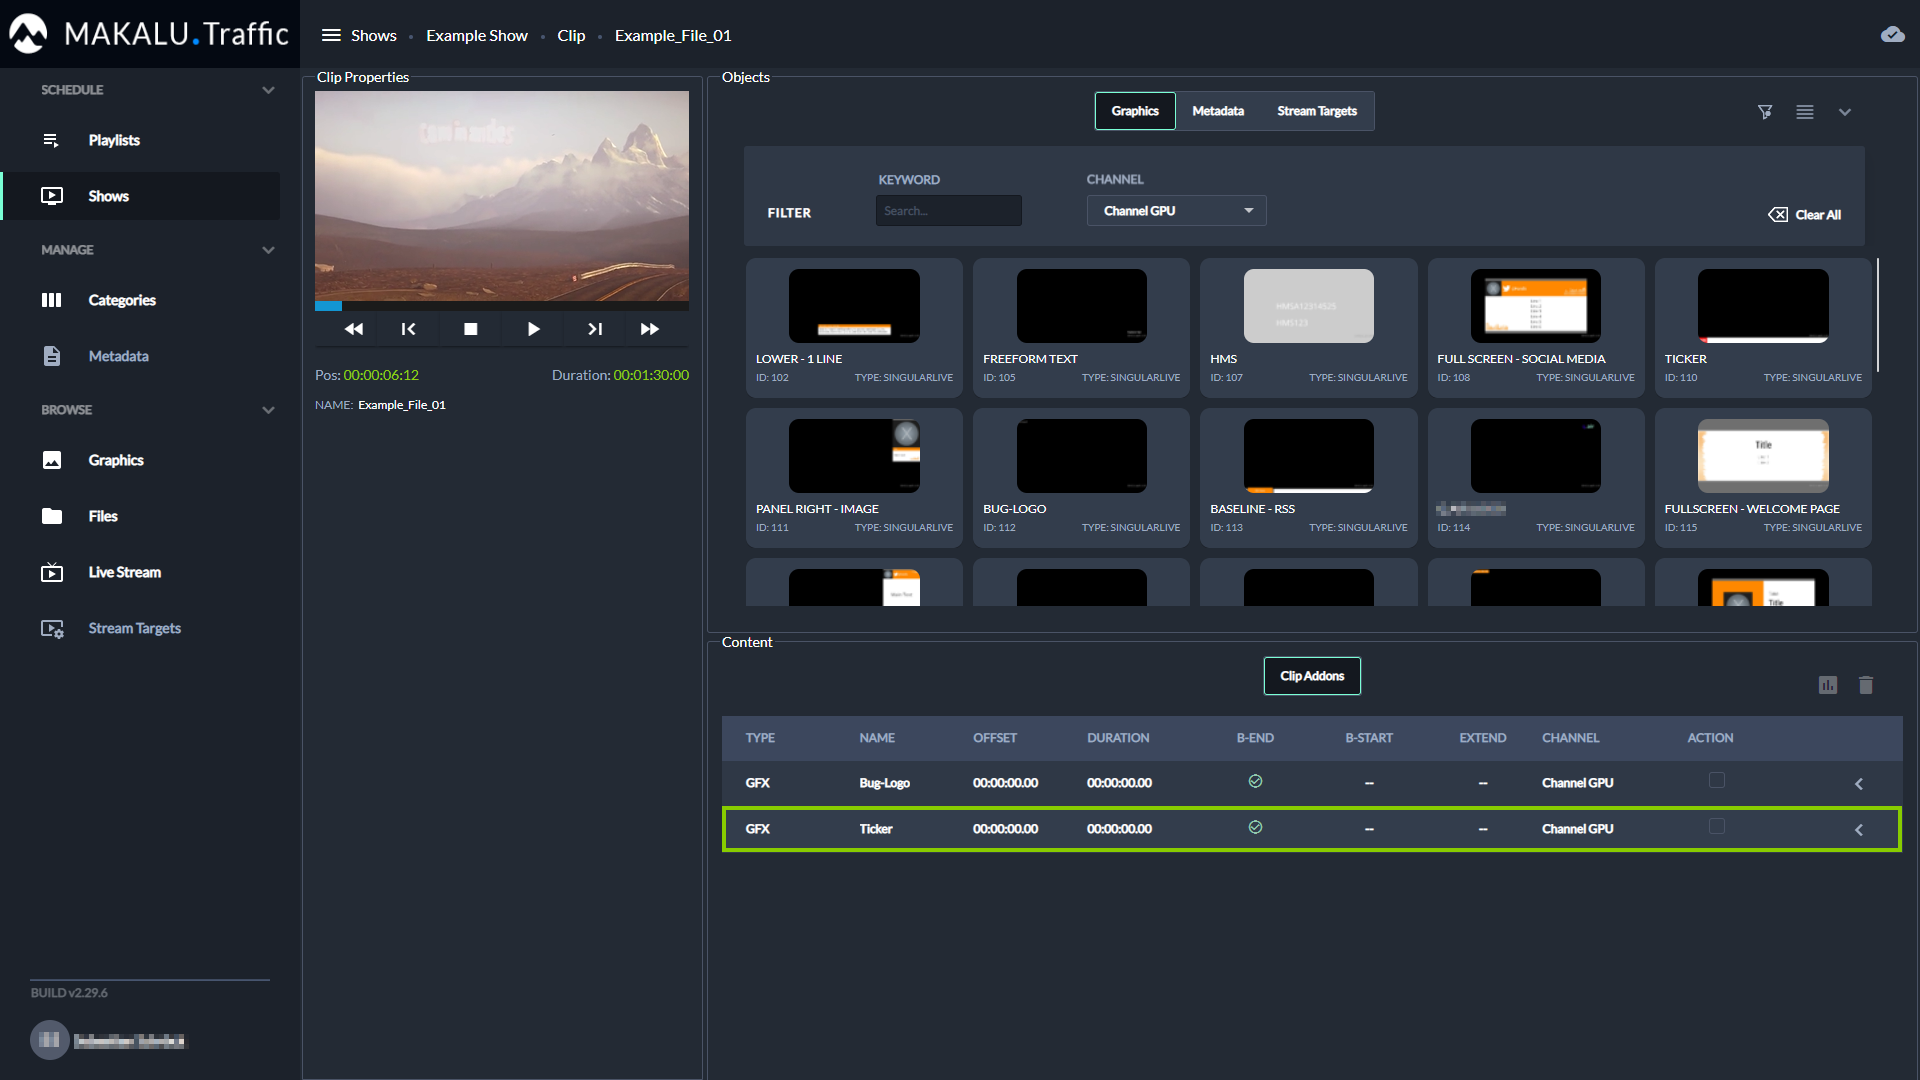
Figure: Makalu Traffic - Secondary event added to clip
-
-
To edit a clip addon, expand it by clicking the Expand icon
on the right.The addon properties are displayed in the Addon details area.
Tip
You can expand and collapse the Objects area via the Expand
and Collapse icons in the top right. This is useful if you want to display an extensive list of addon properties. Collapsing the Objects area allows you to use most of the right side for displaying the details of an addon.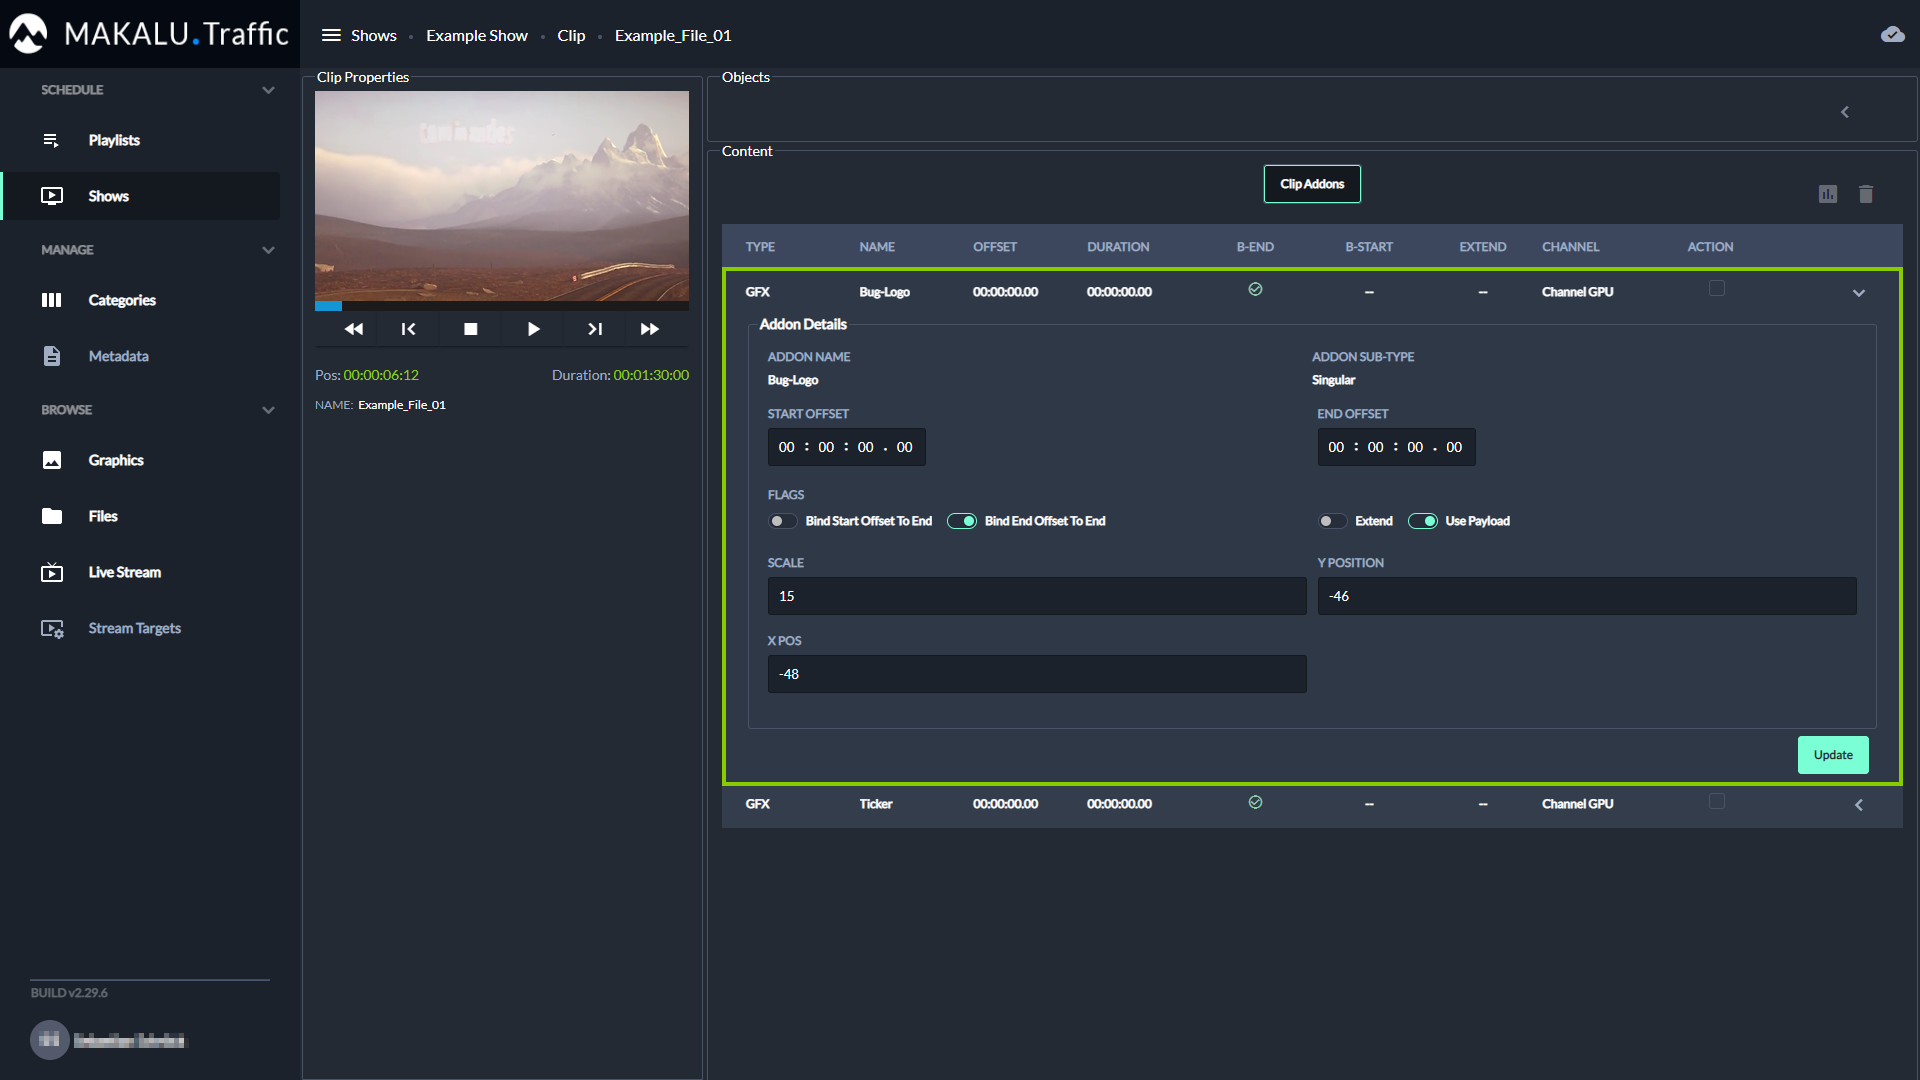
Figure: Makalu Traffic - Edit addon details
-
Edit the addon properties.
Tip
If you are editing a graphics secondary event, you can set the time-related clip properties to default values, by clicking the Set default values icon
 above the clip addons list.
 -
To save your changes, click Update in the Addon details area.
The addon properties are saved.
Duplicating a show
To duplicate a show, proceed as follows:
-
In the left sidebar, select Shows and click the name of the show to be duplicated.
The show details are opened.
-
In the top right click More actions
 and select Duplicate.
A copy of the show (including all properties, primary and secondary events) is created and opened.
-
Edit show properties, primary and/or secondary events as required.
The duplicated show is saved automatically including all edited properties.
Deleting a show
To delete a single show, proceed as follows:
-
In the left sidebar, select Shows and click the name of the show to be deleted.
The show details are opened.
-
In the top right click More actions
and select Delete.A confirmation dialog is displayed.
-
To delete the show, click Confirm.
The show is deleted.
To delete multiple shows, proceed as follows:
-
In the left sidebar, select Shows.
All available shows are listed on the right side.
-
In the list of available shows activate the checkbox to the right of each show to be deleted.
-
Click the Delete selected shows
icon.A confirmation dialog is displayed.
-
To delete the selected shows, click Confirm.
The selected shows are deleted.
Show properties
The following table provides an overview of all available show properties:
Notice
Time-related properties use a frame-accurate notation in the format hh:mm:ss.ff. The frame rate time base is part of the global system configuration. Makalu supports the frame rates 25, 30, 50 and 60 fps.
| Property | Description |
|---|---|
| Show name | Name of the show |
| Category | Main content category |
| Sub-category | Content sub-category, based on the selected main content category |
| Flag - Media Ready | For future use |
| Flag - Random Play | For future use |
| Flag - Approved | For future use |
| Flag - Clean | If activated, graphics addons are not displayed when the show is played, even if graphics are assigned to the show or included clips. This also applies to cases where graphics addons of the previous show would normally extend beyond the regular end of the previous show. Depending on how the duration of the graphics addon is set, graphics of the previous show can stay displayed even after the next show starts. But if the clean flag is activated for the next show, graphics are not displayed. This is useful for e.g. a show container, that only contains commercials. |
| Planned Duration | Planned duration of the show |
| Current Duration | Actual show duration, corresponds to the total combined duration of all assigned primary events |
| Description | Text description for the show |
| Overtime | Time difference between planned duration and current duration |
Clip flags
Each clip within a show has a set of flags, which define how it should be played by the automation, especially how the start and end of each clip should be handled.
The following table provides an overview of all available clip flags:
Flag icon | Flag name | Description |
|---|---|---|
 / /  | Auto Follow | When the playback of the previous clip is finished, the playback of the current clip starts automatically. Notice: By default, the Auto Follow flag is initially activated for every clip. |
 | Open End | The clip is played permanently until the operator manually triggers the start of the next clip. Notice: This flag is only available for clips of type "live source". |
 | Freeze Last | When the playback of the clip is finished, the last frame stays displayed. |
 | Freeze Black | When the playback of the clip is finished, a black image stays displayed. Notice: The image to be displayed is configurable. |
 | Loop | The clip is played in a loop until the operator manually triggers the start of the next clip. Tip: If the loop flag is activated for the last clip in a group, the whole group is played in a loop. |
 | Auto Cue (Cue Next) | The next clip is automatically prepared for playback, but the first frame stays displayed until the operator manually triggers the start of the next clip. |
Clean | The clip is played without graphics addons, even if graphics are assigned to it. Notice: This also applies to cases where graphics addons of the previous clip would normally extend beyond the regular end of the previous clip. Depending on how the duration of the graphics addon is set, graphics of the previous clip can stay displayed even after the next clip starts. But if the clean flag is activated for the next clip, graphics are not displayed. |
Notice
Deactivated flags are displayed in gray, activated flags are highlighted in green.
Using playlists
Creating a new playlist
To create a new playlist, proceed as follows:
-
In the sidebar on the left, select Playlists.
All available playlists are listed on the right side.
-
In the top right click Create Playlist.
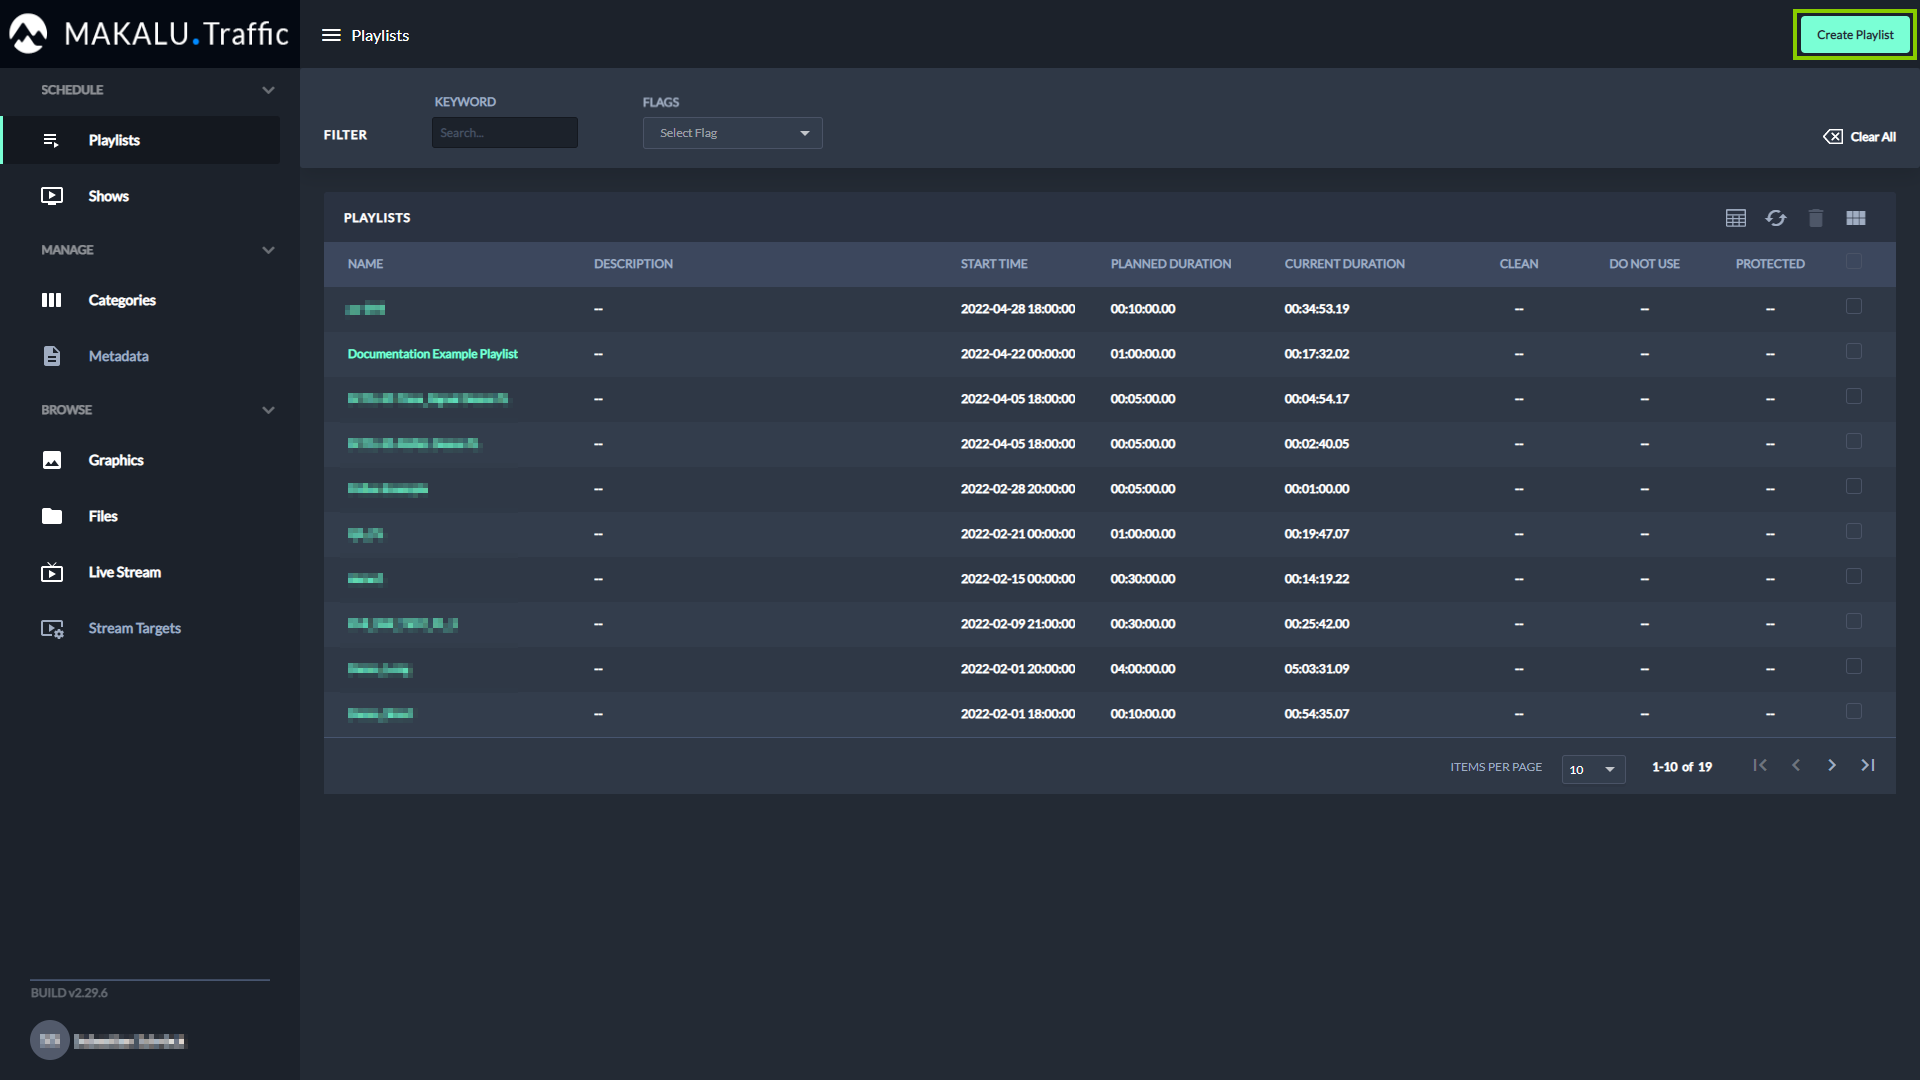
Figure: Makalu Traffic - Create playlist
A dialog is displayed that allows you to define the basic playlist properties.
-
Set the basic playlist properties.
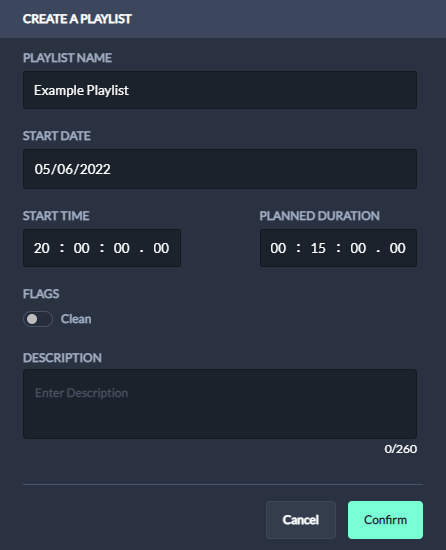
Figure: Makalu Traffic - Define basic playlist properties
Notice
To create a new playlist, at least the following properties must be set:
- Playlist name
- Start time
- Planned duration
-
To create the playlist with the selected properties, click Confirm.
The playlist is created, and the list of available playlists is displayed again.
Since the newly created playlist is initially empty, the next step is to add a show to the playlist.
To add a show to a playlist, proceed as follows:
-
Open the playlist, by clicking on the name of the playlist in the list of available playlists.
The playlist is opened.
-
(Optional) In the Playlist Properties area, edit the basic properties.

Figure: Makalu Traffic - Edit basic playlist properties
-
Add one or more shows to the playlist.
-
On the right in the Objects area the Shows tab is selected, and all available shows are listed below. To filter the available shows, use the filters (Keyword, Category and/or Flags) above the list.
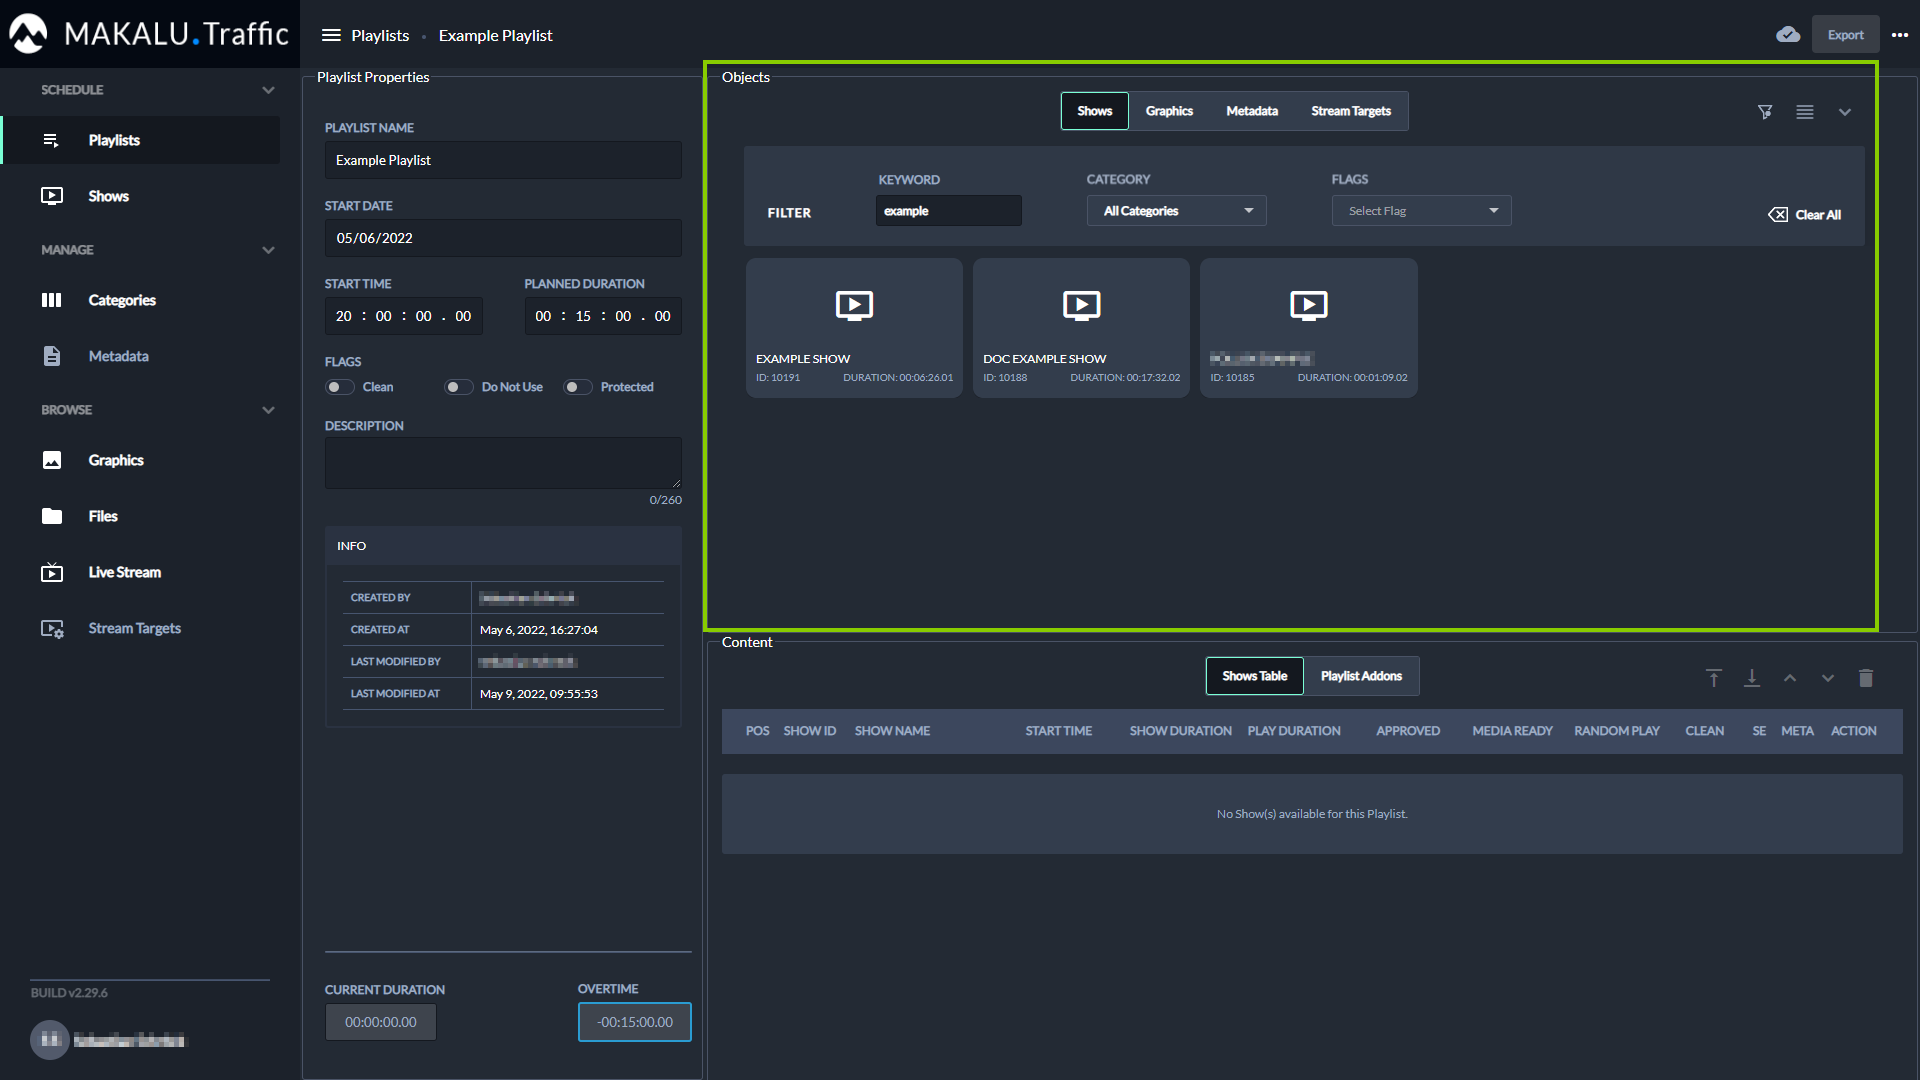
Figure: Makalu Traffic - Filtered shows
Tip
You can switch between a presentation as card or list view, by clicking the Enable card view icon
or Enable list view icon in the top right. -
Select one or more shows and drag them into the Content area on the Shows Table below.
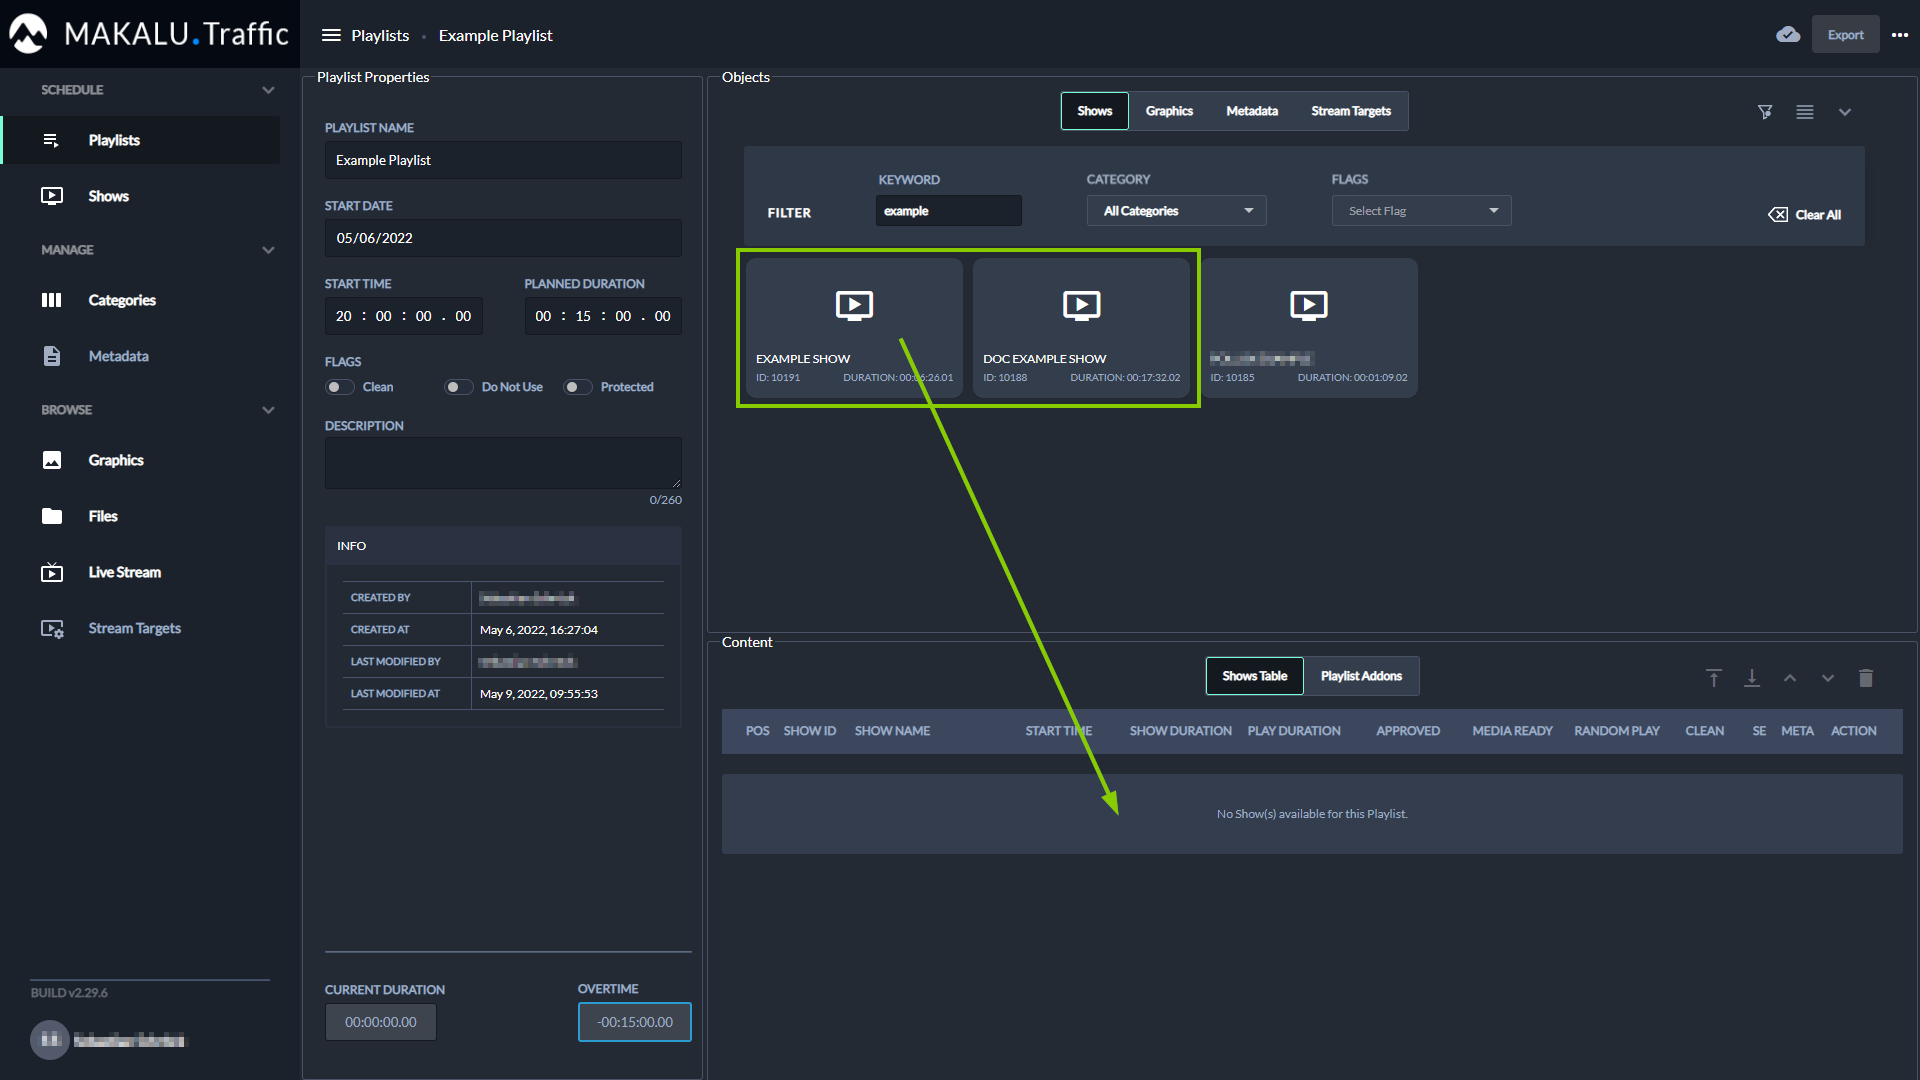
Figure: Makalu Traffic - Add shows to a playlist
The shows are added to the playlist.
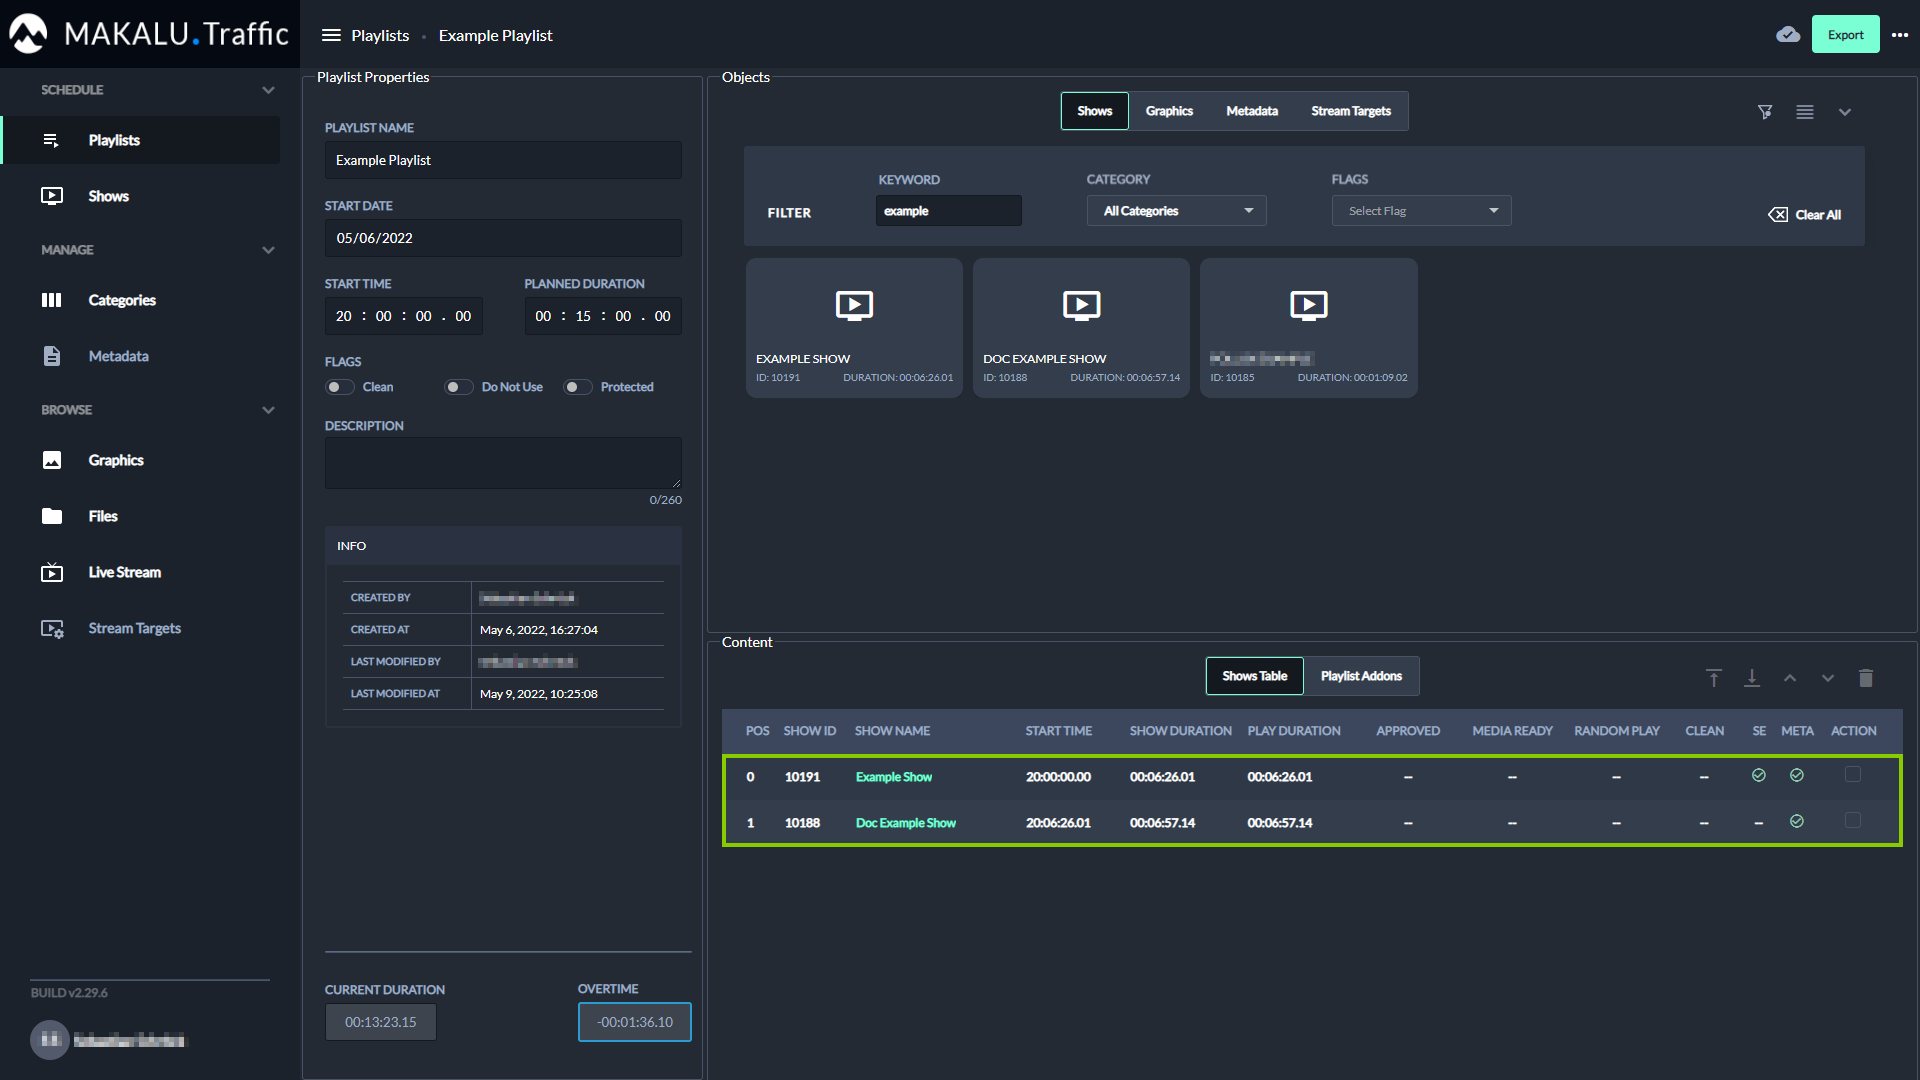
Figure: Makalu Traffic - Shows added to a playlist.
Notice
The fields Current duration and Overtime are updated accordingly.
-
(Optional) Repeat steps a and b to add more shows to the playlist.
The shows are added to the playlist. The start time of each added show is calculated accordingly, depending on the duration of the previously added shows.
Tip
To delete a show from the playlist, proceed as follows:
1 - Select one or more shows to be deleted, by activating the corresponding Action checkbox(es) in the playlist.
2 - Click the Delete Show icon
.3 - In the subsequently displayed dialog click Confirm.
Tip
To change the show order of the playlist, proceed as follows:
1 - Select one or more shows, by activating the checkbox in the Action column.
2 - Use the arrow icons (move up/down, move to top/bottom)
above the show list to change the order.Tip
To open and edit a show directly from the playlist, click the name of the show in the playlist.
-
-
(Optional) Add secondary events to the playlist.
-
On the right in the Objects area select the type of secondary event you want to add (either Graphics, Metadata or Stream Targets).
Available secondary events of the selected type are displayed below.
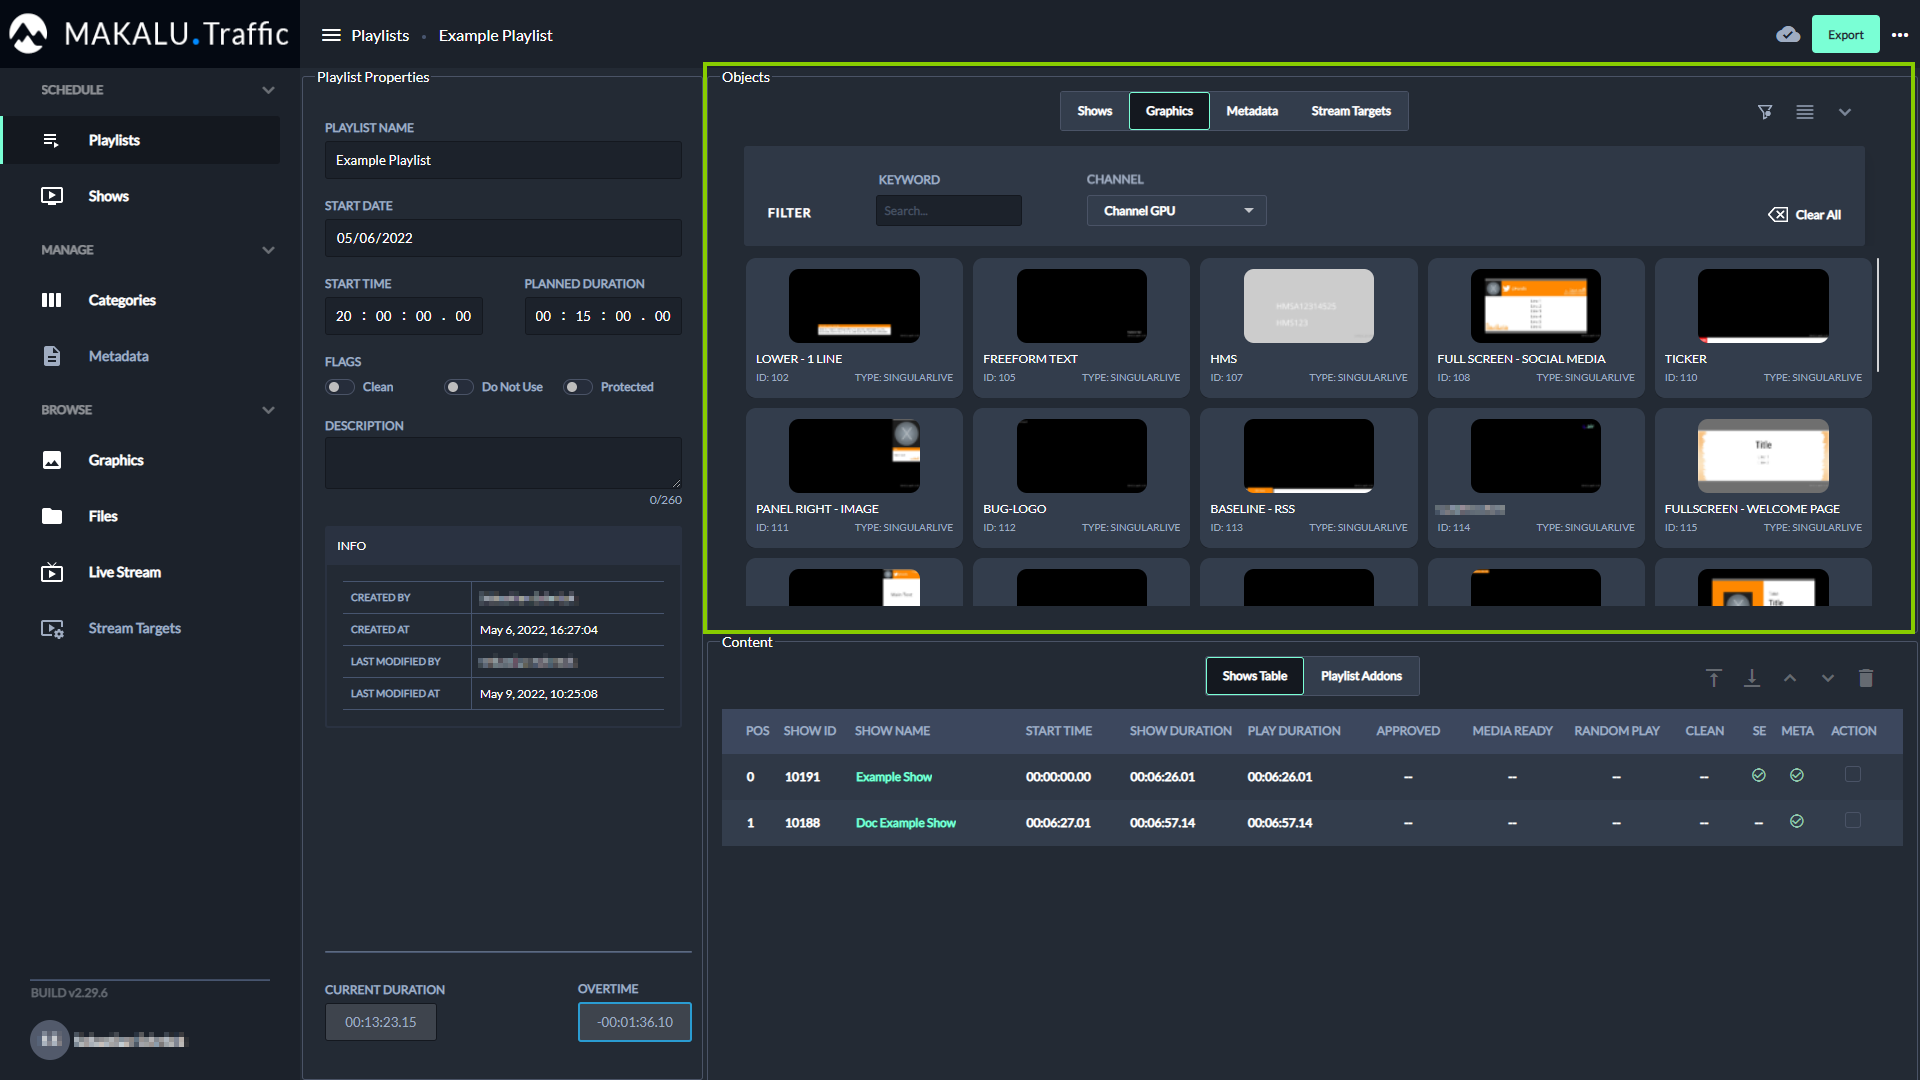
Figure: Makalu Traffic - Secondary events
Tip
You can switch between a presentation as card or list view, by clicking the Enable card view icon
or Enable list view icon in the top right. -
(Optional) To search for secondary events, use the available filters (e.g. Keyword and/or Channel).
Warning
Only add graphics to a playlist that are all assigned to the channel the playlist should later be exported to. Otherwise, you cannot send the playlist to playout.
-
To add a secondary event to the playlist, in the Content area select Playlist Addons, then select a secondary event and drag it on the Playlist Addons list.
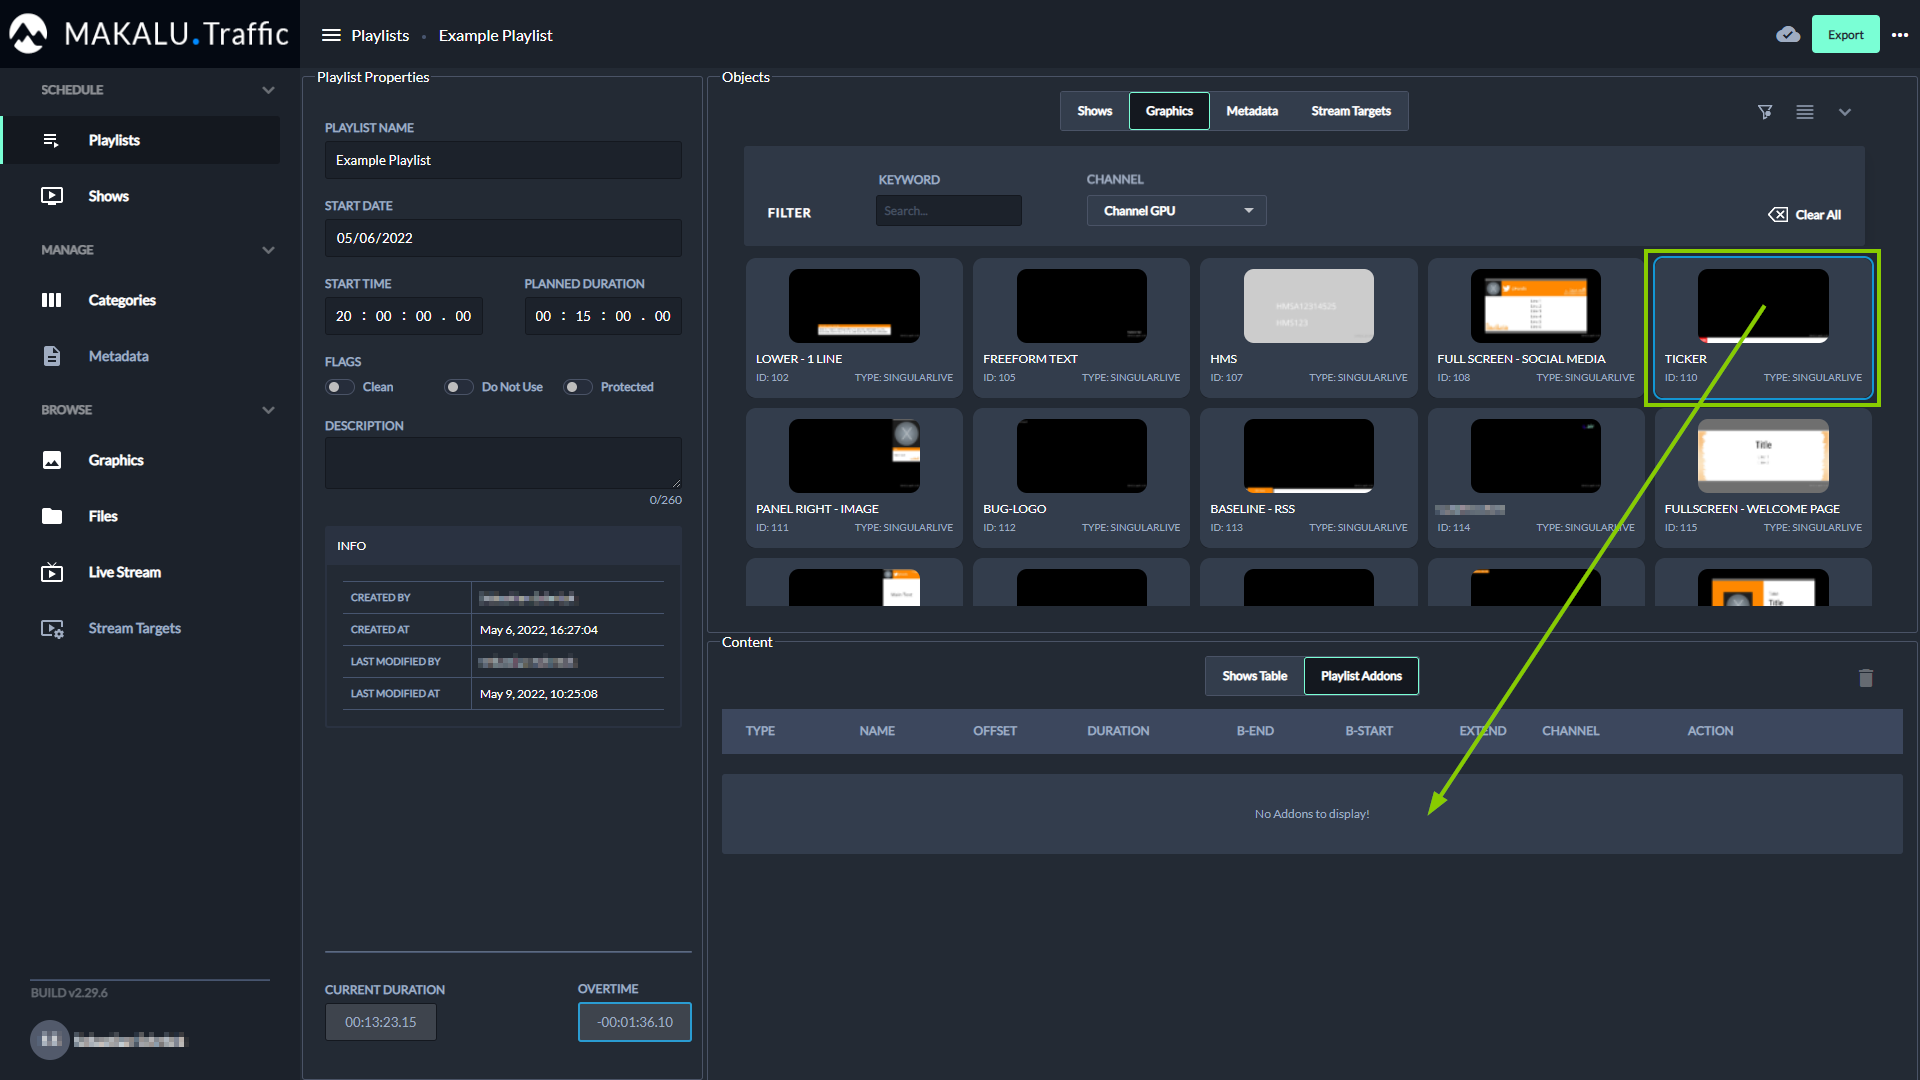
Figure: Makalu Traffic - Add a secondary event to a playlist
The secondary event is added to the Playlist Addons list.
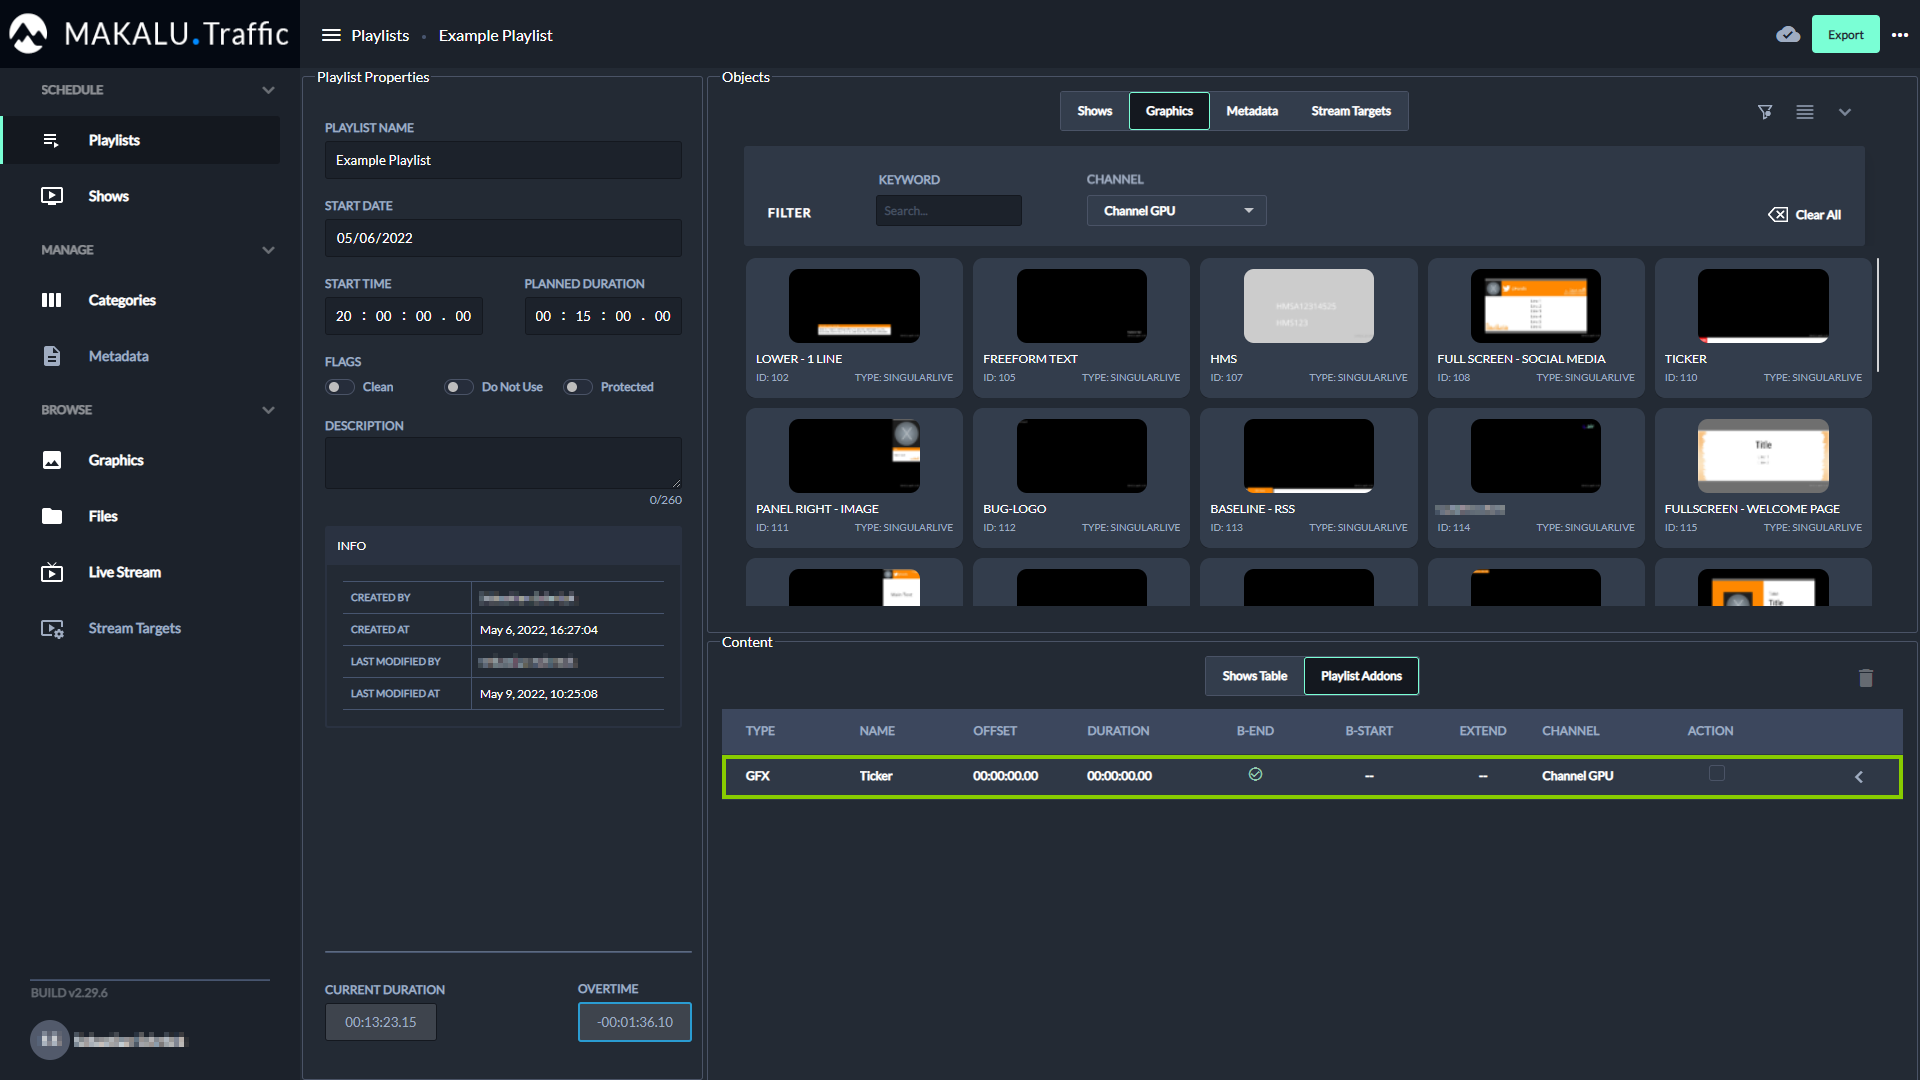
Figure: Makalu Traffic - Secondary event added to a playlist
-
(Optional) Repeat the previous two steps to add more secondary events to the playlist.
-
(Optional) To edit the properties of the added secondary event, expand it by clicking the Expand icon
on the right.The addon properties are displayed in the Addon details area.
Tip
You can expand and collapse the Objects area via the Expand
and Collapse icons in the top right. This is useful if you want to display an extensive list of addon properties. Collapsing the Objects area allows you to use most of the right side for displaying the details of an addon.Tip
To delete an added secondary event, proceed as follows:
1 - Select one or more secondary events to be deleted, by activating the corresponding Action checkbox(es).
2 - Click the Delete Addon icon
.3 - In the subsequently displayed dialog, click Confirm.
The playlist is saved automatically.
-
Sending a playlist to playout
To make a playlist available for a playout channel in the Makalu Automation, the Export function must be used.
To send a playlist to playout, proceed as follows:
-
In the left sidebar, select Playlists and click the name of the playlist that you want to send to playout.
The playlist details are opened.
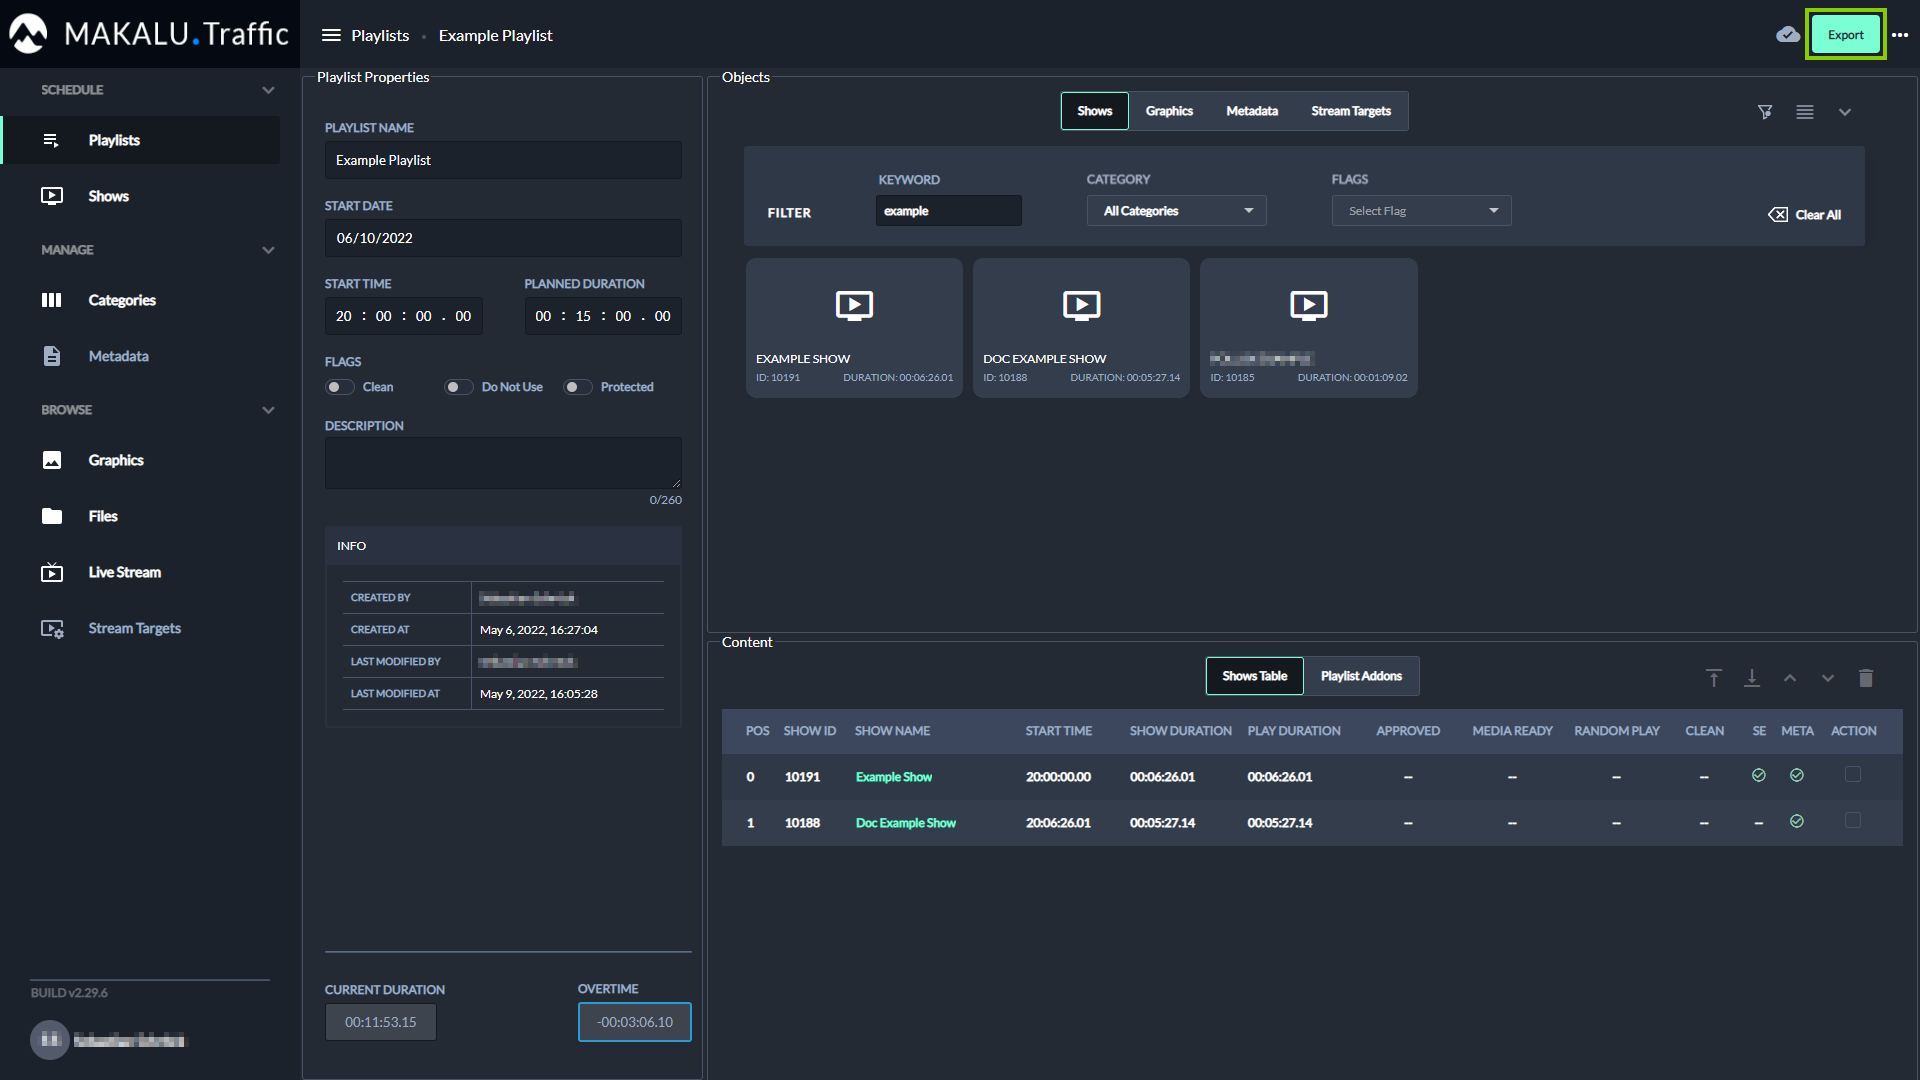
Figure: Makalu Traffic - Playlist details
-
In the top right click Export.
The Export dialog is displayed.
-
Select the playout channel that you want to send the playlist to.
Warning
All graphics that you added to clips, shows and/or the playlist must be assigned to the selected channel. If you use graphics in the playlist, that are assigned to a channel other than the selected, you cannot send the playlist to playout. In this case a corresponding error message is displayed after the next step.
-
Click Confirm.
The playlist is made available for the selected channel in the Makalu Automation.
Notice
If you edit a playlist, that was already sent to playout and you export it again, the existing playlist is updated and can be used for the corresponding playout channel.
Editing a playlist
To edit a playlist, proceed as follows:
-
Open Makalu Traffic.
-
In the left sidebar, select Playlists and click the name of the playlist to be edited.
The playlist details are opened.
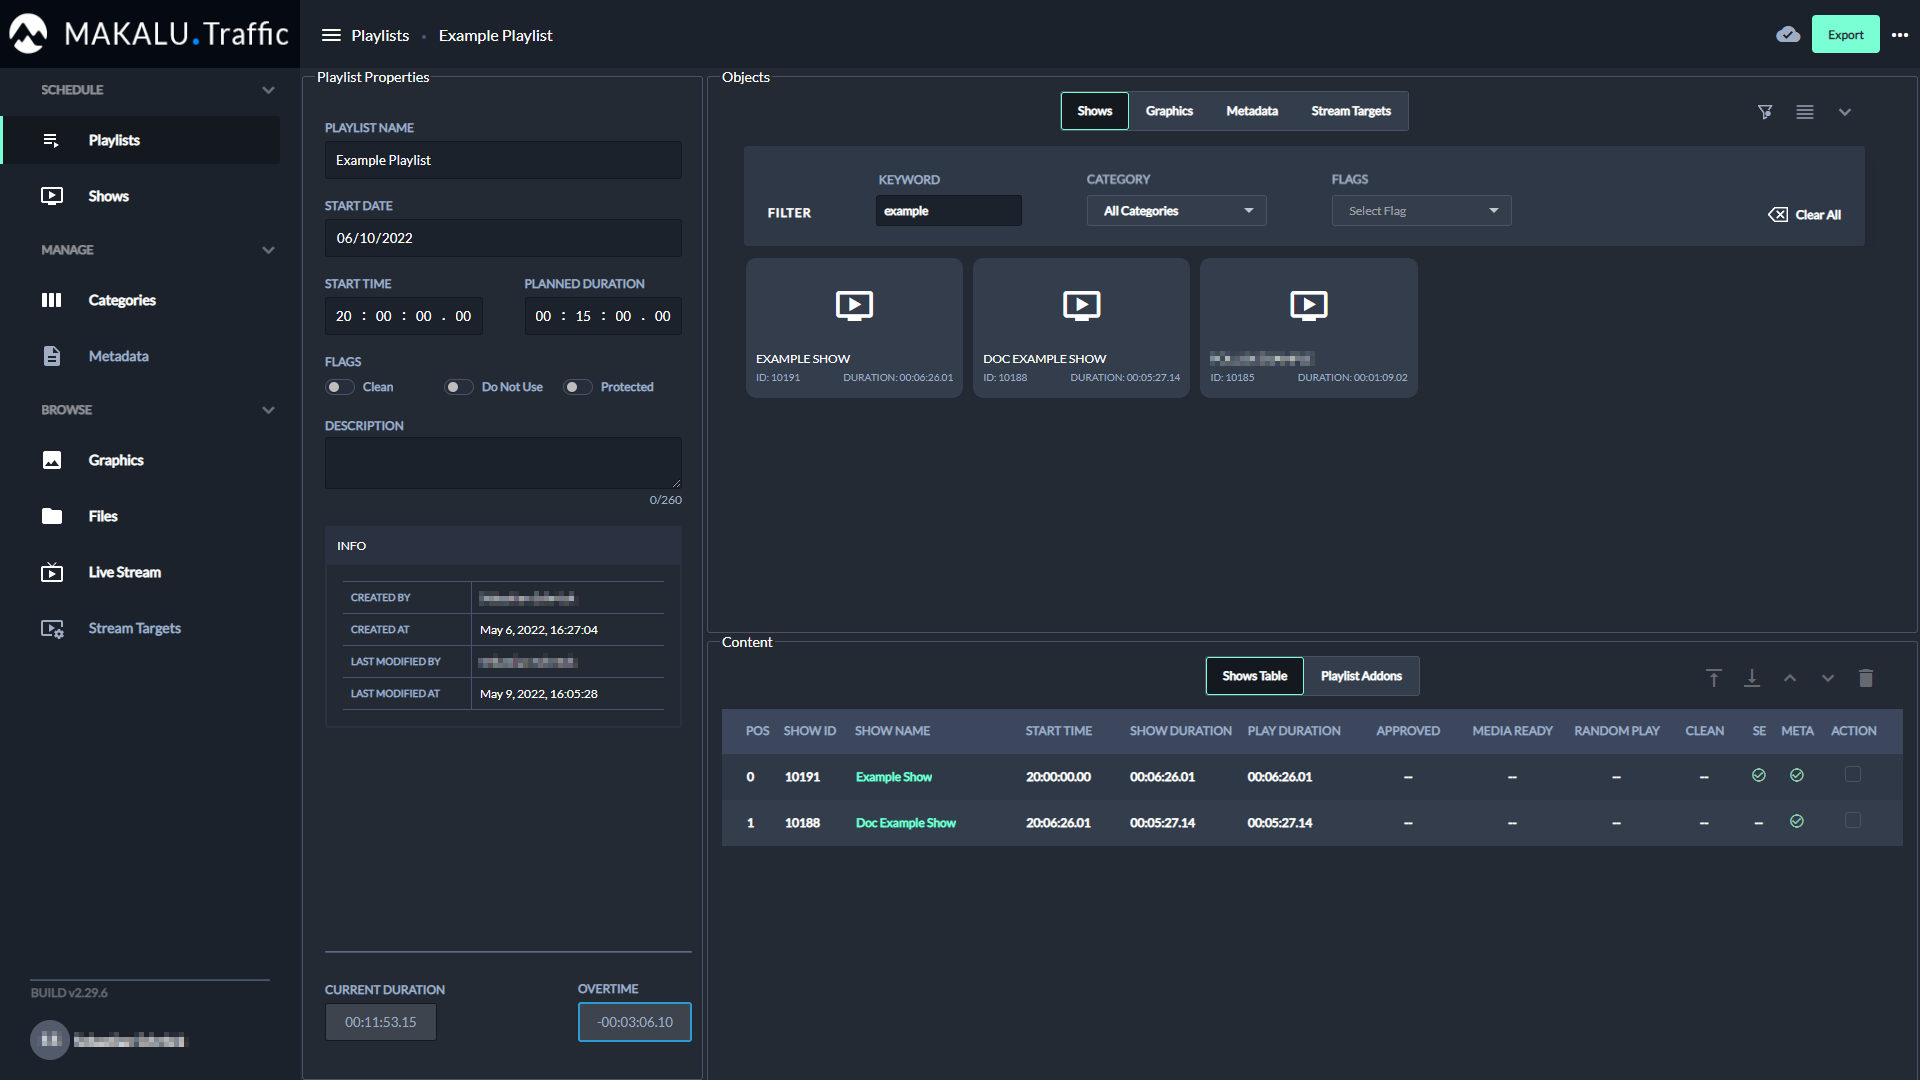
Figure: Makalu Traffic - Playlist details
-
Edit playlist and or secondary event properties as described in section Creating a new playlist
The playlist is saved automatically.
Deleting a playlist
To delete a single playlist, proceed as follows:
-
In the left sidebar, select Playlists and click the name of the playlist to be deleted.
The playlist details are opened.
-
In the top right click More actions
and select Delete.A confirmation dialog is displayed.
-
To delete the playlist, click Confirm.
The playlist is deleted.
To delete multiple playlists, proceed as follows:
-
In the left sidebar, select Playlists.
All available playlists are listed on the right side.
-
In the list of available playlists activate the checkbox to the right of each playlist to be deleted.
-
Click the Delete selected Playlists
icon.A confirmation dialog is displayed.
-
To delete the selected playlists, click Confirm.
The selected playlists are deleted.
Playlist properties
The following table provides an overview of all available playlist properties:
Notice
Time-related properties use a frame-accurate notation in the format hh:mm:ss.ff. The frame rate time base is part of the global system configuration. Makalu supports the frame rates 25, 30, 50 and 60 fps.
| Property | Description |
|---|---|
| Playlist Name | Name of the playlist |
| Start Date | Planned on air date |
| Start Time | Planned airtime |
| Planned Duration | Planned duration |
| Flag - Clean | If activated, graphics addons are not displayed when the playlist is played, even if graphics are assigned to the playlist or to included shows or clips. This also applies to cases where graphics addons of the previous playlist would normally extend beyond the regular end of the previous playlist. Depending on how the duration of the graphics addon is set, graphics of the previous playlist can stay displayed even after the next playlist starts. But if the clean flag is activated for the next playlist, graphics are not displayed. This is useful for e.g. a playlist, that only contains shows that consist exclusively of commercials. |
| Flag - Protected | For future use |
| Flag - Do not use | For future use |
| Current Duration | Actual playlist duration, corresponds to the total combined duration of all assigned shows |
| Description | Text description for the playlist |
| Overtime | Time difference between planned duration and current duration |
Secondary events
When a secondary event is added to a clip, show or playlist, it is considered as an “addon”. Each addon has common time-related properties and optional content-related properties, that apply and can be edited within the context of the corresponding clip, show or playlist.
Notice
Time-related properties use a frame-accurate notation in the format hh:mm:ss.ff. The frame rate time base is part of the global system configuration. Makalu supports the frame rates 25, 30, 50 and 60 fps.
Common properties
The following common and time-related properties are used by graphics and metadata secondary events:
| Property | Description |
|---|---|
| Addon name | Name of the addon |
| Start offset | Offset until the addon is displayed (based on the start of the clip, show or playlist) |
| Bind start offset to end | If activated, the start offset will be calculated based on the start of the clip, show or playlist |
| End offset | Offset until the addon is removed (based on the end of the clip, show or playlist) |
| Bind end offset to end | If activated, the end offset will be calculated based on the end of the clip, show or playlist |
| Extend | If activated, the display duration of the addon can be extended beyond the regular end of the clip, show or playlist it is assigned to |
Examples for using time-related properties
The following table provides examples for using time-related addon properties:
| Example | Start offset | Duration / end offset | Bind end offset to end |
|---|---|---|---|
| Display a graphics addon for the entire duration of a clip, show or playlist | 00:00:00:00 | 00:00:00:00 | Deactivated |
| Display a graphics addon 5 seconds after the clip, show or playlist starts and remove it 10 seconds later | 00:00:05:00 | 00:00:10:00 | Deactivated |
| Display a graphics addon 20 seconds before the clip, show or playlist ends and remove it 15 seconds later | 00:00:20:00 | 00:00:15:00 | Activated |
| Display a graphics addon 2 seconds before the clip, show or playlist ends and remove it 4 seconds later In this case the addon would overlap two clips, shows or playlists. which is e.g. useful for displaying transition effects (wipe, fade, etc.). | 00:00:02:00 | 00:00:04:00 | Activated |
Graphics properties
The following table provides an overview of available graphics secondary event properties:
| Property | Description |
|---|---|
| Addon sub-type | Graphics sub type (e.g. Singular) |
| Use payload | If activated, a custom payload text can be entered. If deactivated, the default payload configured in Singular.Live is used instead. Input fields for custom payload text are only available for graphics that include dynamic text. |
| Graphics type-specific properties | Depending on the graphics type different properties are displayed (e.g. scale and position for images or input fields for the dynamic text payloads) |
Splicing properties
Notice
Splicing events are part of the Dynamic ad triggering (SCTE-35) feature that is available as optional Makalu addon. For more information see section Ad triggering.
The following table provides an overview of available splicing secondary event properties:
| Property | Description |
|---|---|
| Event offset | Offset for the start time of the splicing event (if set to 00:00:00:00 the splicing event trigger is sent starting with the first I-Frame of the corresponding clip or show the event is assigned to) |
| Send duration | If activated, the splicing event duration is also included in the splicing event trigger |
| Splicing event id | Splicing event id (allows a downstream system to decide how the original content should be replaced or blanked) |
| UPID type | Splicing event type UPID (allows a downstream system to decide how the original content should be replaced or blanked) |
| UPID | Splicing event UPID (allows a downstream system to decide how the original content should be replaced or blanked) |
| Web delivery allowed | If activated, the "web delivery allowed" flag is set accordingly in the splicing event trigger, signaling a downstream system that web delivery is allowed for the corresponding content |
| Regional blackout | If activated, the "regional blackout" flag is set accordingly in the splicing event trigger, signaling a downstream system that regional blackout is enabled for the corresponding content |
| Archive allowed | If activated, the splicing event trigger includes information that signals a downstream system that archiving is allowed for the corresponding content |
| Device restrictions | Information about restrictions that apply to certain device groups |
| Use automatic | If activated, the end splicing event trigger is sent automatically when the event duration is completed If deactivated, the end splicing event trigger must be sent manually by the operator |
| Avail expected | Total number of avails to be expected Range: 0-255 (use 0 to disable feature) Only available for splicing secondary events of type "SCTE-35 Avail" |
| Avail num | Current avail number Range: 0-255 (use 0 to disable feature, must not be greater than "Avail expected" number) Only available for splicing secondary events of type "SCTE-35 Avail" |
| Auto return | Defines if downstream systems should automatically switch back to the original program content at the end of an avail If activated, downstream systems get the information to automatically switch back to the original program content when the avail duration ends (requires that "Send duration" is also activated) If deactivated, downstream systems get the information to not automatically switch back to the original program content. Instead they must wait until they receive the corresponding message, that is automatically sent by the splicer and triggers downstream systems to switch back to the original program content. Only available for splicing secondary events of type "SCTE-35 Avail" |
Stream target properties
The following table provides an overview of available stream target secondary event properties:
| Type | Property | Description |
|---|---|---|
| YouTube | Title | Stream event title |
| YouTube | Description | Stream event content description |
| YouTube | Automatic | Time-related switch |
| YouTube | Start time | Start date and time of the streaming event |
| Generic | Source stream | Source to be streamed |
| Generic | Target type | Target type of the stream (e.g. YouTube, Facebook, LinkedIn, Twitch, RTMP, RTMPS) |
| Generic | Title | Stream event title |
| Generic | Description | Stream event content description |
| Generic | Stream URL | Target URL |
| Generic | Stream key | Stream key (used for authentication) |
| Generic | Username | Username (if required for authentication) |
| Generic | Password | Password (if required for authentication) |
| Generic | Start time | Start date and time of the streaming event |
Recording properties
The following table provides an overview of available recording secondary event properties:
| Property | Description |
|---|---|
| Source stream | Source stream to be recorded |
| Record channel | Encoder to be used for the recording |
| Job name | Name of the recording job |
| Dest path | Target folder for storing the recorded file |
| Profile | File format/profile to be used for the recording (only available if a broadcast encoder is used) |
Metadata properties
The following table provides an overview of available metadata secondary event properties:
| Type | Property | Description |
|---|---|---|
| EPG | Short event descriptor | Short description of the content |
| EPG | Extended event descriptor | Detailed description of the content |
| EPG | Name | EPG name |
| EPG | FSK | Parental rating (based on German motion picture rating system organization FSK, e.g. 0, 6, 12, 16, 18) |
| EPG | DVB content | Content category (e.g. news, magazine, comedy, etc.) |
| EPG | Char code | Character encoding of the EPG information (default: Western European - ISO/IEC 8859) |
| EPG | Language | Language of the EPG information (e.g. German or English) |
| Moderator | Name | Moderator name |
| Now Next Later | Now | Now text |
| Now Next Later | Next | Next text |
| Now Next Later | Later | Later text |
| Online EPG | Title | Online EPG title |
| Online EPG | Short synopsis | Short content summary |
| Online EPG | Detail synopsis | Detailed content summary |