Ad triggering
Notice
Dynamic ad triggering requires the optional Makalu SCTE-35 addon.
The dynamic ad triggering feature enables you to signal ad insertion opportunities that can be used by downstream systems to automatically replace these parts of your content.
The underlying workflow is based on the SCTE-35 standard and enables you to schedule splicing event trigger points in your program that are afterwards included in the playout output data stream. These splicing trigger points can be evaluated by downstream systems to perform server-side or player-side ad insertion. In addition to ad insertion, SCTE-35-based splicing events can be used for various other purposes, e.g. for regional content variations (opt-out), for blanking content on the web or to trigger recording servers.
Shortly before a splicing event is sent by the playout, the event itself is announced. For this purpose additional information is included in the playout output stream. The time interval for announcing the upcoming splicing event is configurable and usually set between one and four seconds before the start of the actual event.
Depending on its properties a splicing event can be stopped either automatically or manually. For an automatic splicing event the end event trigger is automatically sent when the playback of the corresponding clip or show is finished. A manual splicing event must be stopped manually by an operator.
In Makalu you can add and manage splicing events in the following ways:
-
use Makalu Traffic to add splicing events to clips or shows already when you create/schedule playlists
-
use Makalu Automation for last minute changes
Splicing event types
Makalu provides the following splicing event types:
| Makalu splicing event type | Matching splice command according to SCTE-35 specification |
|---|---|
| SCTE-35 Avail | Corresponds to the legacy splice command splice_insert() |
| SCTE-35 | Corresponds to the more recent splice command time_signal() with segmentation descriptor |
Which splicing event type you need to use for your application depends on your downstream systems, what data they expect and how they are configured.
For more information about splicing events, refer to the official SCTE-35 standard specification (ANSI/SCTE 35 2020 - "Digital Program Insertion Cueing Message") which is available on the SCTE website.
Adding a splicing event via Makalu Traffic
Notice
In the following it is assumed that you already have created a show and want to add a splicing event to this existing show. For information about how to create a new show, see section Traffic (Creating a show).
You can also add splicing events to single clips in a similar way. For information about how to edit a clip, see section Traffic (Editing a clip).
Notice
Only one splicing event can be scheduled and sent at a certain point in time. This means, for example, that if there is already a splicing event added to a show, it is not possible to add an additional splicing event to individual clips within this show.
To add a splicing event to a show, proceed as follows:
-
Either use the Shows area in the sidebar on the left or the list of shows on the right to search for the show to be edited.
-
Click the name of the show to be edited.
The show details are opened in a new tab.
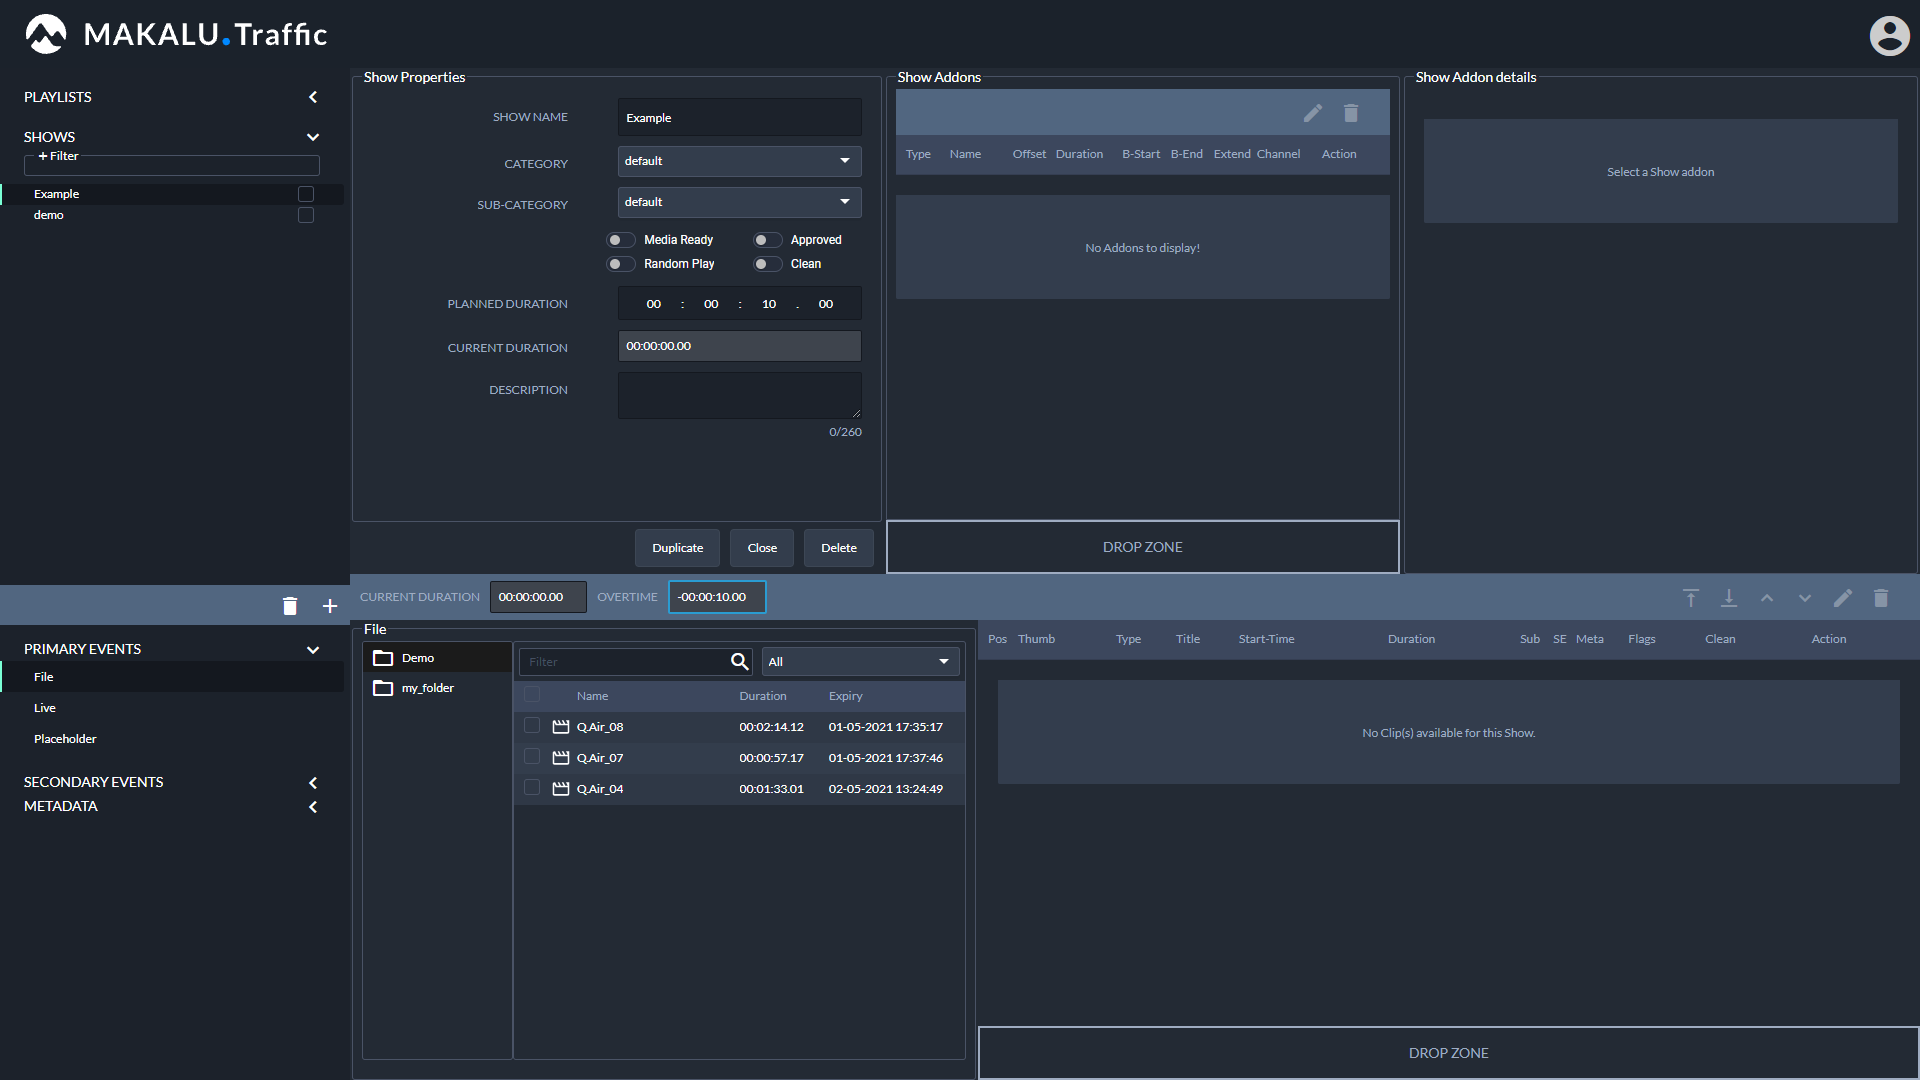
Figure: Makalu Traffic - Show details
-
In the sidebar on the left select Secondary Events > Splicing.
The list of available splicing event types is displayed.
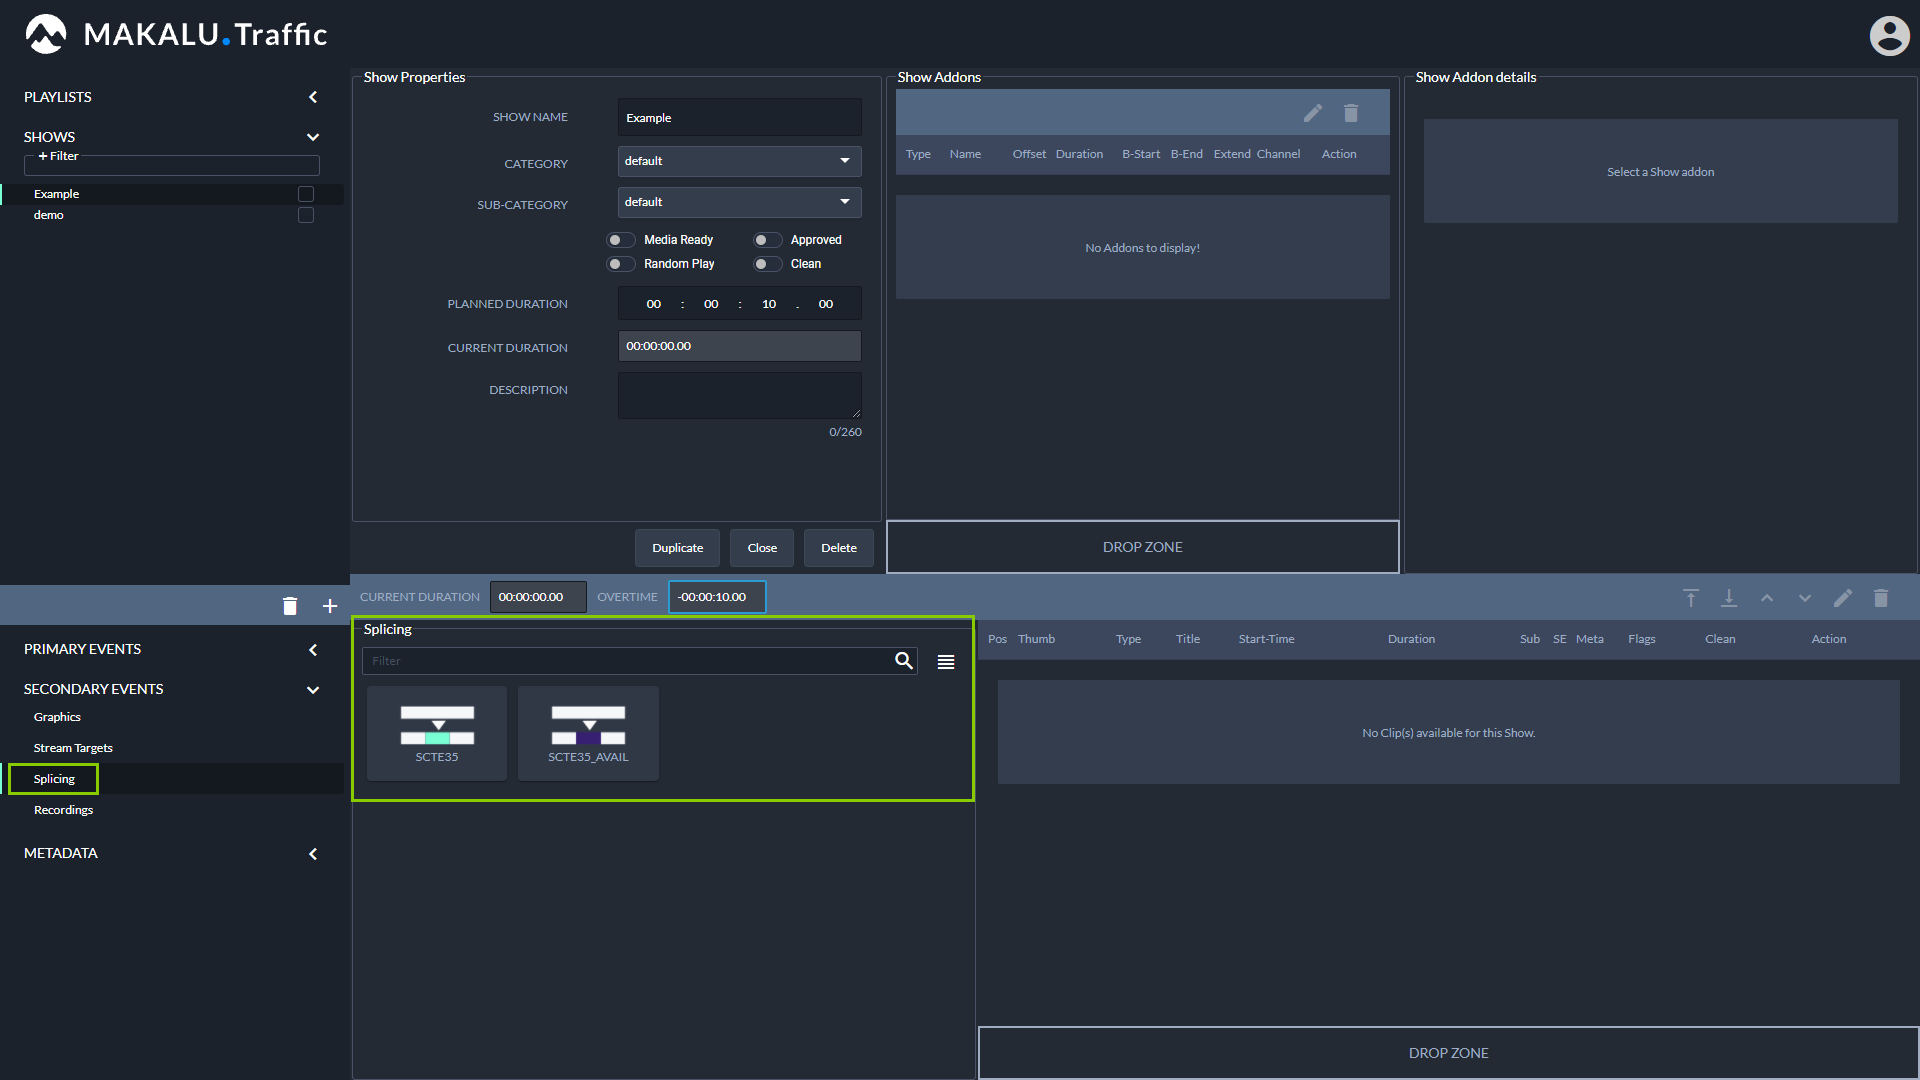
Figure: Makalu Traffic - Available splicing event types
-
Select the splicing event type to be added and drag it onto the Drop Zone in the Show Addons area.
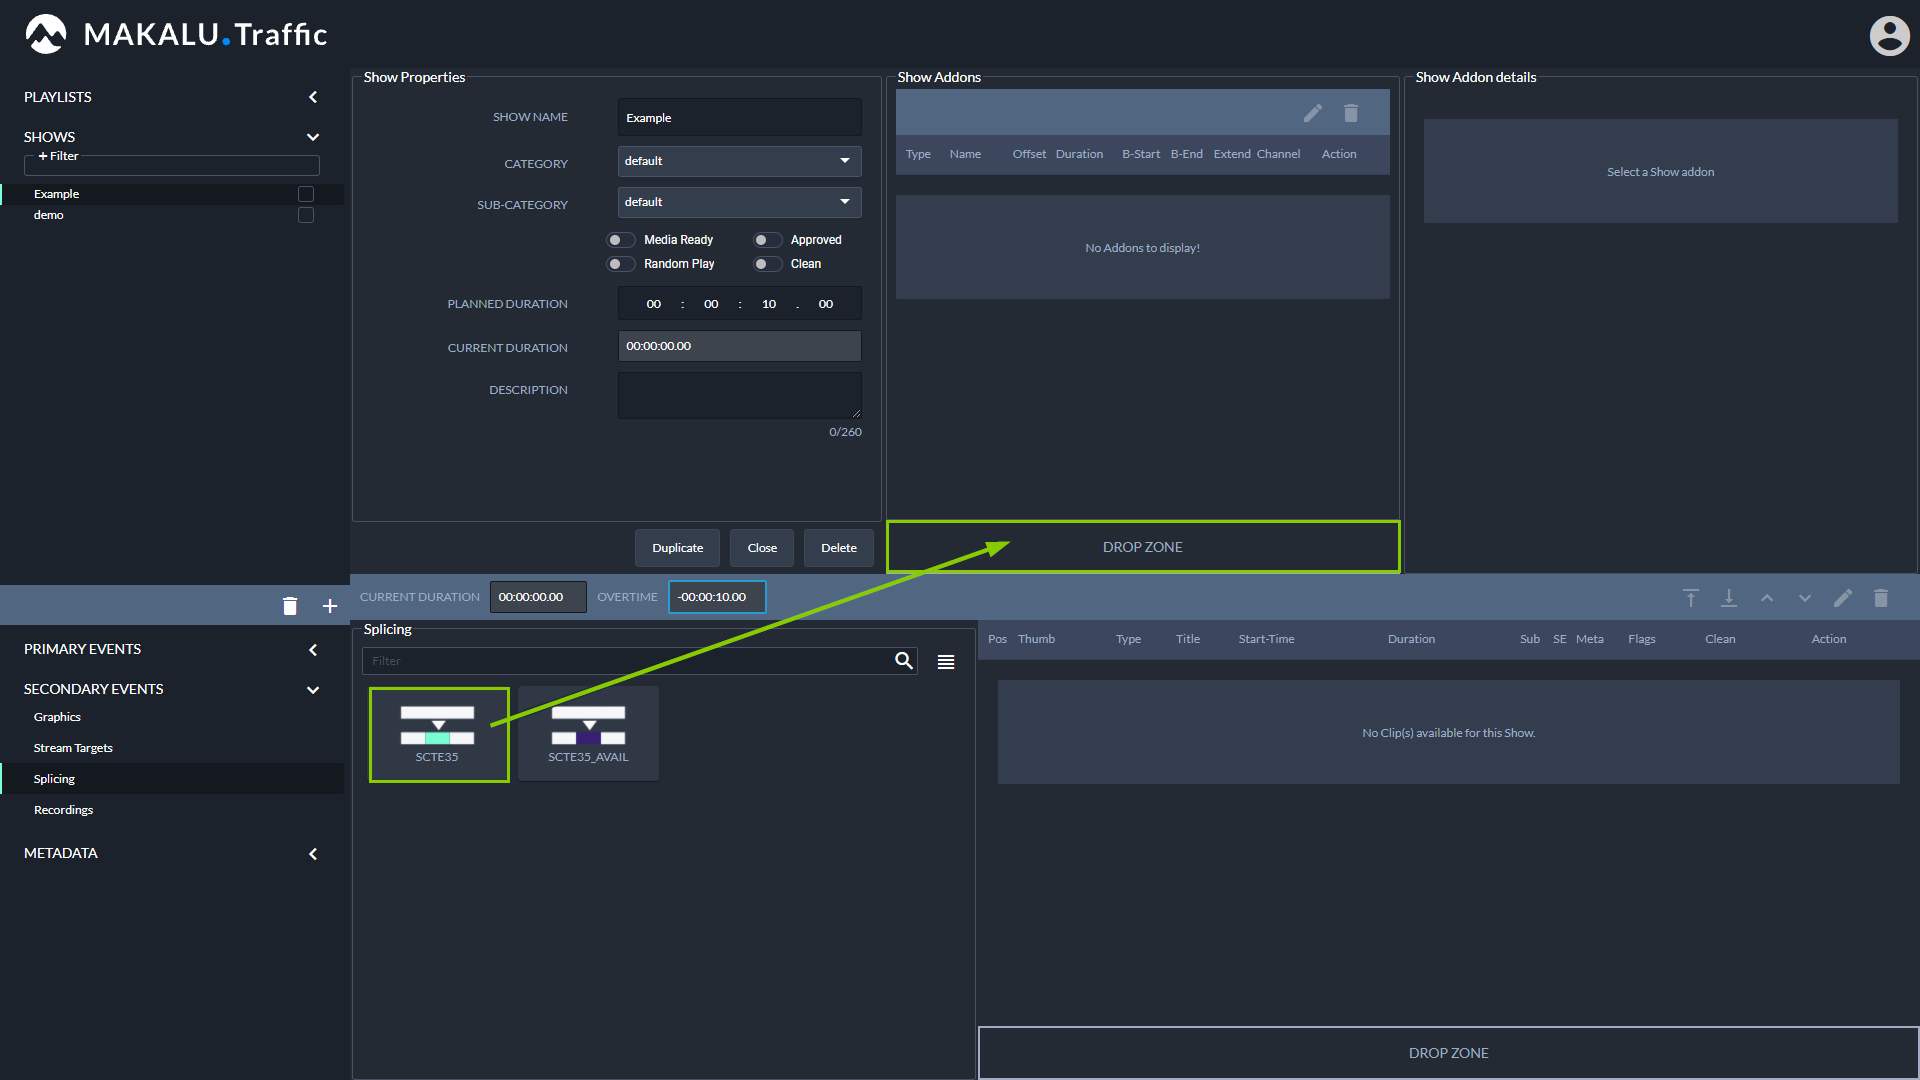
Figure: Makalu Traffic - Add splicing event to show
The splicing event is added to the show addons list.
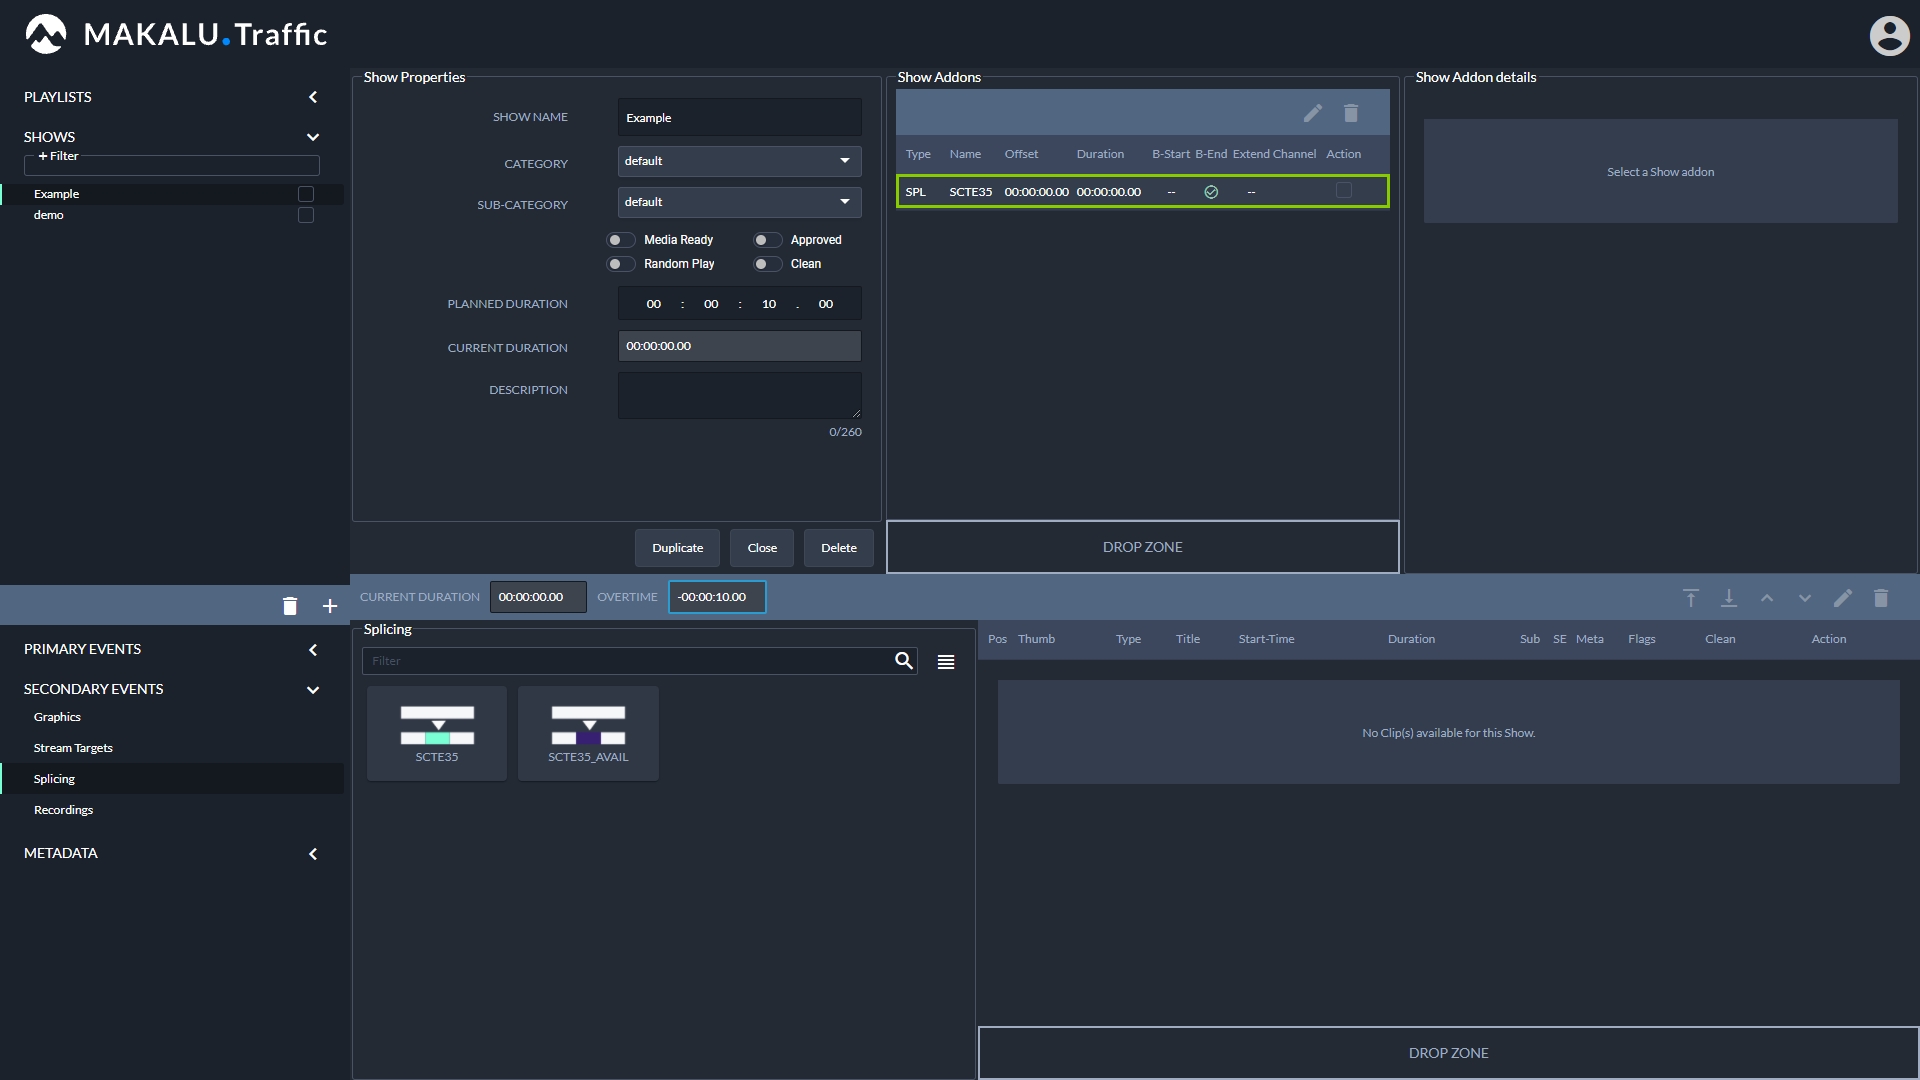
Figure: Makalu Traffic - Splicing event added to show
-
Edit the splicing event properties, by selecting the event in the Show Addons list and click the Edit Addon icon.
The splicing event details are displayed to the right, where you can edit the available properties.
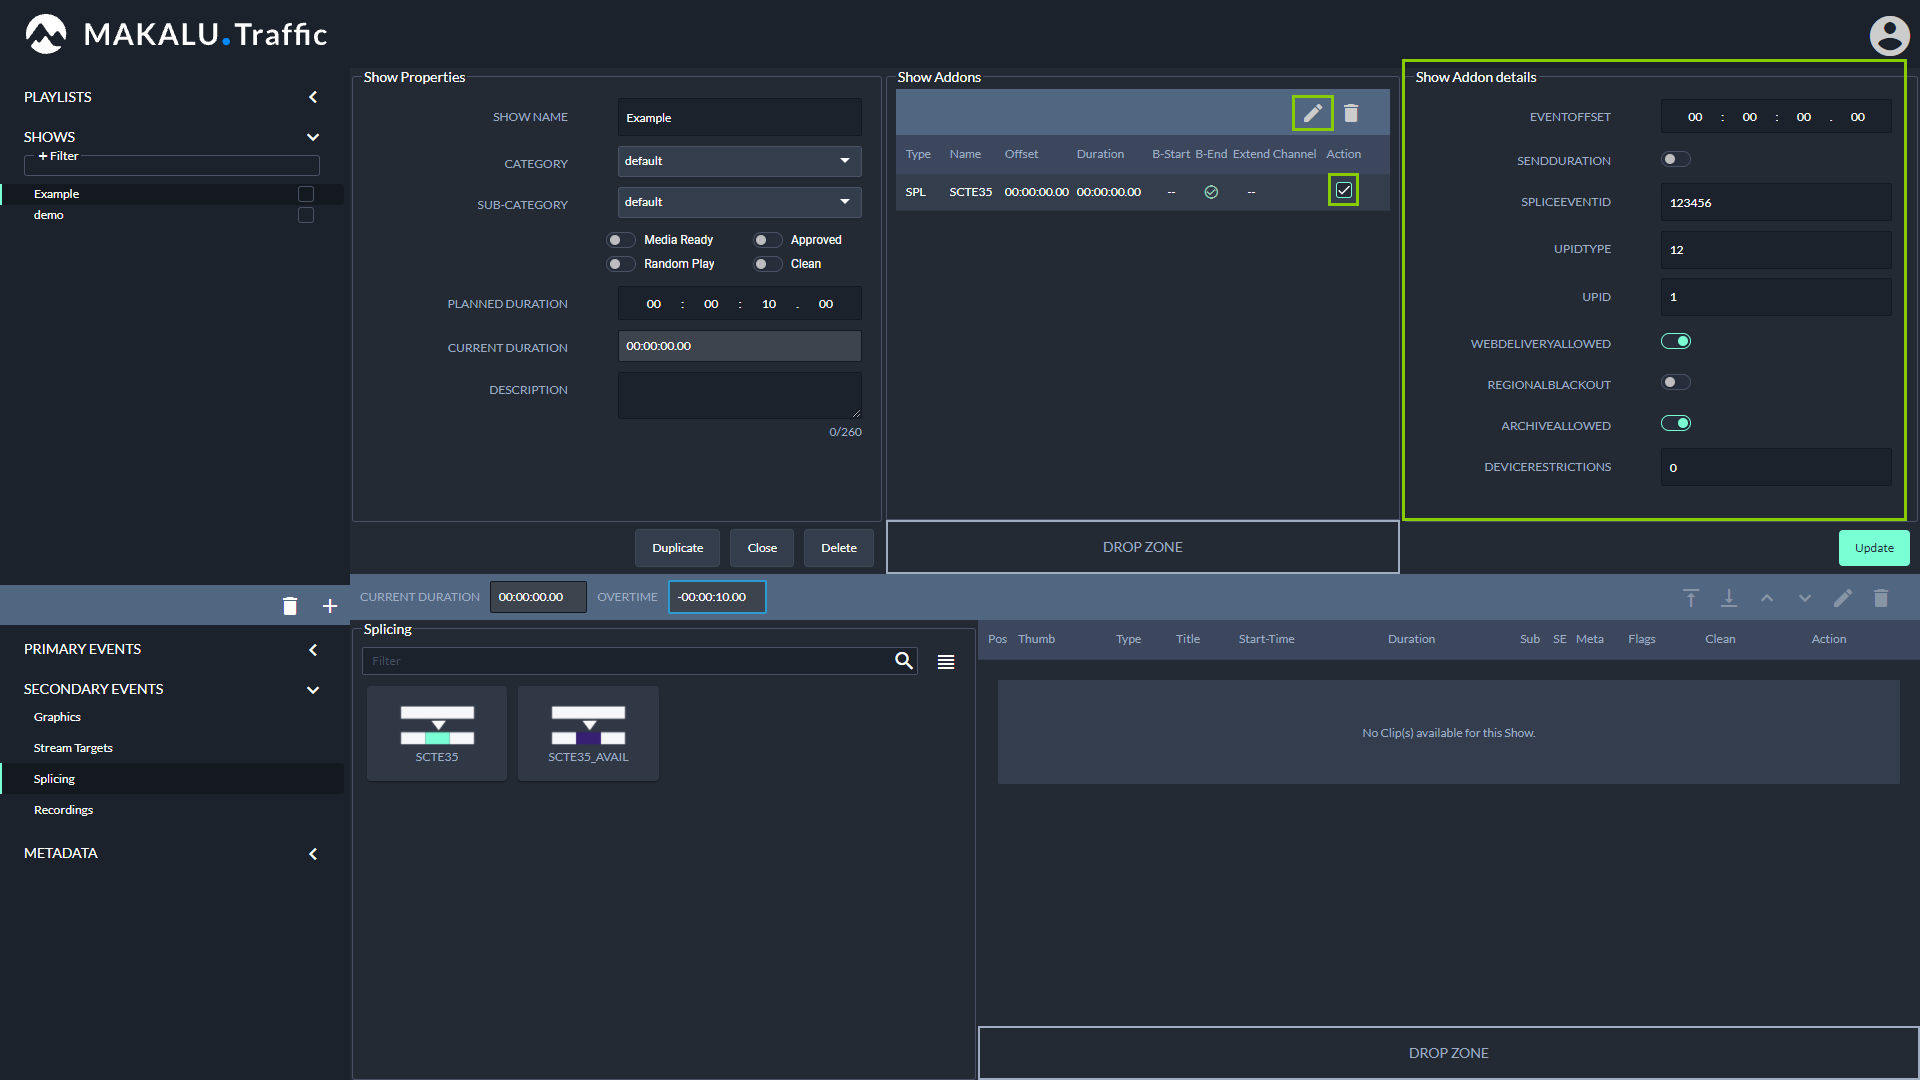
Figure: Makalu Traffic - Edit splicing event details
-
To save your changes, click Update in the Show Properties area.
The show is saved.
-
To close the tab with the show details, click Close below the show properties.
The tab is closed.
Adding a splicing event via Makalu Automation
To add a splicing event to a single clip, proceed as follows:
-
(Optional) If you want to add a new playlist to the rundown, see section Adding a playlist to a rundown.
-
In the rundown expand a playlist by clicking the plus icon on the left side.
The playlist is expanded.
-
Expand a show in the playlist by clicking the plus icon on the left side.
The show is expanded.
-
Select the clip to which you want to add the splicing event by activating the corresponding checkbox on the left side.
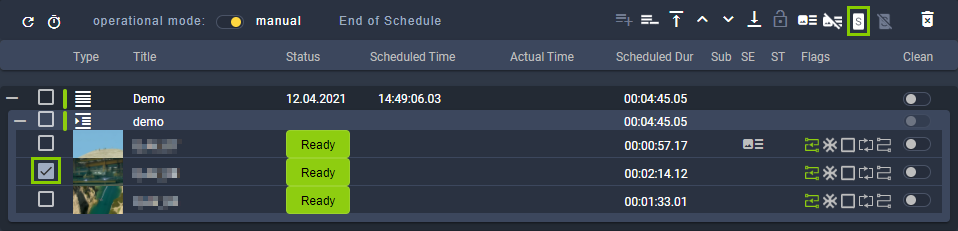
Figure: Makalu Automation - Select clip
-
Click the Add splicing event for selected clip
 icon in the rundown toolbar.
The splicing event details are displayed.
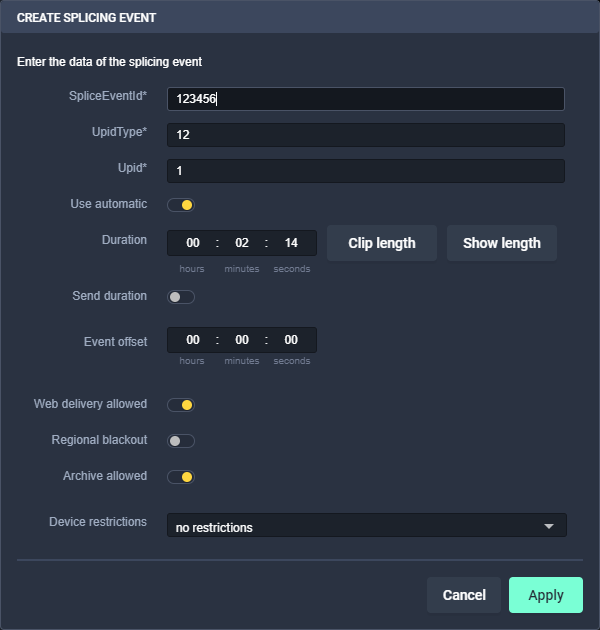
Figure: Makalu Automation - Splicing event details
-
Edit the splicing event details.
-
To confirm your changes, click Apply.
The splicing event is added to the clip and the splicing event icon is displayed to the right of the clip status.
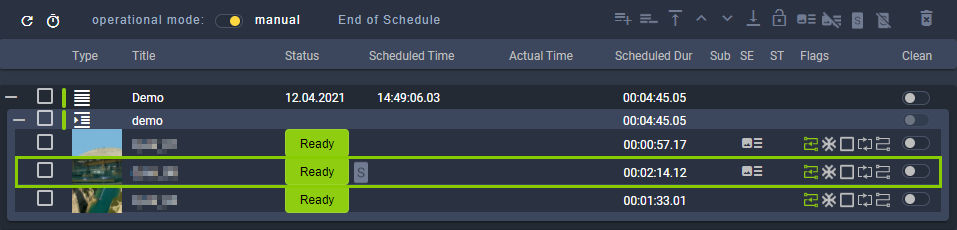
Figure: Makalu Automation - Splicing event added to clip in rundown
Visual representation of splicing events in a rundown
Splicing events with automatic stop trigger added to a single clip are highlighted with a dark grey splicing icon.

Figure: Makalu Automation - Splicing event added to a single clip, automatic stop trigger
Splicing events with manual stop trigger added to a single clip are highlighted with a white splicing icon.

Figure: Makalu Automation - Splicing event added to a single clip, manual stop trigger
Splicing events with automatic stop trigger added to a show are highlighted with dark grey (first clip) and light grey (subsequent clips) splicing icons.
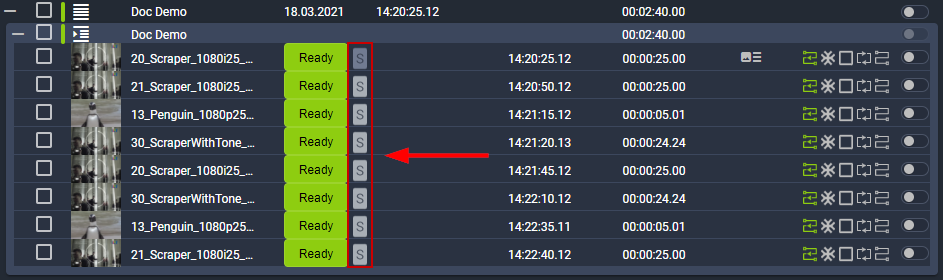
Figure: Makalu Automation - Splicing event added to a show, automatic stop trigger
Splicing events that are currently active (on air) are highlighted with a red splicing icon.

Figure: Makalu Automation - Splicing event added to a show, on air
Removing a splicing event from the rundown
To remove a splicing event from a single clip or a show in the rundown, proceed as follows:
-
In the rundown expand the corresponding playlist.
The playlist is expanded.
-
Expand the corresponding show.
The show is expanded.
-
Depending on whether you want to remove a splicing event from a single clip or a show:
-
To remove a splicing event from a single clip, select the clip with the splicing event to be removed, by activating the checkbox on the left side.
-
To remove a splicing event from a show, select the first clip of the show with the splicing event to be removed, by activating the checkbox on the left side.
-
-
Click the Delete splicing event for selected clip
 icon in the rundown toolbar.
The splicing event is removed.