Live sources and stream targets
Each incoming live stream received by Makalu is referred to as a live source. Live sources are used by multiple Makalu applications, e.g. to preview incoming streams or to schedule them in a rundown. Each playout output signal can also be routed internally and used again as a live source. Every live source is defined by a set of configuration properties (metadata), like e.g. the used protocol, the URL used to receive the stream or (if required) stream credentials. These configuration properties can e.g. be used to set up an external device or software that provides an incoming source stream to Makalu.
The target for each outgoing live stream is referred to as a stream target. Like a live source each stream target is defined by a set of configuration properties (metadata), like e.g. the used protocol, the target URL or (if required) stream credentials. Stream targets can be used by multiple Makalu applications, e.g. to schedule them in a rundown and defining which parts of the scheduled program should be streamed to downstream service providers or video platforms.
To manage, preview, monitor and route incoming and outgoing live streams (and in addition to the streaming capabilities described in section Social media Streaming), Makalu includes the Stream Control application.
Accessing Makalu Stream Control
-
Open Makalu Stream Control via
https://live-ui.customer-identifier.makalu.live.The Stream Control user interface is opened.
Manage live sources
Using the live sources overview
To access the live sources overview, in the navigation sidebar on the left select Live Sources > Overview.
The live sources overview is displayed.
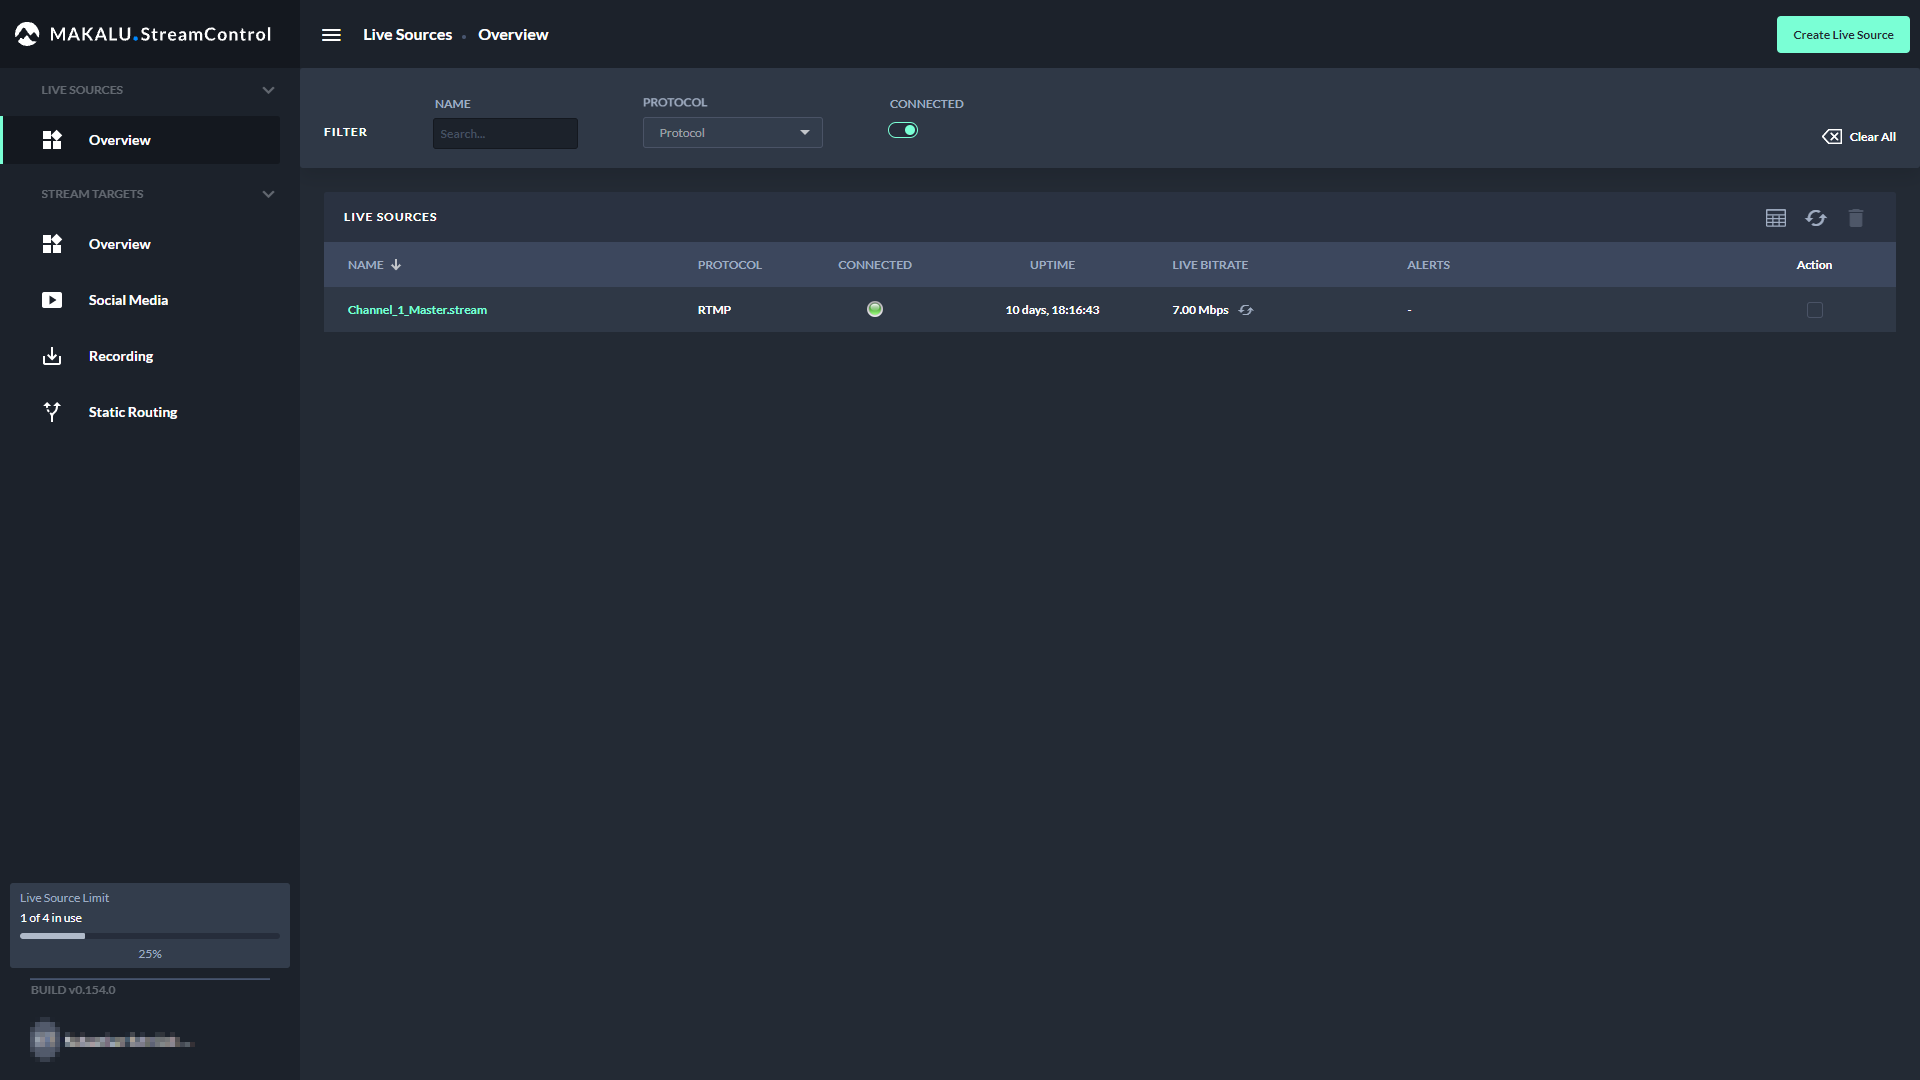
Figure: Live source overview
In the Live Sources area all currently available live sources are listed with basic information (e.g. name, protocol, status, uptime, live bitrate, and alerts). You can customize the columns to be displayed and manually trigger a list update, by using the corresponding buttons above the list.
To display only specific live sources, use the Filter area above the list. There you can e.g. search live sources by name, by status flags (connected, verified, etc.) or by protocol (RTMP, SRT, etc.).
Creating a live source
To create a live source, proceed as follows:
-
In the navigation sidebar on the left select Live Sources > Overview.
-
In the upper right, click Create Live Source.
The Create A Live Source dialog is displayed.
-
Enter a name for the live source and select the protocol to be used.
Notice
The name of the live source must be unique.
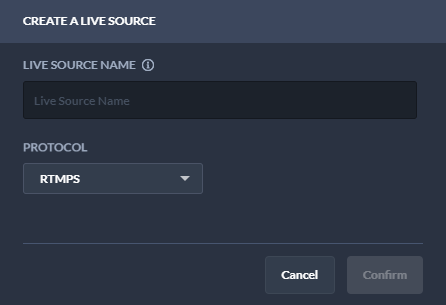
Figure: Create live source
-
(Optional) Depending on the selected protocol, additional configuration properties may be displayed. Set the values as required.
Notice
If you select e.g. protocol RTMP the additional property On connect Authenticate is available. If you enable it the URL of the created live source (which must be used to provide the source stream to Makalu) will include username and password for authentication.
-
Click Confirm.
The live source is created and added to the live sources list. It is also available in Makalu Traffic as primary event and can be added to shows. In Makalu Automation it is available under Media > Live, can be previewed and added to a rundown.
Notice
You can now configure your device/software/encoder that provides the actual source stream by using the configuration properties of the live source you created. To do this, select the newly created live source, copy the values of the corresponding configuration properties to the clipboard and paste them into your device/software settings. Afterwards start the stream. If everything is configured properly and the incoming stream is received correctly, the live source status changes from red (disconnected) to green (connected) and the preview can be started.
Previewing a live source
To preview a live source, proceed as follows:
-
In the navigation sidebar on the left select Live Sources > Overview.
-
In the live sources list click the name of the live source to be previewed.
A preview player and detailed information about the live source are displayed at the top of the page.
-
In the preview player click the Play icon.
The preview starts.
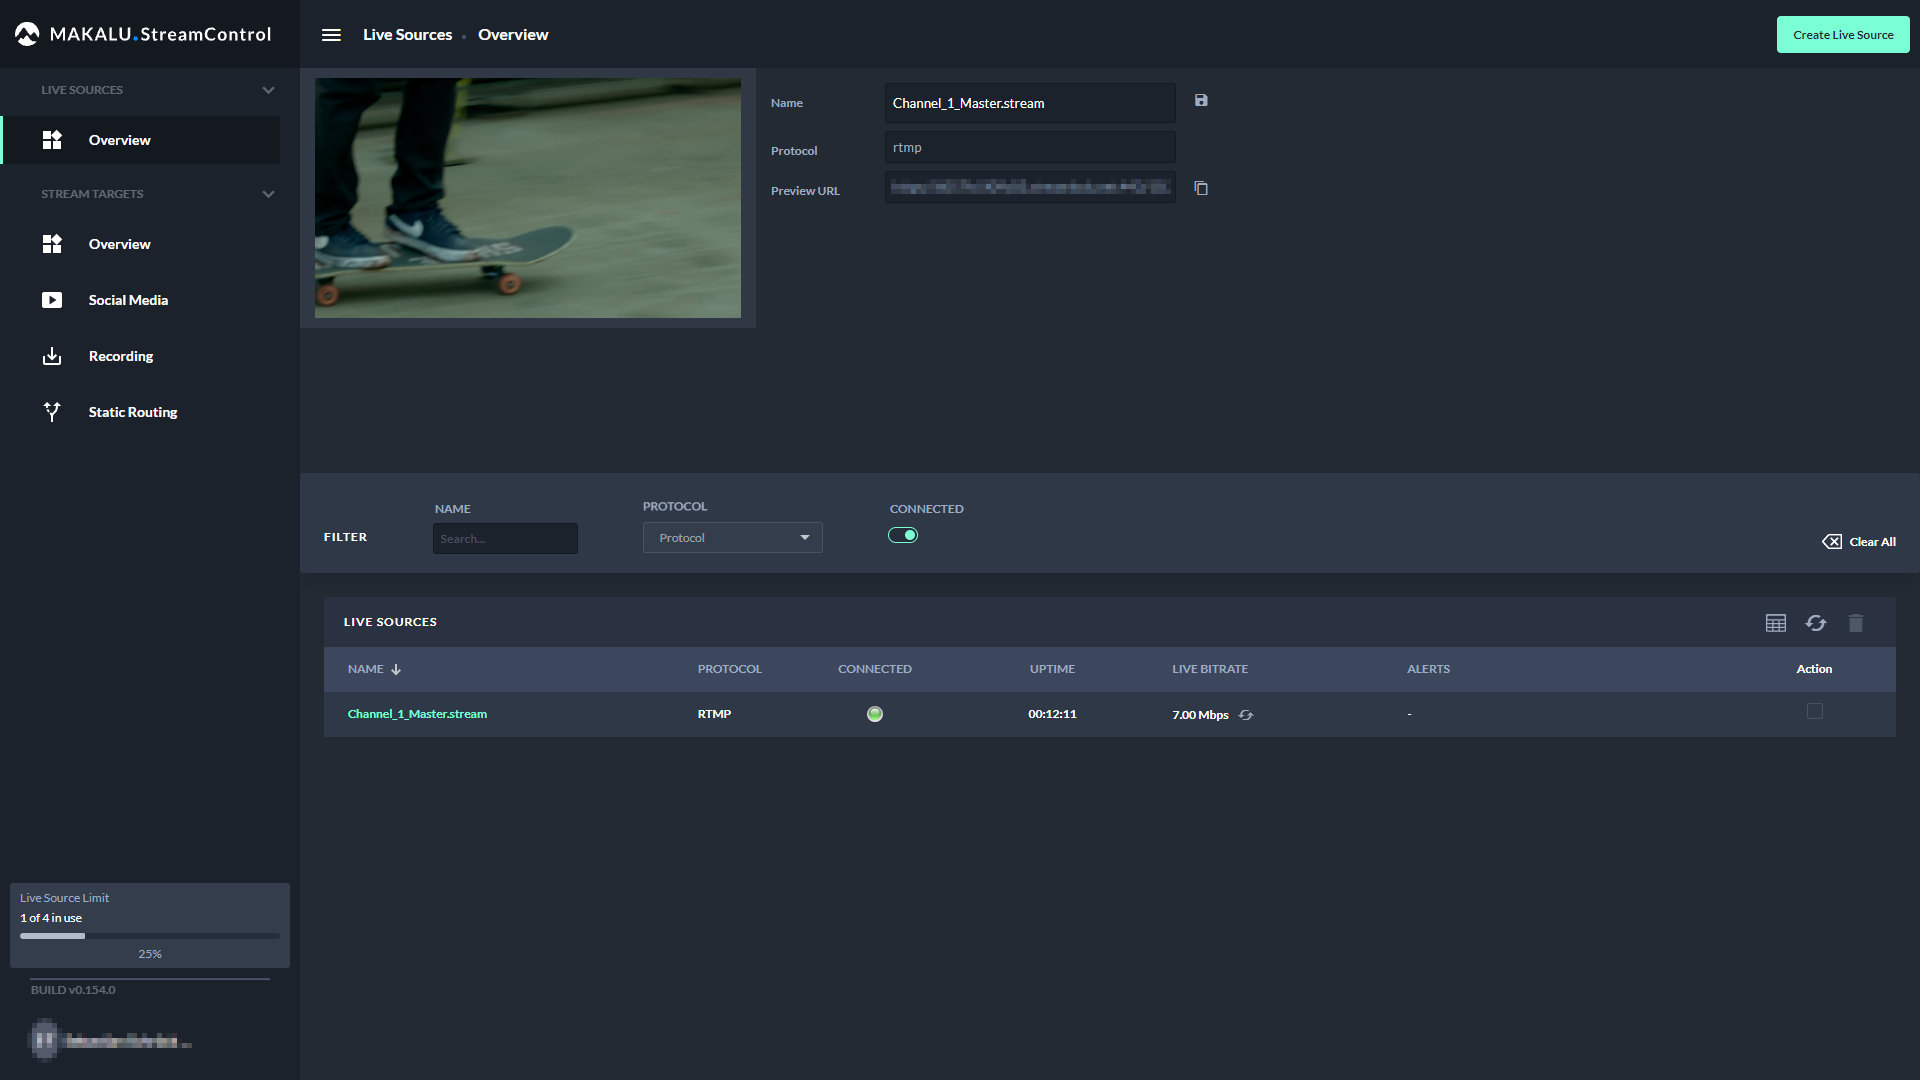
Figure: Live source preview
-
Use the player controls to e.g. trigger pause, play or full screen view.
Editing a live source
Notice
You can only edit the name of a live source. All other settings cannot be changed as they are automatically generated.
To edit a live source, proceed as follows:
-
In the navigation sidebar on the left select Live Sources > Overview.
-
In the live sources list click the name of the live source to be edited.
A preview player and detailed information about the live source are displayed at the top of the page.
-
Edit the name of the live source.
-
Click Save.
The changed live source configuration is saved.
Deleting a live source
To delete a live source, proceed as follows:
-
In the navigation sidebar on the left select Live Sources > Overview.
-
In the live sources list in the Action column activate the checkbox of the live source to be deleted.
-
Click the Delete selected live source icon above the live sources list.
-
Confirm the displayed dialog by clicking Confirm.
The live source is deleted and removed from the live source list.
Manage stream targets
Using the stream targets overview
To access the stream target overview, in the navigation sidebar on the left select Stream Targets > Overview.
The stream target overview is displayed.
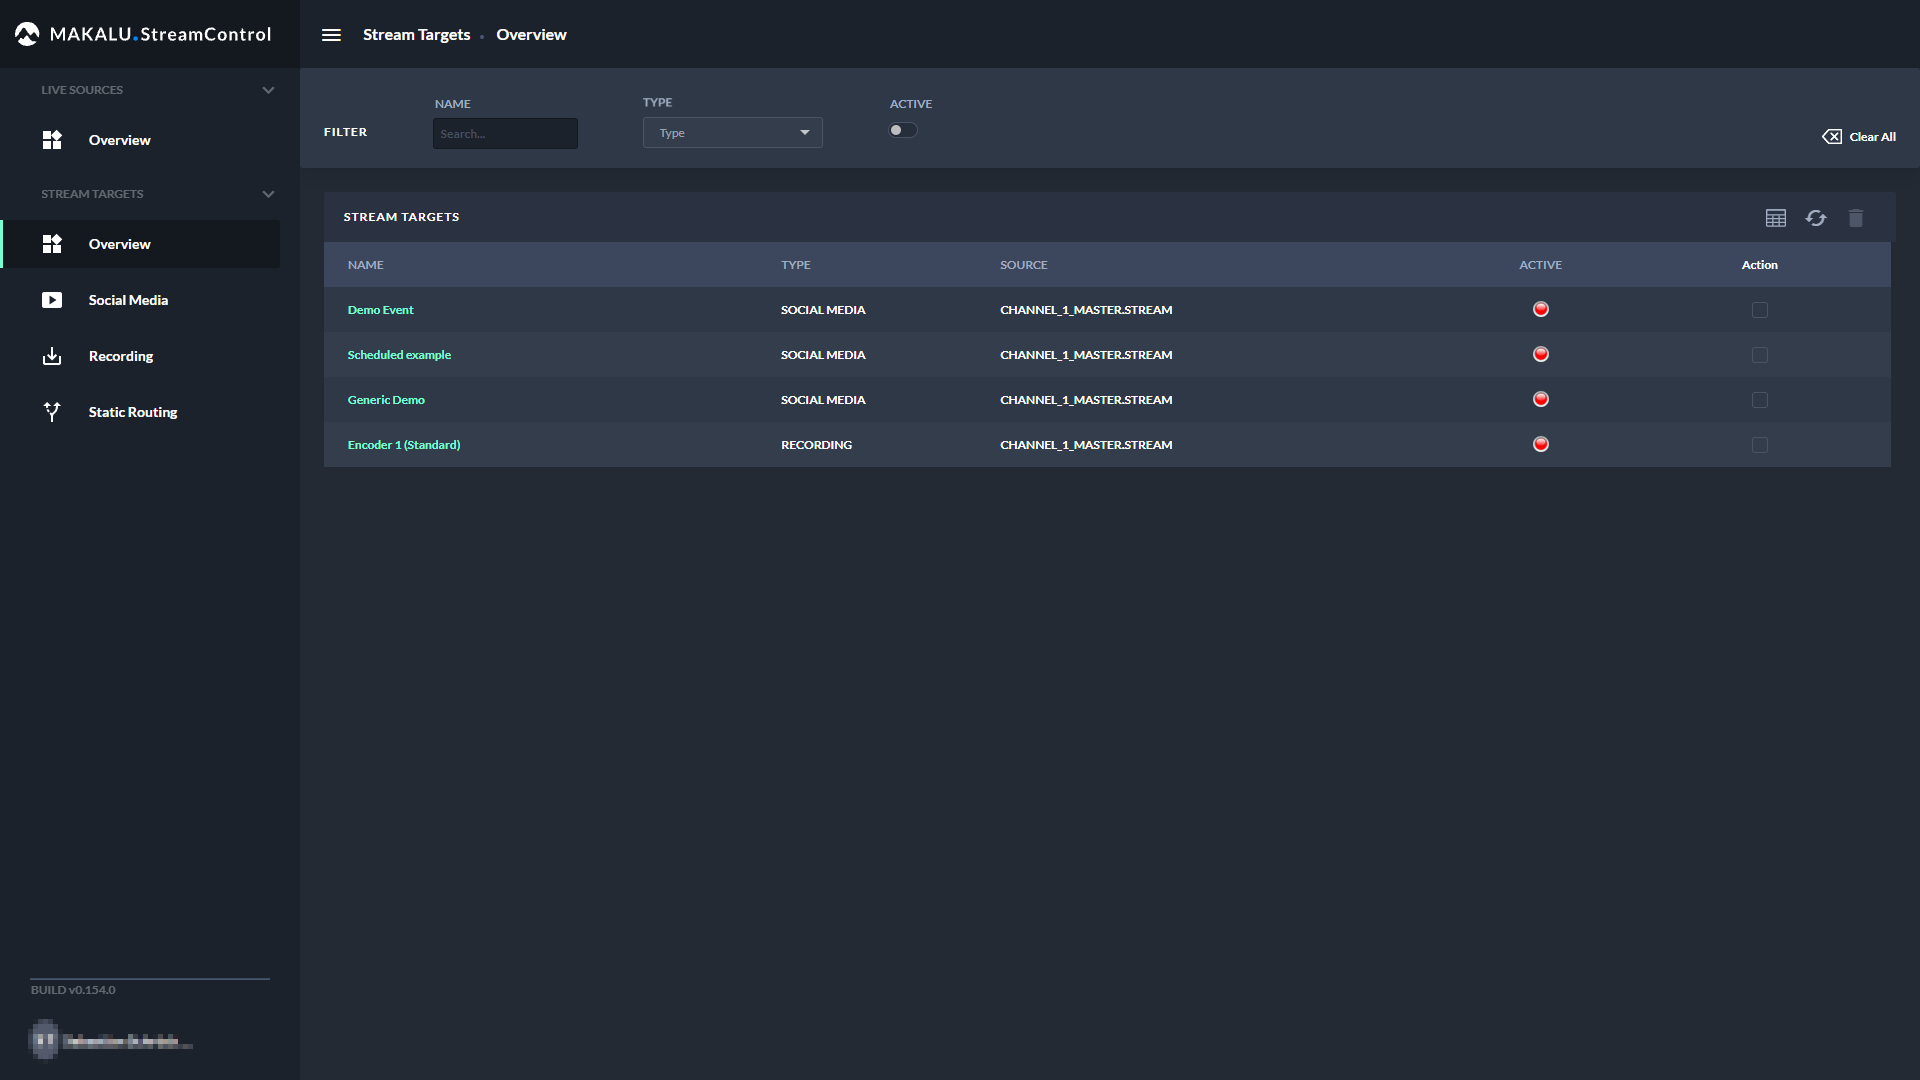
Figure: Stream target overview
In the Stream Targets area all currently available stream targets and jobs are listed with basic information (e.g. name, type, source, and status). You can customize the columns to be displayed and manually trigger a list update, by using the corresponding buttons above the list.
To display only specific stream targets, use the Filter area above the list. There you can e.g. search stream targets by name, by type (YouTube, Generic, etc.) or active status.
You can display and edit the details of each stream target, by clicking on the corresponding stream target name.
Creating a static routing stream target
A static routing stream target enables you to permanently stream any live source to any valid target, without having to schedule it in a rundown.
To create a static routing stream target, proceed as follows:
-
In the navigation sidebar on the left select Stream Targets > Static Routing.
-
In the upper right, click Add.
The Create A Stream Target dialog is displayed.
-
Select the protocol to be used.
Depending on the selected protocol, different configuration properties are displayed.
-
Set all configuration properties as required.
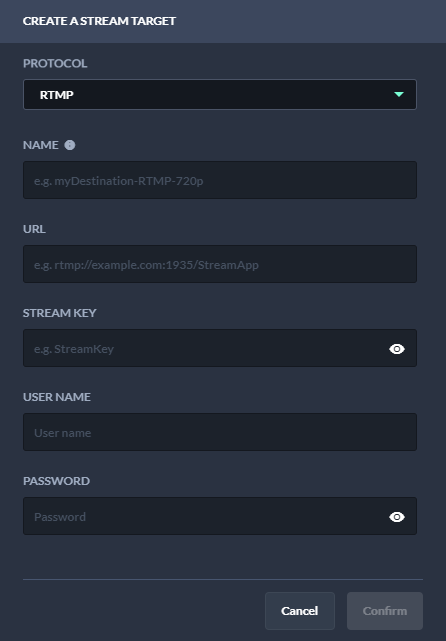
Figure: Static routing stream target properties
-
Click Confirm.
The static routing stream target is created and added to the stream targets list with status inactive (red).
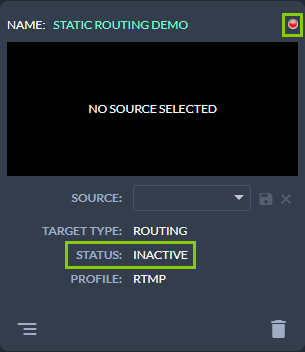
Figure: Static routing stream target created
-
Select the live source to be used via the Source dropdown menu.
If the source stream is valid and running, preview playback starts automatically.
-
Right next to Source click the Save source stream icon.
The source of the static routing stream target is saved. If source and target are valid and the stream is running the status changes to active (green).
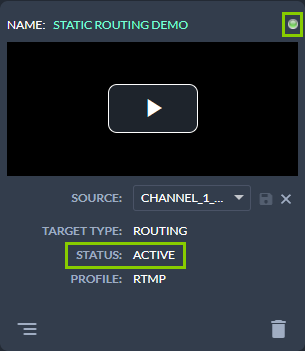
Figure: Active static routing stream target
Notice
To preview the live source, in the preview player click the Play icon and use the player controls to e.g. trigger a full screen preview.
Editing a static routing stream target
To edit a static routing stream target, proceed as follows:
-
In the navigation sidebar on the left select Stream Targets > Static Routing.
-
Look for the target to be edited and in the bottom left of the corresponding tile click the View and edit configuration data icon.
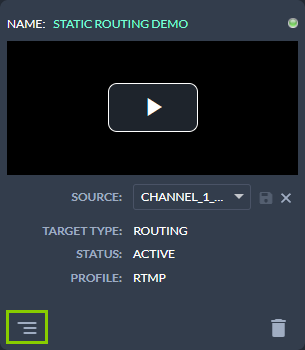
Figure: Open static routing stream target settings
The target settings are displayed.
-
Change the settings as required.
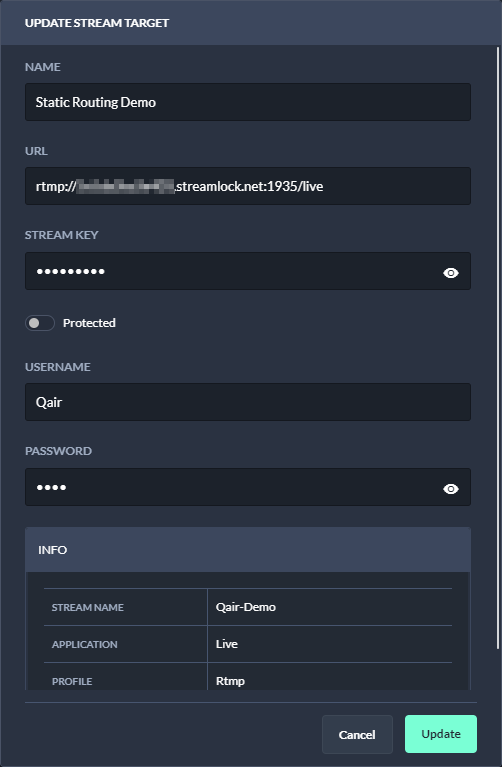
Figure: Update static routing stream target settings
-
Confirm your changes, by clicking Update.
The changed static routing stream target settings are saved.
Editing a social media or generic stream job
In the following a YouTube stream job is used as example for managing stream jobs. The same approach applies to generic stream jobs.
To edit a stream job, proceed as follows:
-
To get an overview of all available YouTube stream jobs, in the navigation sidebar on the left select Stream Targets > Social Media.
-
Look for the stream job to be edited and in the bottom left of the corresponding tile click the View and edit configuration data icon.
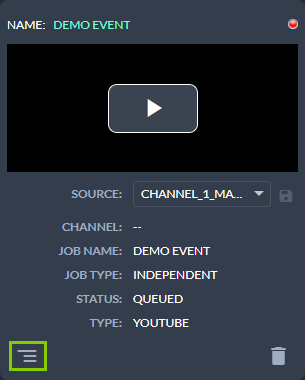
Figure: Open stream job settings
The target settings are displayed.
-
Change the settings as required.
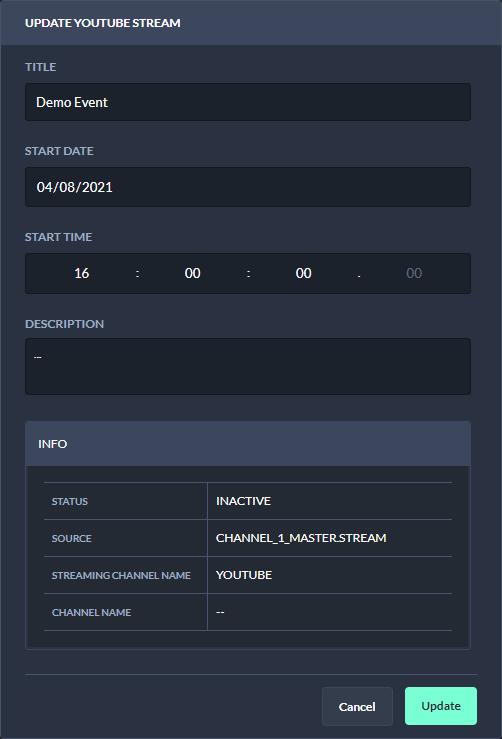
Figure: Update stream job settings
-
Confirm your changes, by clicking Update.
The stream job settings are updated.
Deleting a stream target
To delete a stream target, proceed as follows:
-
In the navigation sidebar on the left select Stream Targets > Overview.
-
In the stream targets list in the Action column activate the checkbox of the stream target to be deleted.
-
Click the Delete selected stream target icon above the live sources list.
-
Confirm the displayed dialog by clicking Confirm.
The stream target is deleted and removed from the stream targets list.
Synchronizing stream targets between Wowza and Makalu
Under certain conditions (e.g. because of special customer requirements regarding the stream format or certain stream properties) it may not be possible to create a stream target via the default mechanism provided by Makalu Stream Control. In this case the corresponding stream target must be created manually via the Wowza Manager UI. Afterwards it can be synchronized with Makalu via Stream Control and can then be used like a "regular" stream target.
To synchronize stream targets, proceed as follows:
-
In the navigation sidebar on the left select Stream Targets > Static Routing.
-
In the upper right, click Sync.
All stream targets that were created via the Wowza Manager UI and can be synchronized are listed.
-
Select one or more stream targets to be synchronized.
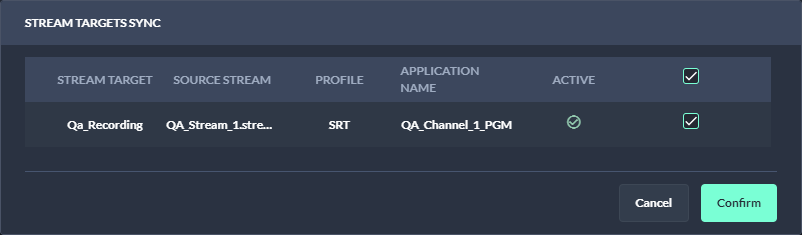
Figure: Synchronize stream targets
-
Click Confirm.
The selected stream targets are synchronized with Makalu and can afterwards be used like "regular" stream targets.