Audio mapping
Basic information
Makalu includes a feature for audio mapping (also referred to as "audio routing" or "audio shuffling") that provides versatility when working with varying audio configurations, as it allows you to map audio inputs to audio outputs as required. It enables error-free audio playback by ensuring that the audio included in the files and live sources used on the input side matches the configured audio scheme of the channel on the output side. The mapping between audio input and output is controlled via audio schemes, which are part of the configuration of each Makalu playout channel.
An audio scheme could, for example, include the following default mapping for input files/live sources with eight audio channels mapped to eight output channels:
| Audio input | Mapped to audio output |
|---|---|
| Input 1 | Output 1 (Full Mix L) |
| Input 2 | Output 2 (Full Mix R) |
| Input 3 | Output 3 (Original Language L) |
| Input 4 | Output 4 (Original Language R) |
| Input 5 | Output 5 (Audio Description L) |
| Input 6 | Output 6 (Audio Description R) |
| Input 7 | Output 7 (Silence L) |
| Input 8 | Output 8 (Silence R) |
Both file-based and live sources can include multiple audio tracks, which in turn can contain multiple audio channels. To be played correctly, each source has to be checked and configured accordingly. For uploaded files, this is done automatically as part of the technical metadata determination during file processing.
The input and output audio channels are mapped either by automatically applying a standard audio scheme with a default configuration or by manually defining an individual audio mapping for each clip. This enables you to define how to deal with file-based content or live input that deviates from the configured channel audio output.
For this purpose, Makalu provides secondary events of the type Audio mapping that can be used in the following ways:
- they can be added to clips in the rundown at short notice via Makalu Automation
- they can be added on the fly to the clip currently on-air via Makalu Automation
Common use cases
A common use case for this feature is to plan the mapping/routing of audio channels in advance, for example, to adapt the audio playback of purchased content (which uses a deviating audio channel configuration, for example, a different number of audio channels) to the configured channel audio output. This eliminates the need for the time-consuming and expensive process of producing the corresponding content again with an adapted audio configuration.
An example audio scheme for input files with two audio channels mapped to eight output channels could include the following mapping:
| Audio input | Mapped to audio output |
|---|---|
| Input 1 | Output 1 |
| Input 2 | Output 2 |
| Input 1 | Output 3 |
| Input 2 | Output 4 |
| Input 1 | Output 5 |
| Input 2 | Output 6 |
| Input 1 | Output 7 |
| Input 2 | Output 8 |
Another use case could be a live source with faulty audio. For example, a live source should be played, and the TX operator checks it via the preview of the Automation UI. It turns out that only the left channel of an expected stereo signal of the live source is working. The source may have an error, but stereo output should still be made possible. By using the audio mapping feature, the TX operator can map the left input channel to all output channels as a workaround, so that at least all output channels play audio.
An example audio scheme for input sources with one audio channel mapped to eight output channels could include the following mapping:
| Audio input | Mapped to audio output |
|---|---|
| Input 1 | Output 1 |
| Input 1 | Output 2 |
| Input 1 | Output 3 |
| Input 1 | Output 4 |
| Input 1 | Output 5 |
| Input 1 | Output 6 |
| Input 1 | Output 7 |
| Input 1 | Output 8 |
Using audio mapping for short-term planning (via Makalu Automation)
To change the audio mapping settings of any clip in the rundown, add an audio mapping secondary event as follows:
-
Open the Makalu Automation detailed channel view as described in section Accessing the detailed channel view.
-
On the right side, select the Media tab.
All available media items are listed in the media list.
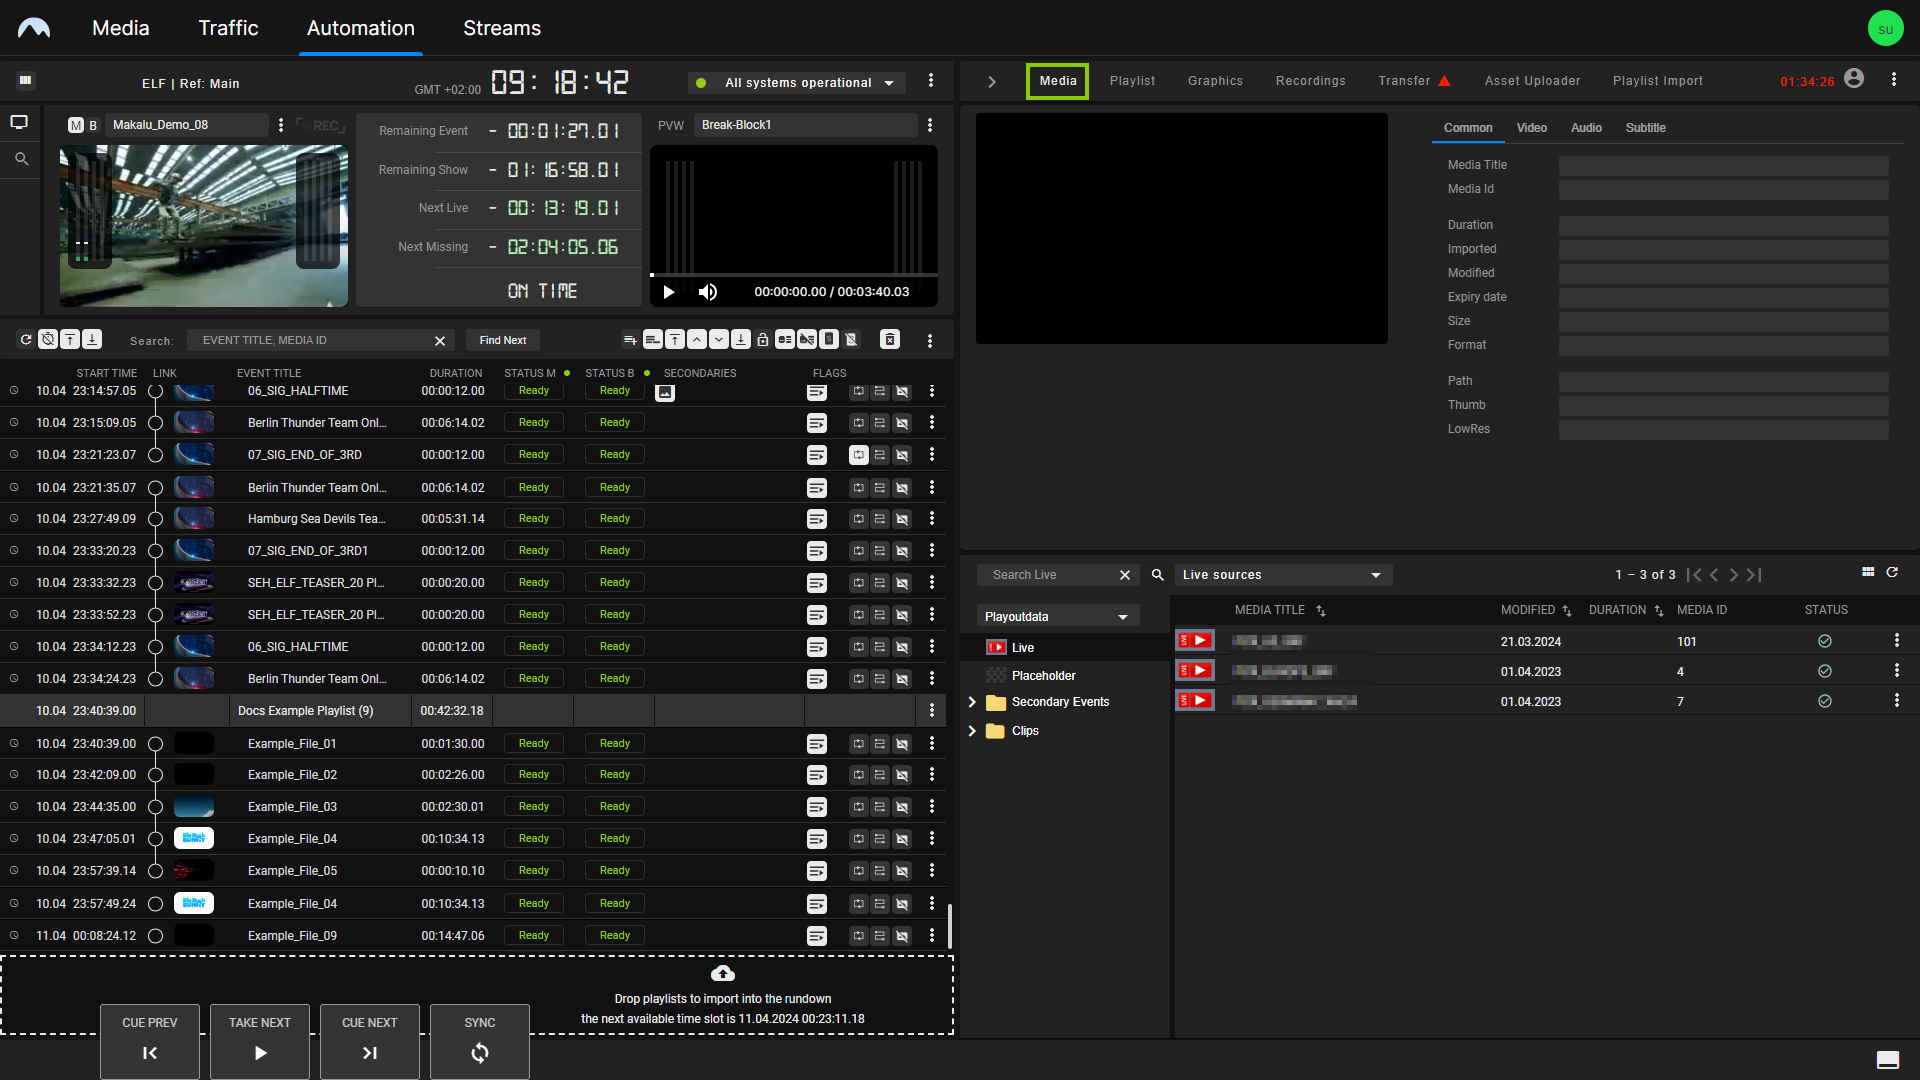
Automation - Show expanded and media tab opened -
In the media list, click Secondary Events and select Audio Mapping.
All available audio mapping secondary events are listed.
-
Select an audio mapping secondary event and drag it on a show or clip in the rundown.
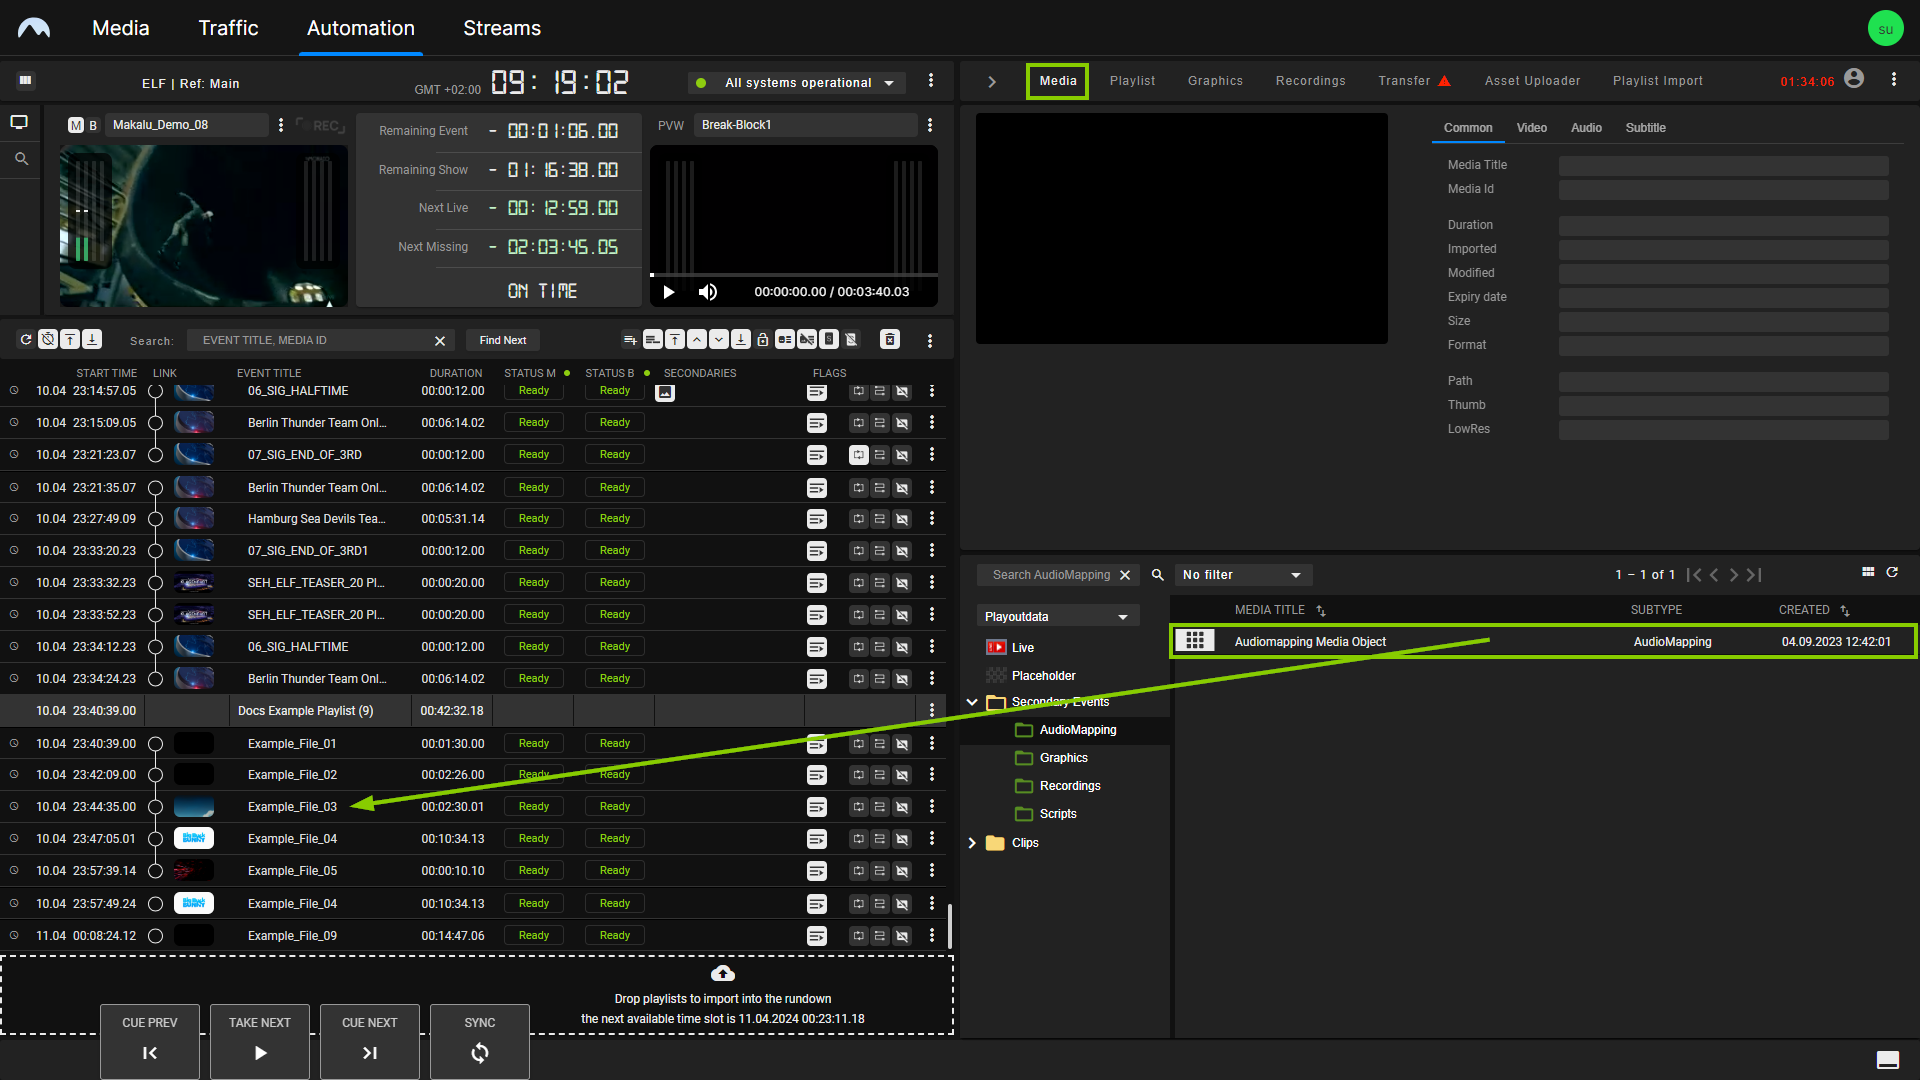
Automation - Secondary event selected The selected audio mapping secondary event is added to the show or clip, which is indicated by the corresponding icon in the Secondaries column. The default settings of the audio mapping secondary event are applied.
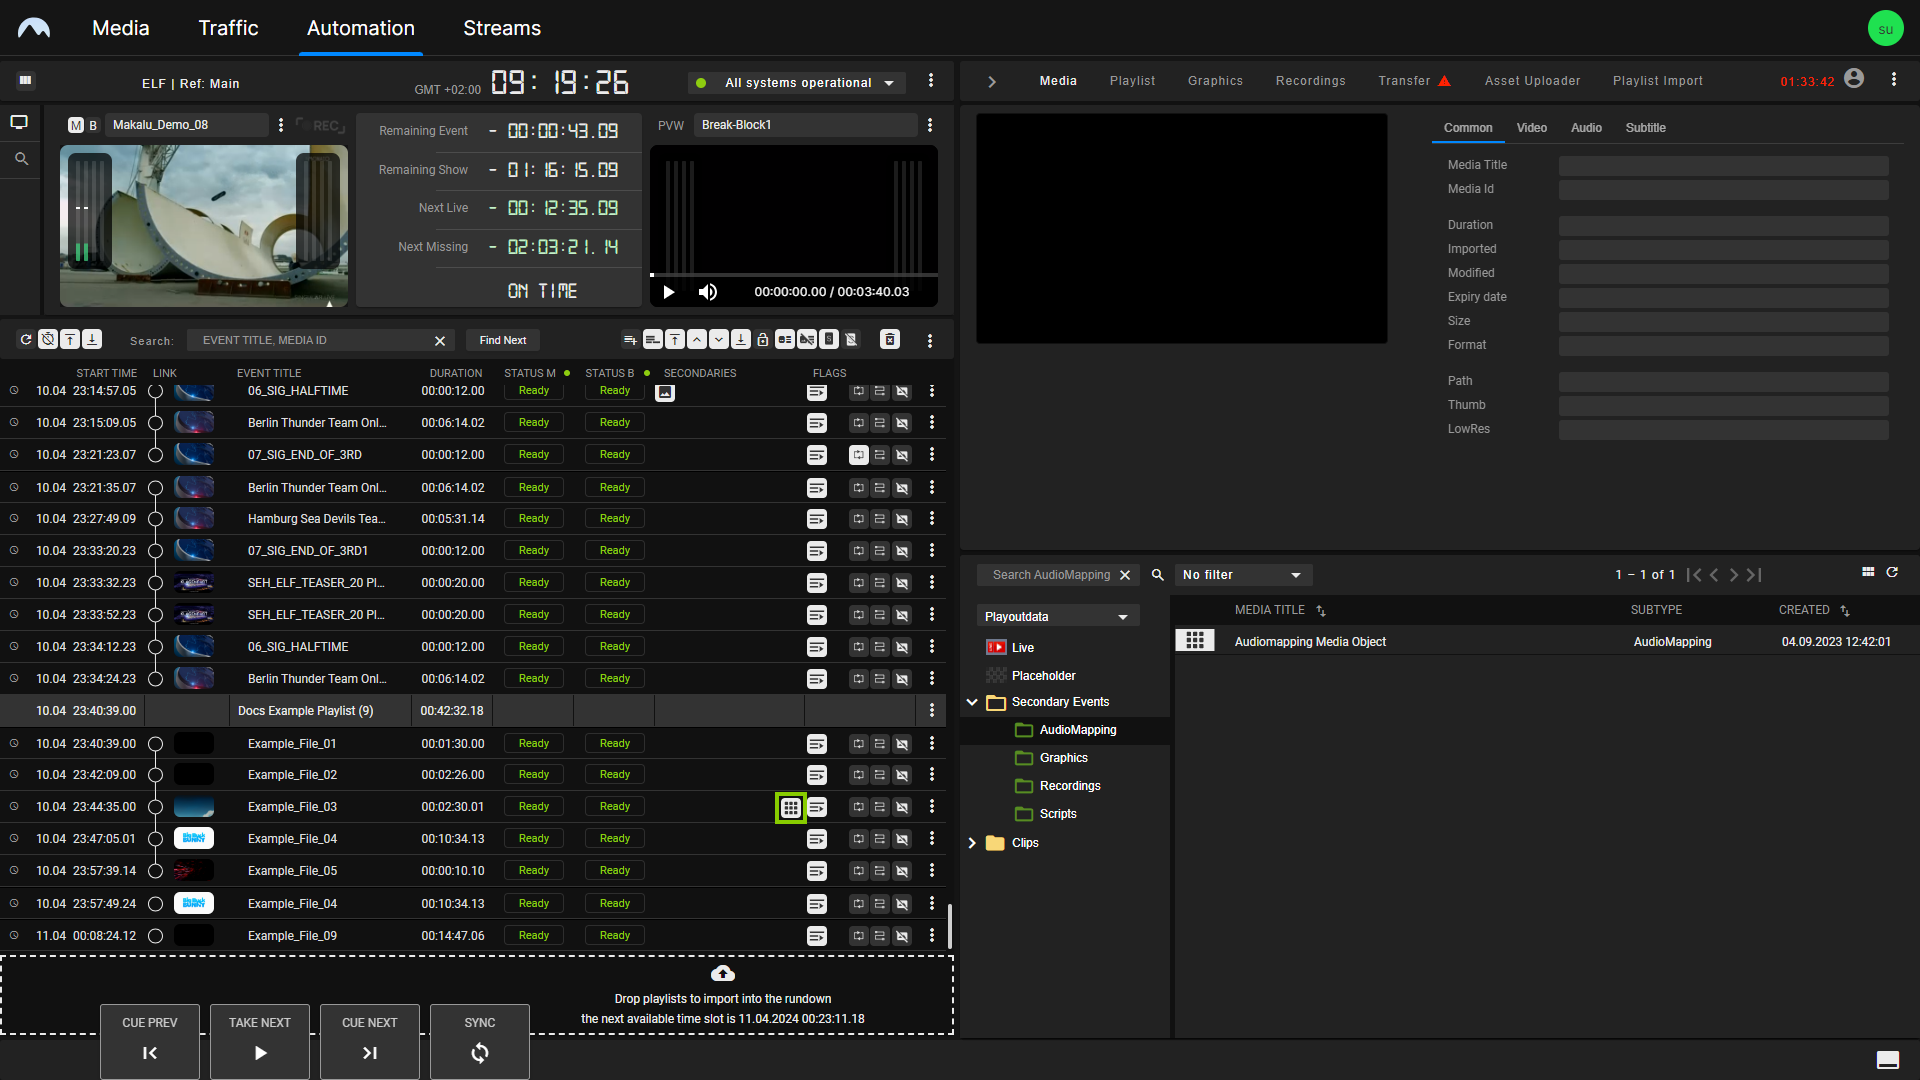
Automation - Secondary event added to a clip -
To edit the settings of the added audio mapping secondary event, proceed as follows:
-
Expand the list of audio mapping secondary events added to the show or clip by clicking the Audio Mapping icon
 in the Secondaries column of the corresponding element.
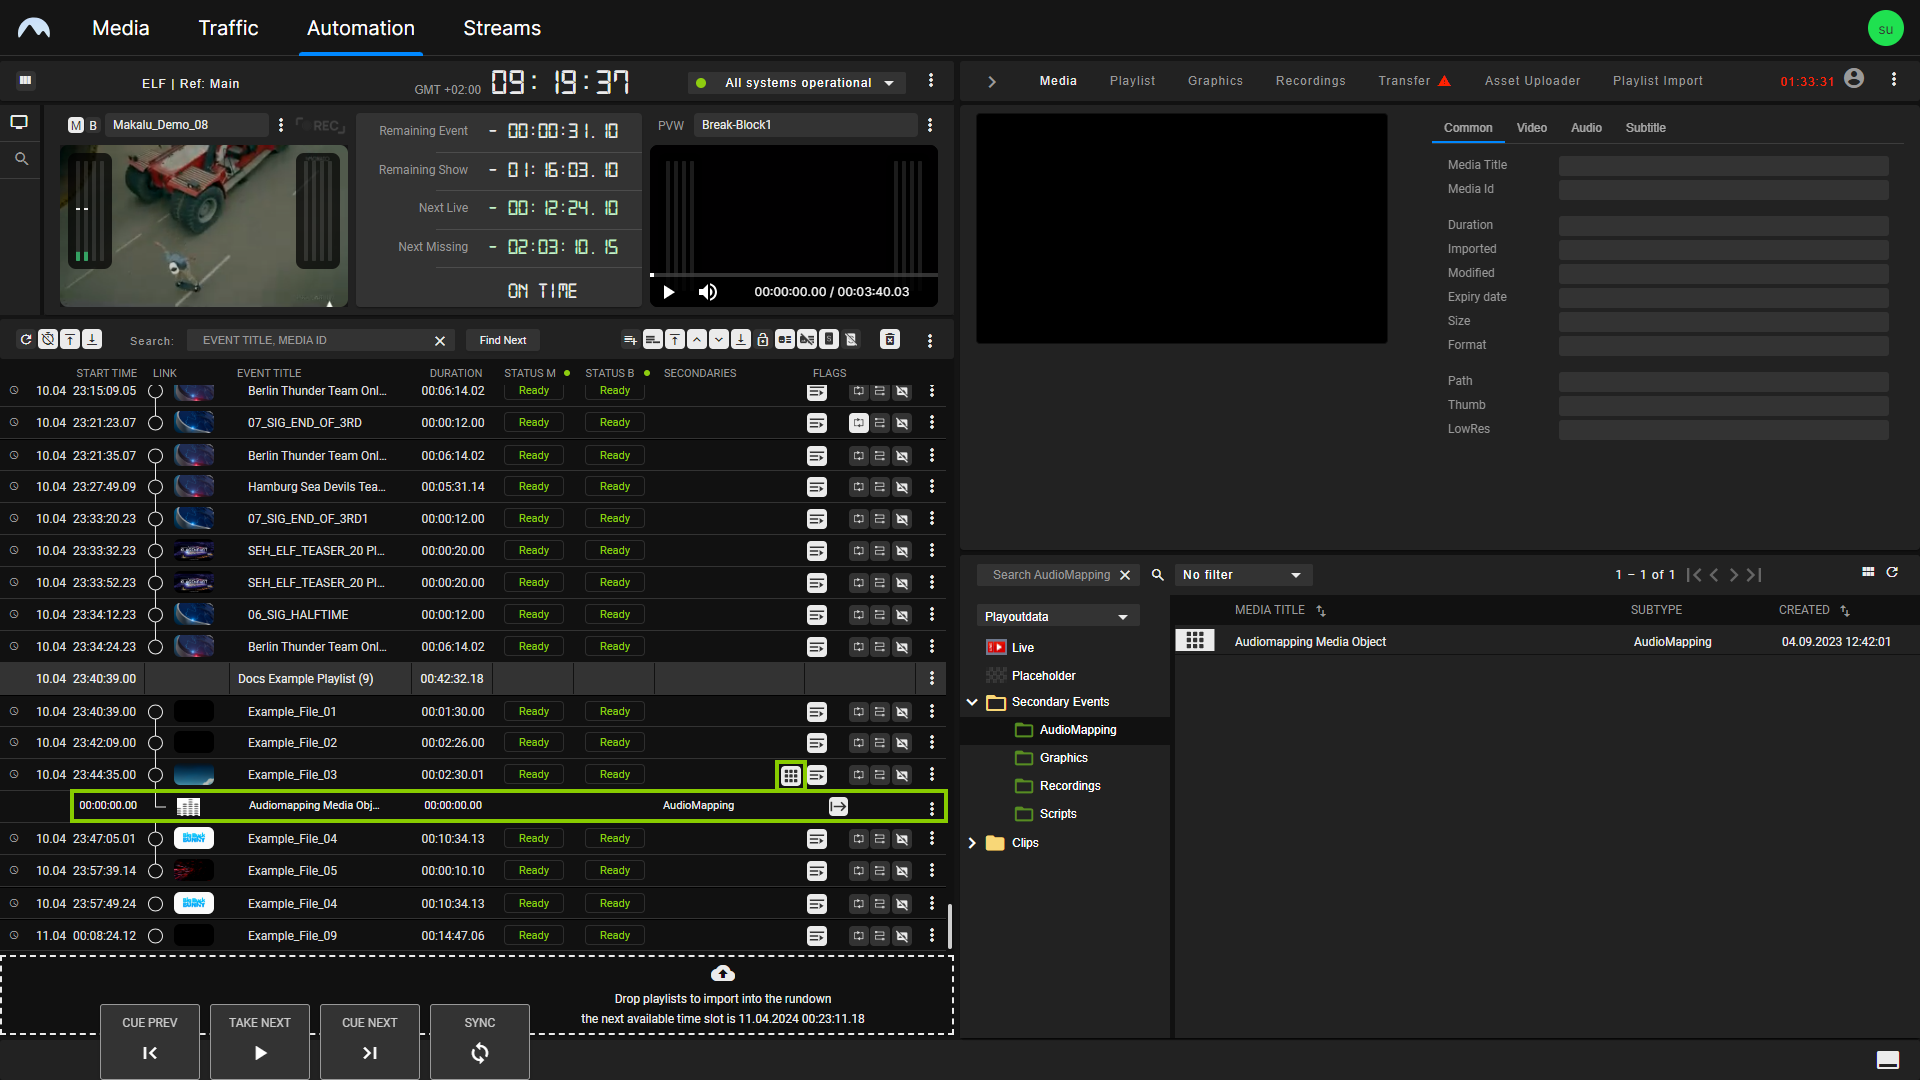
Automation - Clip secondary event list expanded -
Click the Options icon
 of the show or clip and select Edit Secondary.
 -
Change the audio mapping settings as required by enabling the output to be used for each corresponding input.
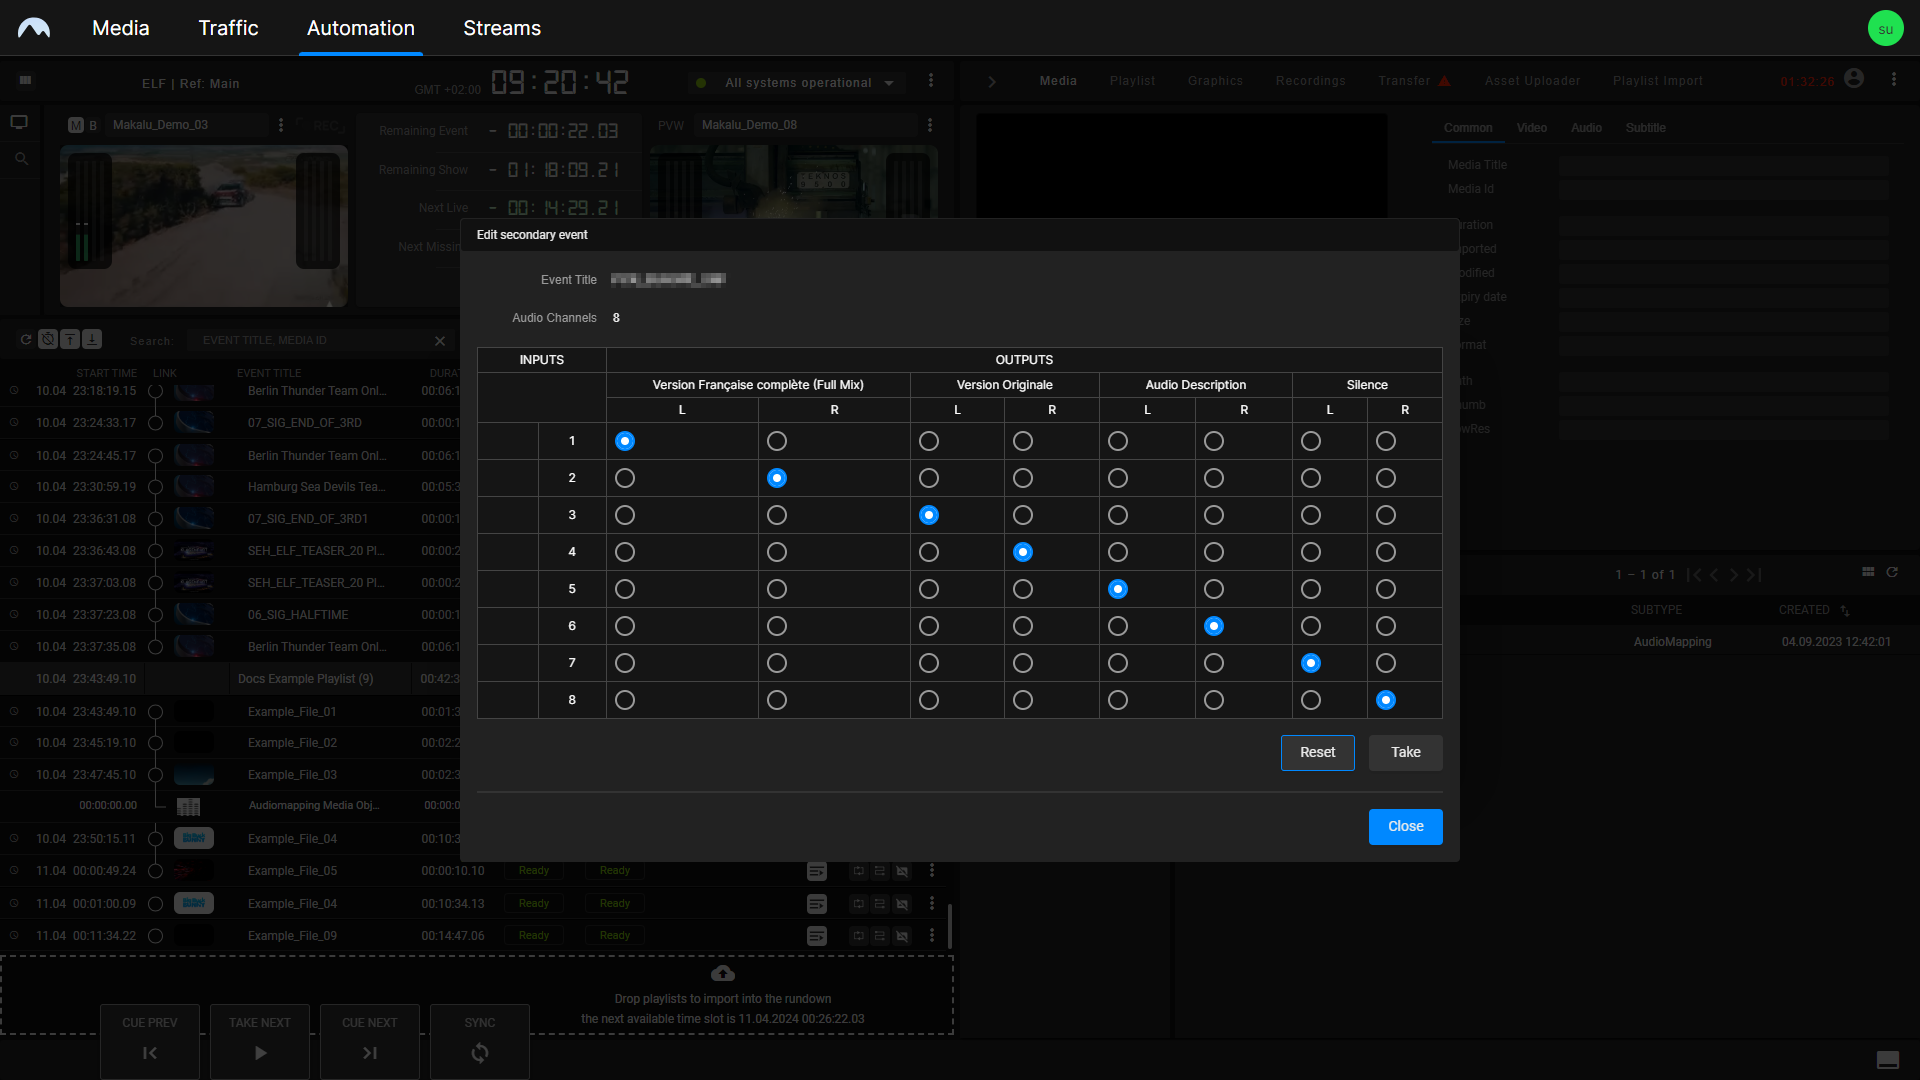
Automation - Change the audio mapping settings -
To confirm your changes, click Take.
The changes are applied in real time by the corresponding player.
-
Close the menu by clicking Close.
-
The selected audio mapping secondary event is added, and the settings of the corresponding clip are changed based on your selected inputs and outputs.
Using audio mapping for live/on-the-fly changes (via Makalu Automation)
To change the audio mapping settings of the clip currently on-air, proceed as follows:
-
Open the Makalu Automation detailed channel view as described in section Accessing the detailed channel view.
-
In the preview area at the top left, to the right of the clip name display, click the Options icon
 and select Show Audio.
Automation - Open the audio mapping settings The audio mapping settings menu opens.
-
Change the audio mapping settings as required by enabling the output to be used for each corresponding input.
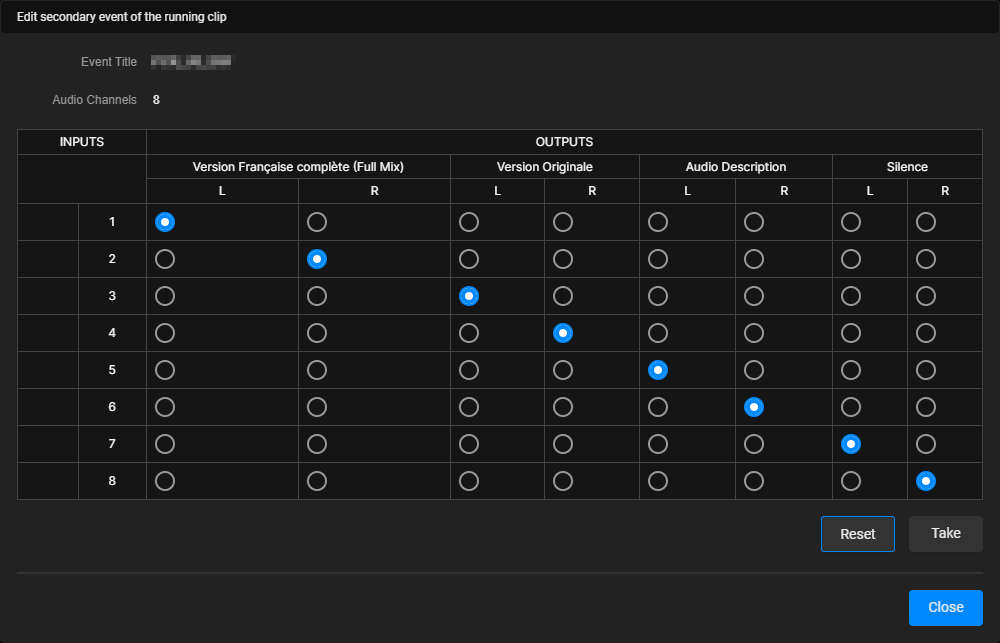
Automation - Change the audio mapping settings Tip
To undo your changes and restore the original audio mapping settings of the clip, click Reset.
Notice
If the clip does not yet have an audio mapping secondary event, it will be added by your action, which is confirmed by the display of a corresponding note.
Notice
If playback of the current clip ends while you are making changes, you cannot save the changed audio mapping settings. In this case, a corresponding note is displayed. To change the audio mapping settings of the clip currently playing, first close the audio mapping menu and then reopen it.
-
To confirm your changes, click Take.
The changes are applied in real time by the corresponding player.
-
Close the menu by clicking Close.
The audio mapping settings of the clip currently on-air are changed based on your selected inputs and outputs.