Using playlists
Using the Playlists view
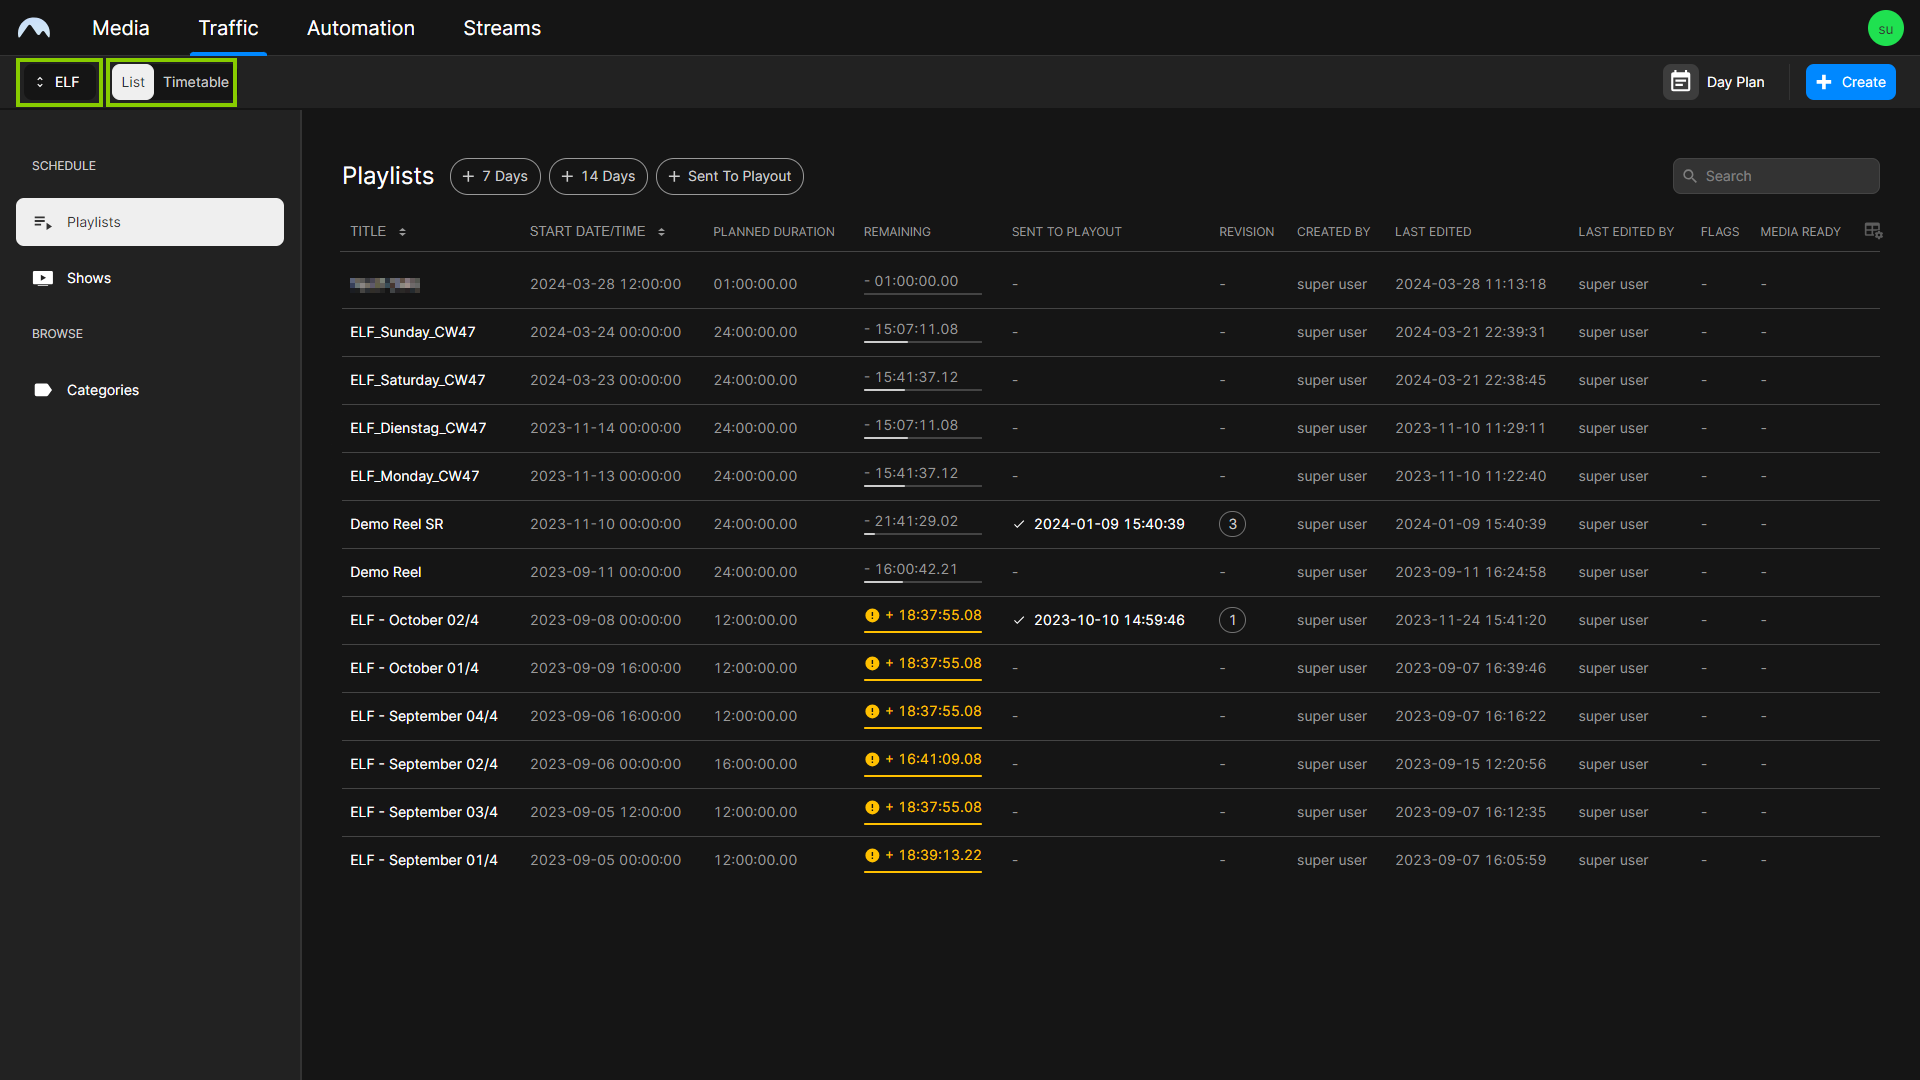
The Playlists view is displayed by default when you open the Makalu Traffic UI. To display it again at a later time, select Playlists in the sidebar on the left.
It provides an overview of all available playlists for the currently selected channel and can be displayed as either List or Timetable view. To switch between views, use the View selector at the top left. To switch between channels, use the Channel selector to the left, which includes a list of all available channels.
Notice
In the context of program planning via Makalu Traffic, no distinction is made between redundant and non-redundant channels. All available channels are listed once and can be selected using the Channel selector. The scheduled program applies to the entire selected channel and all its players (main and backup, if applicable).
Using the List view
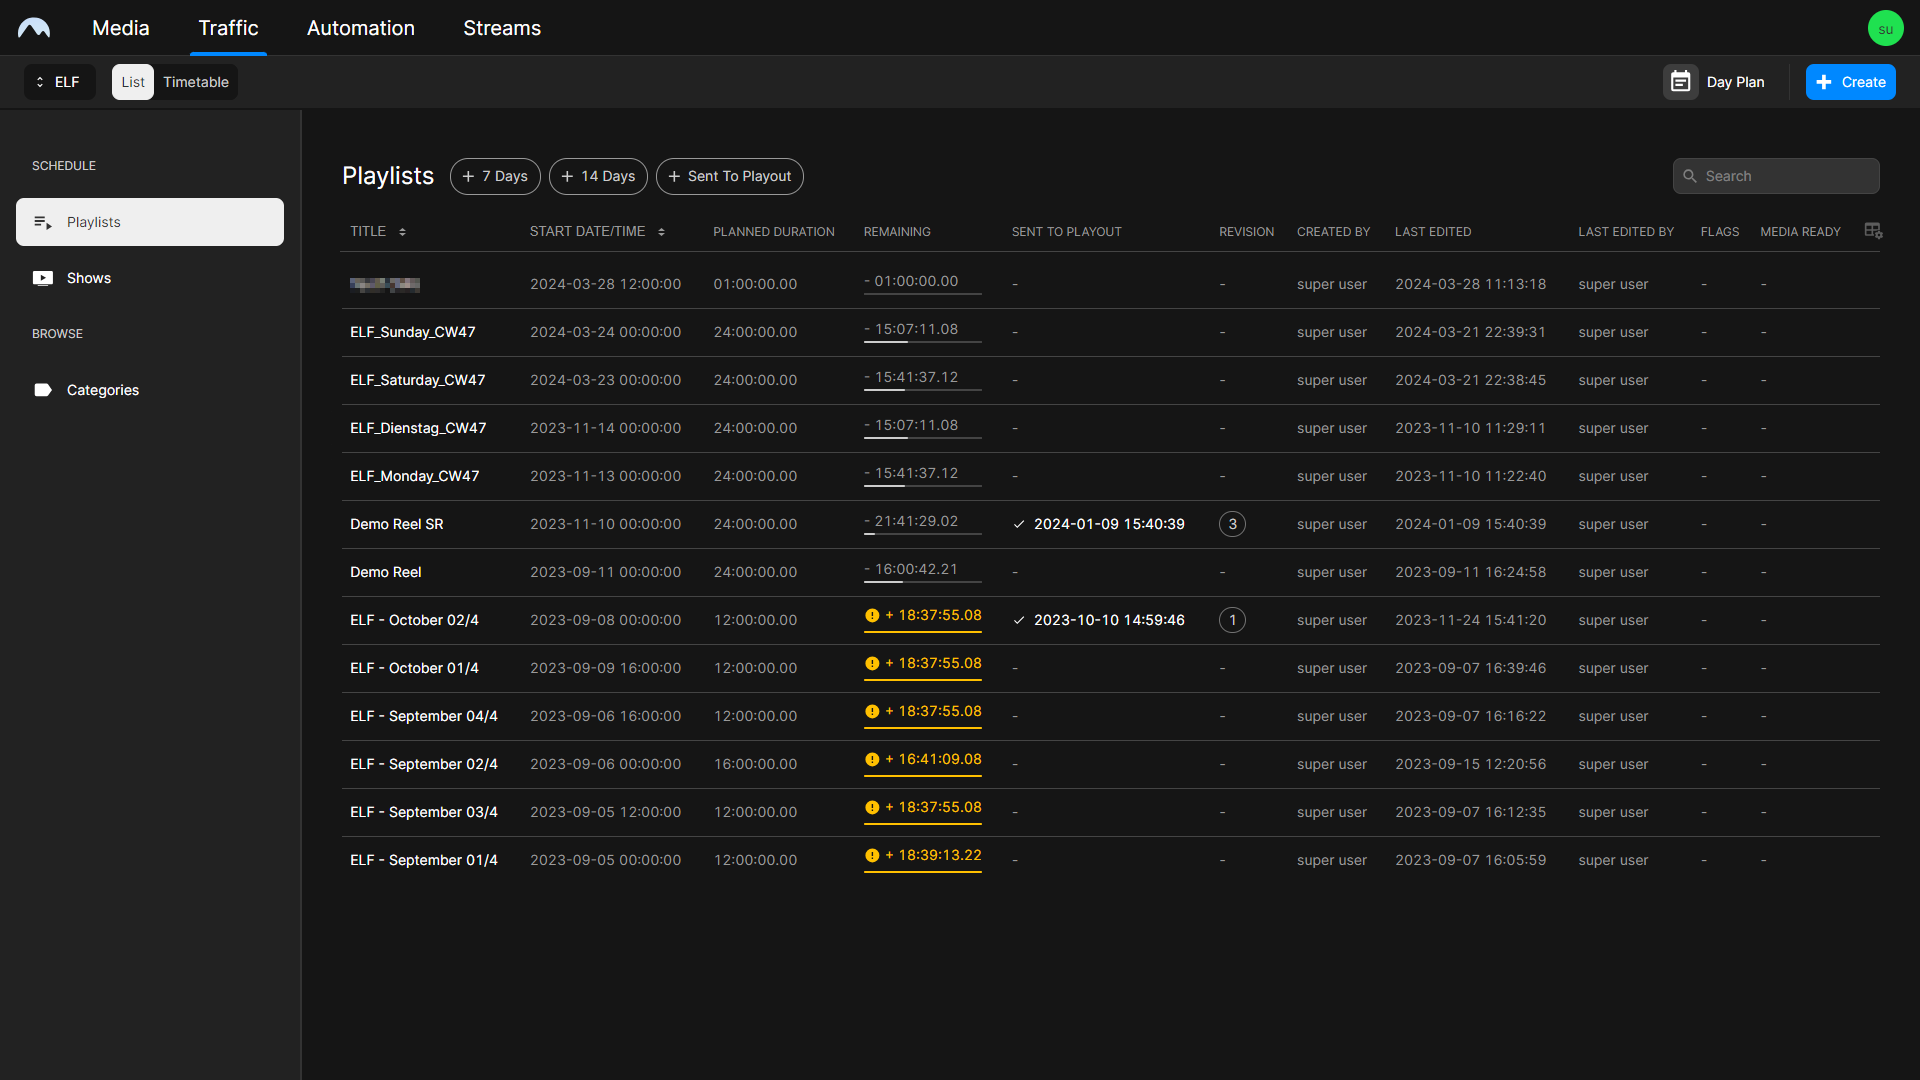
When you open the Playlists area, the List view is selected by default. It displays all available playlists in table form, sorted by their start time.
By default, only a selection of available columns is displayed. To customize the displayed columns, click the Column selection icon ![]() at the top right and select the columns to be displayed. The columns Title and Start date/time are sortable. You can change the sort order by clicking the name of the corresponding column. Most of the available columns are self-explanatory, but some columns provide additional information.
at the top right and select the columns to be displayed. The columns Title and Start date/time are sortable. You can change the sort order by clicking the name of the corresponding column. Most of the available columns are self-explanatory, but some columns provide additional information.
The column Remaining displays the fill level (the total duration of all the shows the playlist contains, in relation to the Planned Duration of the playlist). If a playlist is not yet completely filled, it is highlighted in gray. In this case, the time to be filled is displayed as a negative value (for example, -00:10:00:00 if there are 10 minutes still to be filled). If a playlist is "overfilled" (if the total duration of the shows it contains exceeds the planned duration of the playlist), it is highlighted in orange and with a warning icon. The remaining time is then displayed as a positive value (for example, +00:10:00:00 if the total duration of the added shows exceeds the planned playlist duration by 10 minutes).
Tip
You can also display the fill level as a percentage by hovering your mouse over the value displayed in the column Remaining.
The optional column Revision displays the revision number of the playlist. It increases every time a playlist is sent to playout.
The list of playlists can be narrowed by using the filter functions above the table. They enable you to filter the list based on the planned playlist start date (for example, in the next 7 or 14 days) or based on the status if the playlist was already sent to playout. You can also search for a specific playlist title by using the search field at the top right.
You can create a new playlist by clicking Create at the top right. Additional functions (Delete, Duplicate, and Send to playout) are available per playlist via the Options icon ![]() on the right side of each playlist row. A detailed view of each playlist can be opened by clicking Open.
on the right side of each playlist row. A detailed view of each playlist can be opened by clicking Open.
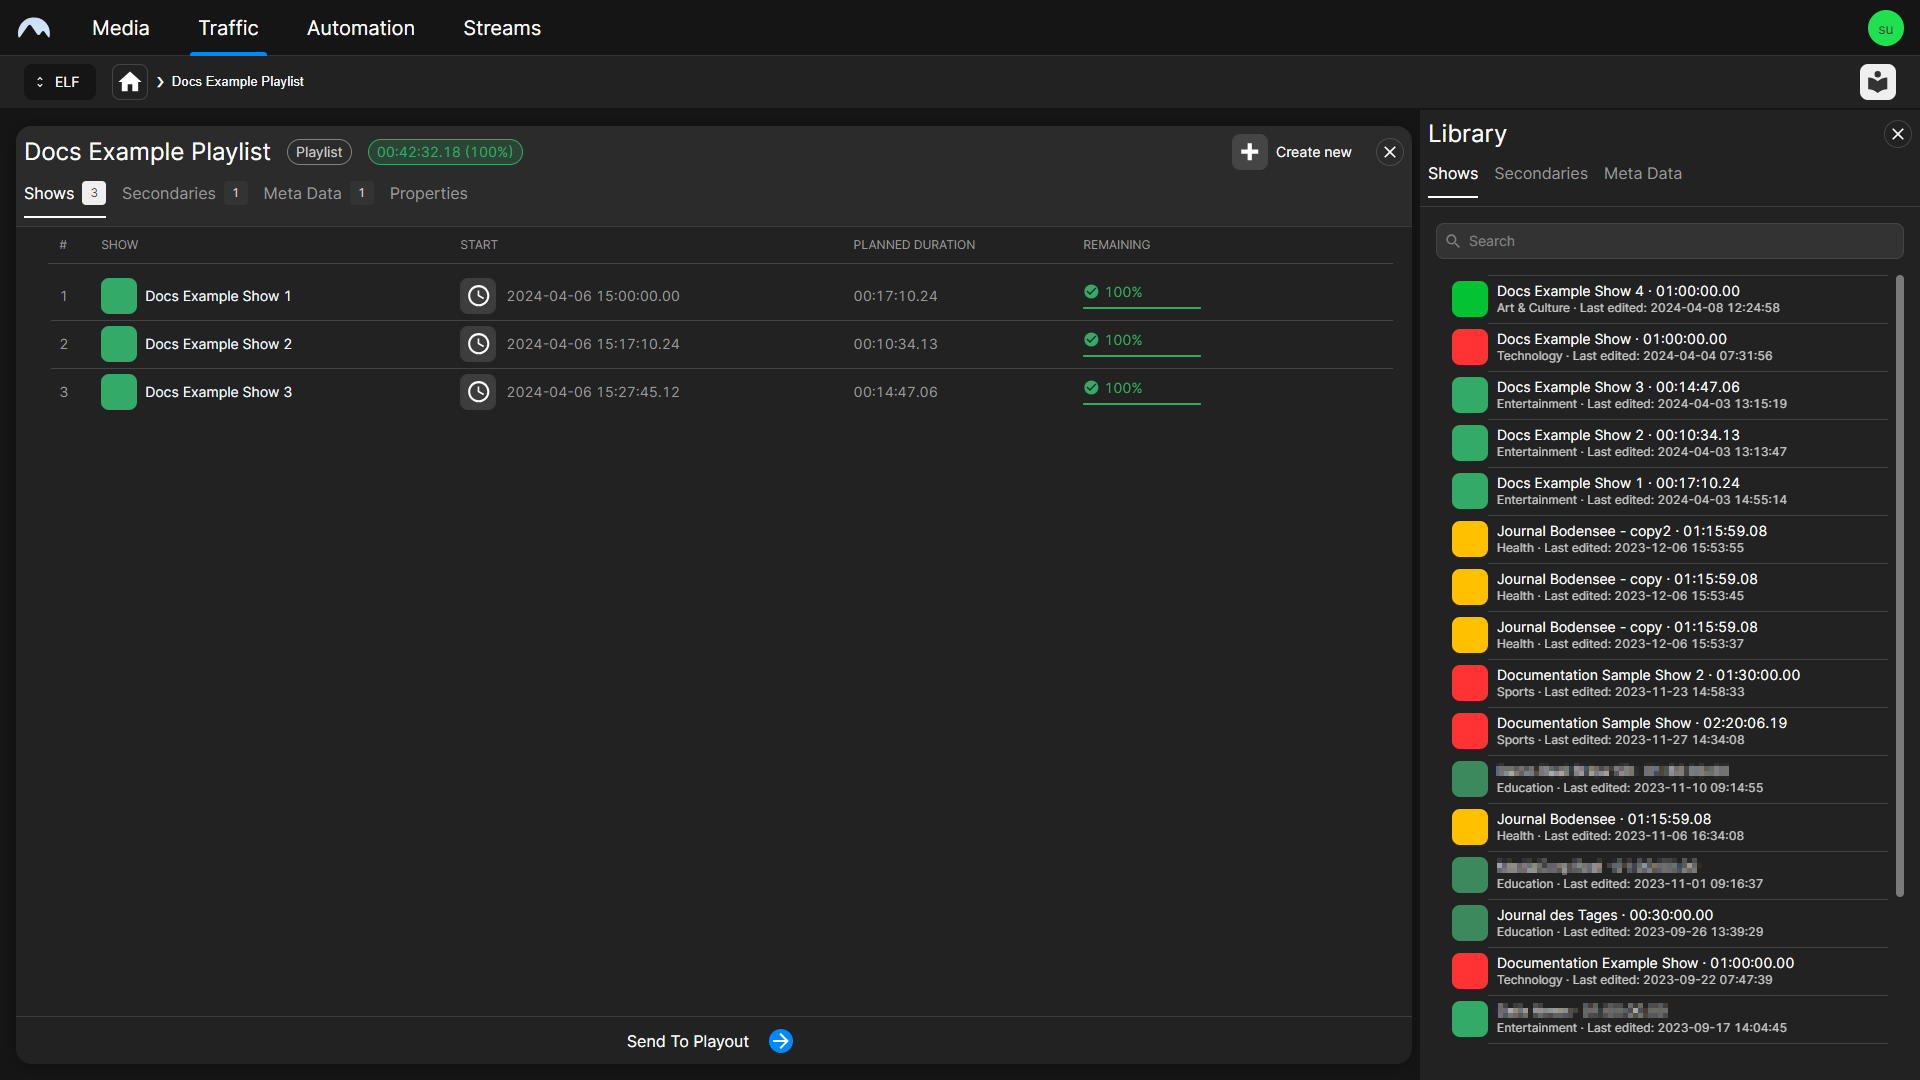
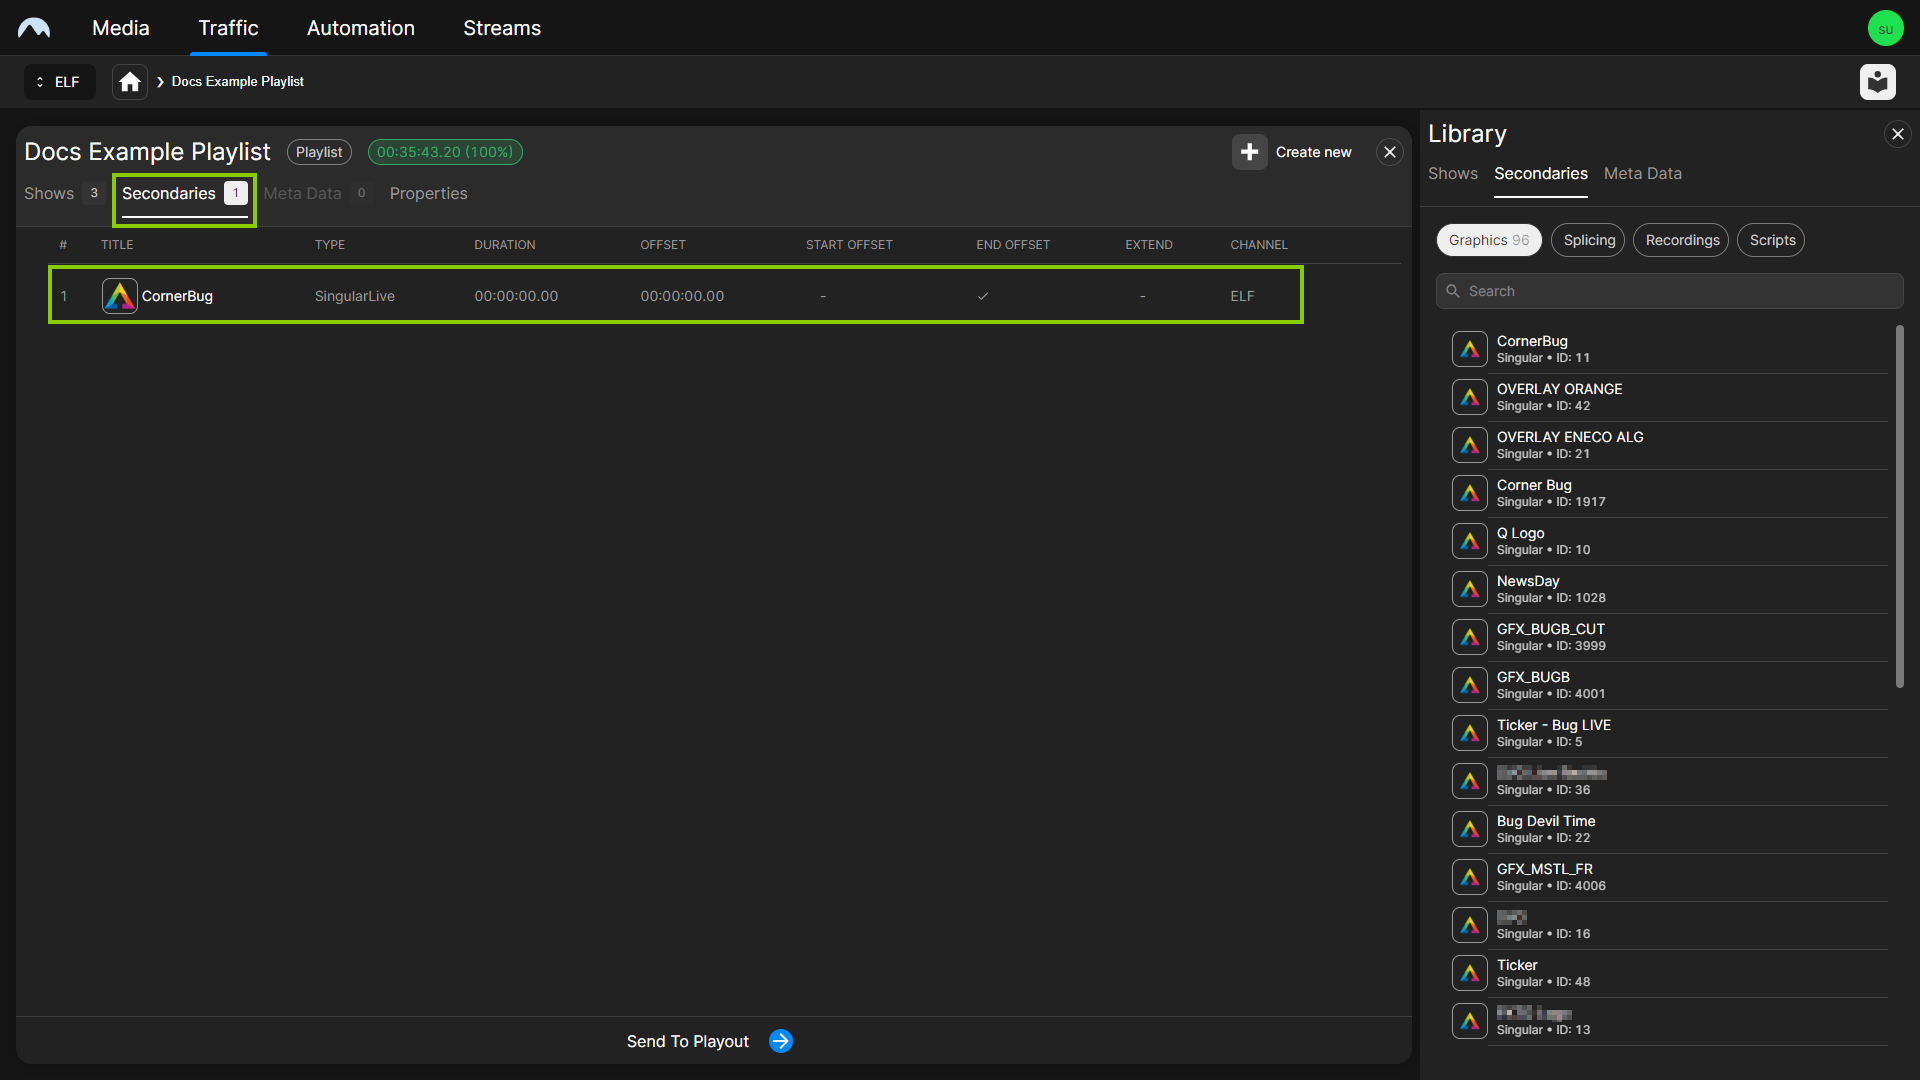
The detailed playlist view displays the fill level of the playlist at the top. The components of the playlist (shows, secondary events, metadata, and properties) are listed below and can be accessed via corresponding tabs. On the right side, the library is displayed.
The library can be displayed or hidden by clicking the Library icon ![]() at the top right. It lists all available shows, secondary events, and metadata that can be added to the playlist and/or the shows of the playlist. You can search for specific elements by using the search menu above the list. Elements listed in the library can be added to the currently opened playlist or the included shows via drag and drop. Alternatively, you can add an element to the current playlist by clicking the Plus icon to the right of the element to be added.
at the top right. It lists all available shows, secondary events, and metadata that can be added to the playlist and/or the shows of the playlist. You can search for specific elements by using the search menu above the list. Elements listed in the library can be added to the currently opened playlist or the included shows via drag and drop. Alternatively, you can add an element to the current playlist by clicking the Plus icon to the right of the element to be added.
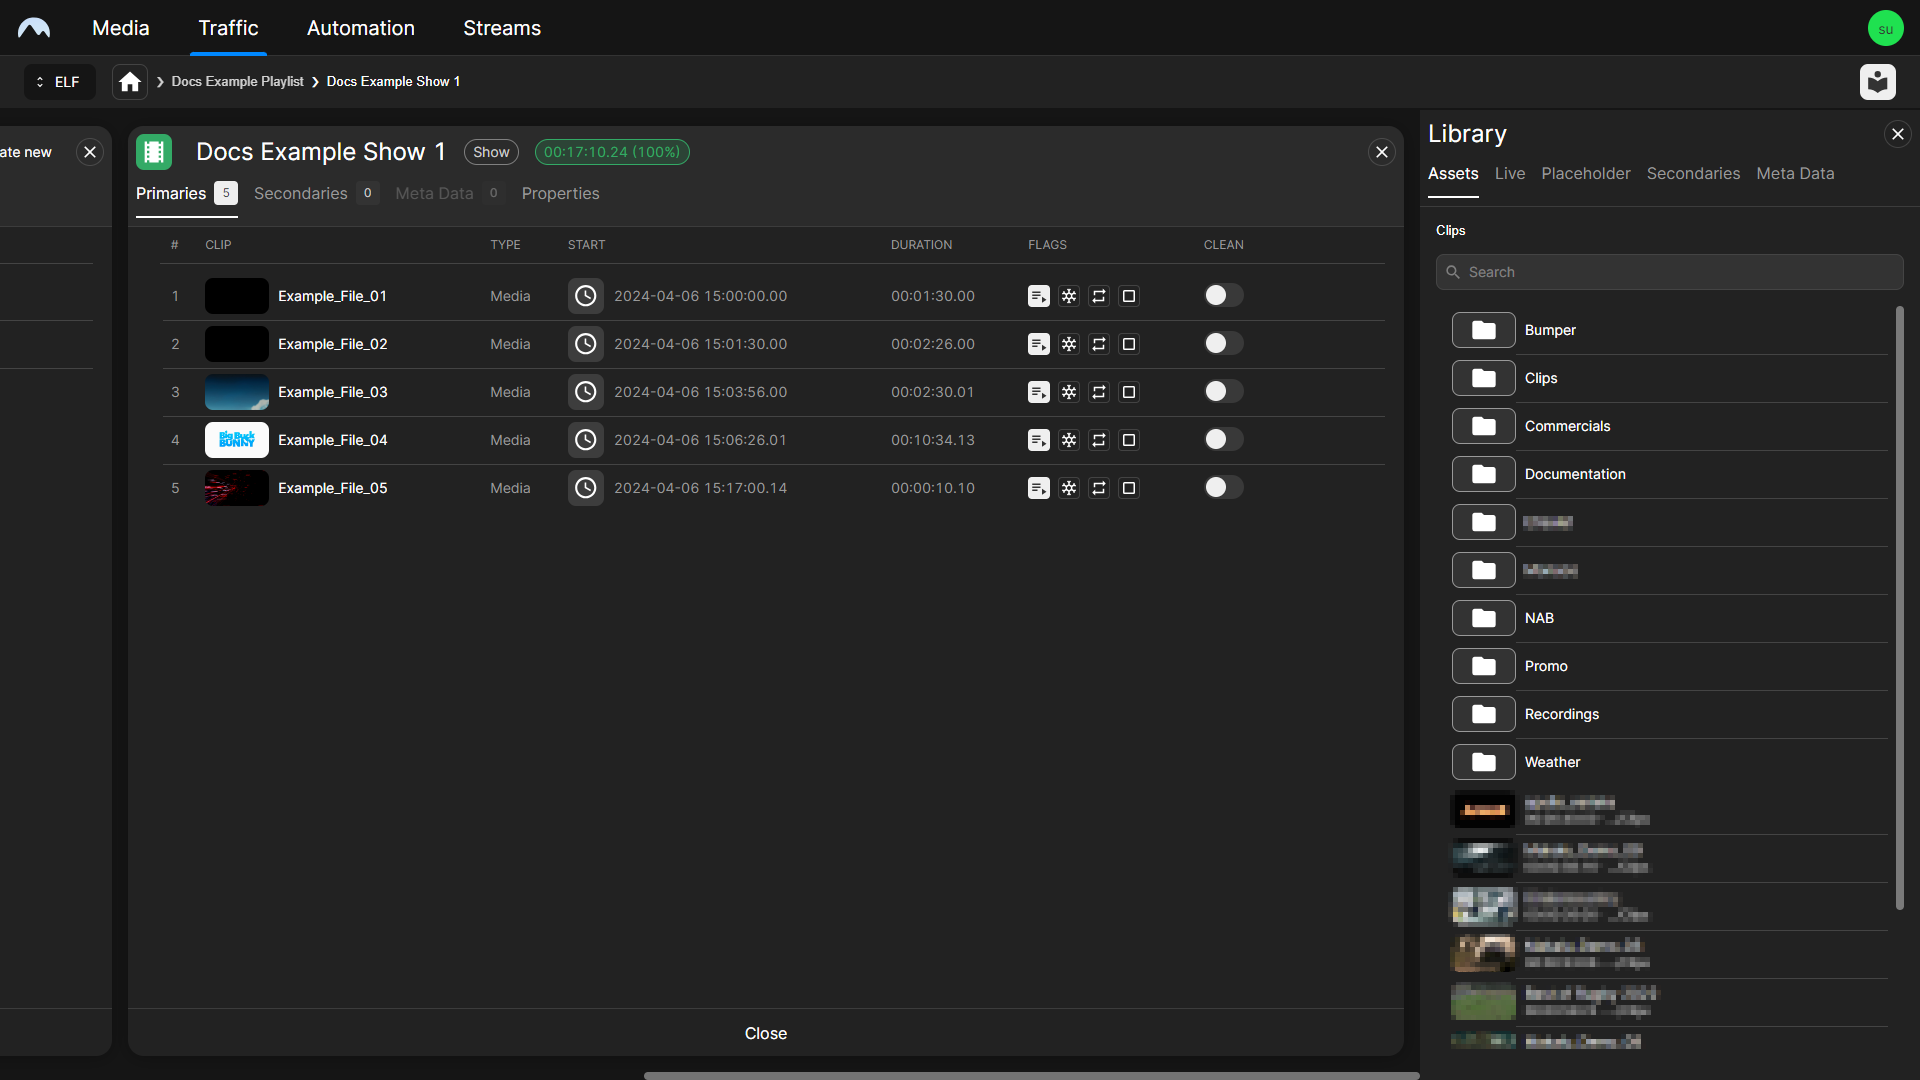
You can create a new show by clicking Create new above the list of shows. Selecting a show displays the included clips on the right side. Additional functions (Duplicate and Remove) are available per show via the Options icon ![]() on the right side of each show row. You can open a detailed view of each show by clicking Open. It provides an overview of all components of the show and access to the details of each included clip. For more information about how to use the Shows view, see the section Using the Shows view.
on the right side of each show row. You can open a detailed view of each show by clicking Open. It provides an overview of all components of the show and access to the details of each included clip. For more information about how to use the Shows view, see the section Using the Shows view.
This type of display enables efficient horizontal navigation from a playlist to a show to a single clip. All three hierarchy levels are displayed side by side. Depending on the display resolution used, a scroll bar may be displayed at the bottom of the page. By moving the scroll bar to the left or right, navigation across the three levels is possible at any time.
Additionally, a "breadcrumb" navigation is available at the top left, allowing you to navigate between the three hierarchical levels. You can also use it to return to the main page by clicking the Home icon ![]() .
.
Using the Timetable view
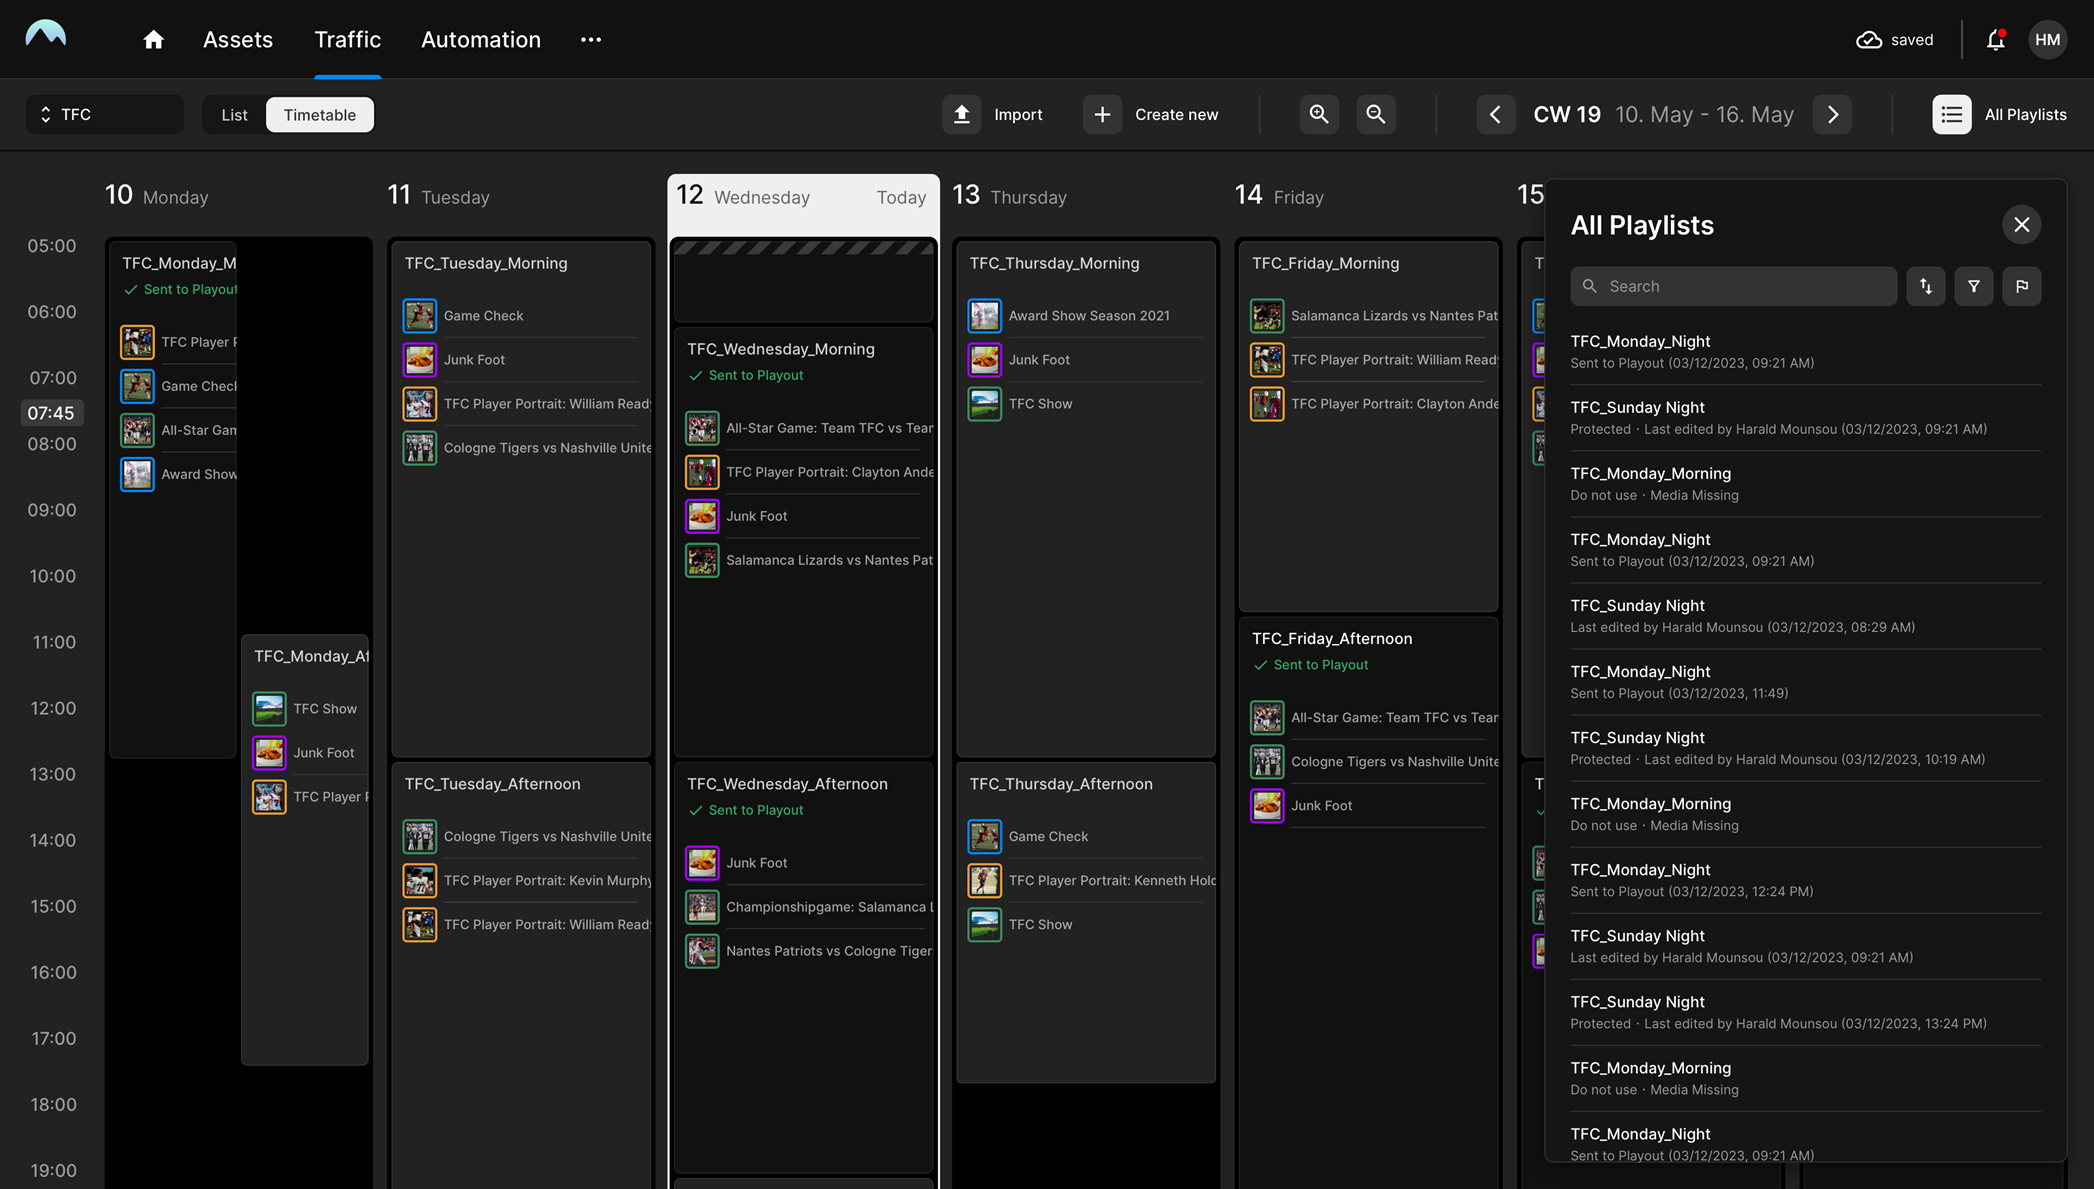
To open the Timetable view, use the View selector at the top left and select Timetable. The Timetable view displays playlists in a calendar view, based on their scheduled start date and time. It is particularly beneficial during the start of the planning process and the initial playlist creation, as it makes it easy to see which days have already been completely filled with playlists and where there may still be free times or gaps. Additionally, it allows you to conveniently add playlists to the timetable and add shows to playlists via drag and drop. When opening the Timetable view, the current week is initially displayed, and the current day is highlighted.
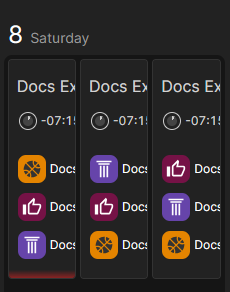
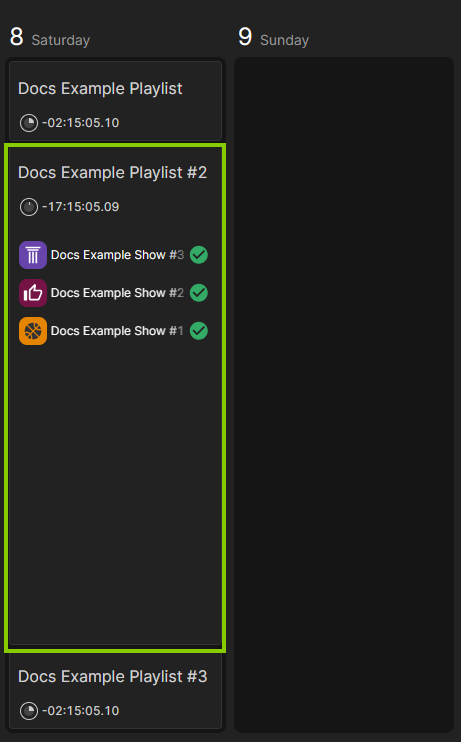
Scheduled playlists are displayed with a list of included shows, information about their total fill level, the individual fill level of each show they contain, and whether the playlist has already been sent to playout.
The following icons are used to make it easier to distinguish the fill level of the individual elements visually:
| Icon | Description |
|---|---|
| Playlist/Show is empty | |
| Playlist/Show is partially filled | |
| Playlist/Show is filled completely | |
| Playlist/Show is overfilled |
Tip
If a playlist is either partially filled or overfilled, the under- or overrun time is displayed next to its fill level icon.
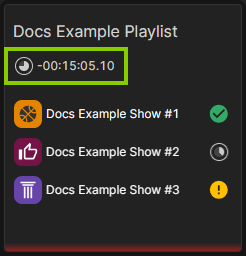
You can also display this time for a show, by hovering your mouse over the fill level icon of the show.
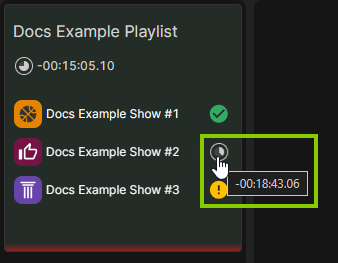
If multiple playlists are scheduled for the same time or if their planned times partially overlap, the day view is split, and the conflicting playlists are displayed side by side.
The controls at the top right of the Timetable view enable you to zoom in and out of the time display, as well as to select the calendar week to be displayed. To the right of these controls, your local time zone is displayed. You can also display or hide the menu for listing and searching available playlists and shows by clicking All Playlists and Shows.
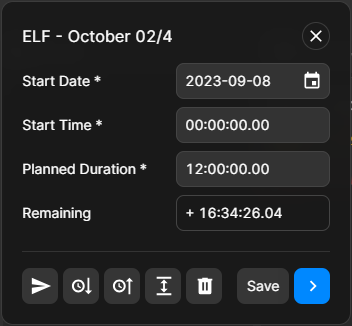
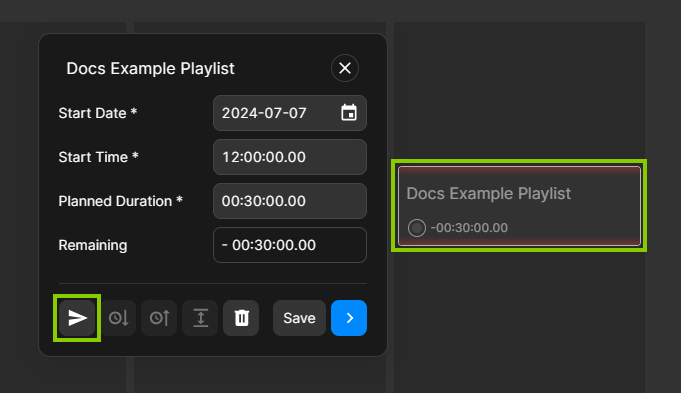
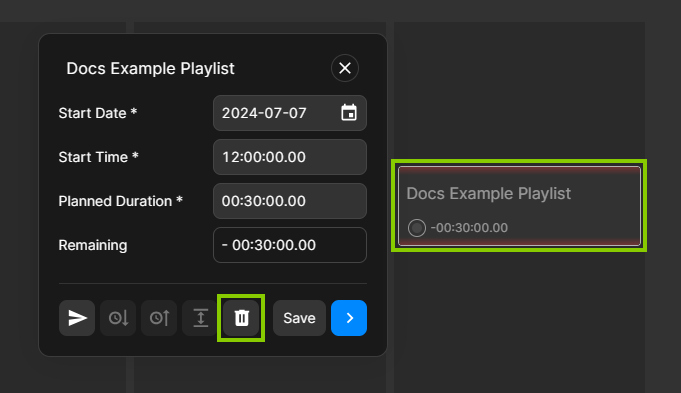
Selecting a playlist in the Timetable view opens an Actions menu, that displays basic time properties and provides additional editing functions.
In addition to changing the time properties Start Date, Start Time, and Planned Duration of the selected playlist, the Actions menu provides the following functions:
| Icon | Function | Description |
|---|---|---|
| Send to playout | Send playlist to playout (see the section Sending a playlist to playout) | |
| Snap forward | Snap playlist to the beginning of the next playlist (close the gap to the following playlist) | |
| Snap backward | Snap playlist to the end of the previous playlist (close the gap to the previous playlist) | |
| Expand | Change planned start time and/or extend planned duration of the playlist to fill a gap before and/or after the playlist | |
| Delete | Delete playlist | |
| Save | Save edited time properties | |
| Open | Open detailed playlist view |
You can create a new playlist, by clicking Create new at the top center. Alternatively, you can also create a new playlist by clicking the Plus icon, which is displayed when you hover your mouse over a free time slot on a day. Afterward, a menu is displayed that allows you to specify basic playlist properties.
Opening a playlist in the timeline view displays the same detailed view as mentioned in section Using the List view.
Creating a playlist
To create a new playlist, proceed as follows:
-
In the sidebar on the left, select Playlists.
The List view is opened and all available playlists for the currently selected channel are listed in the middle.
-
At the top right, click Create.
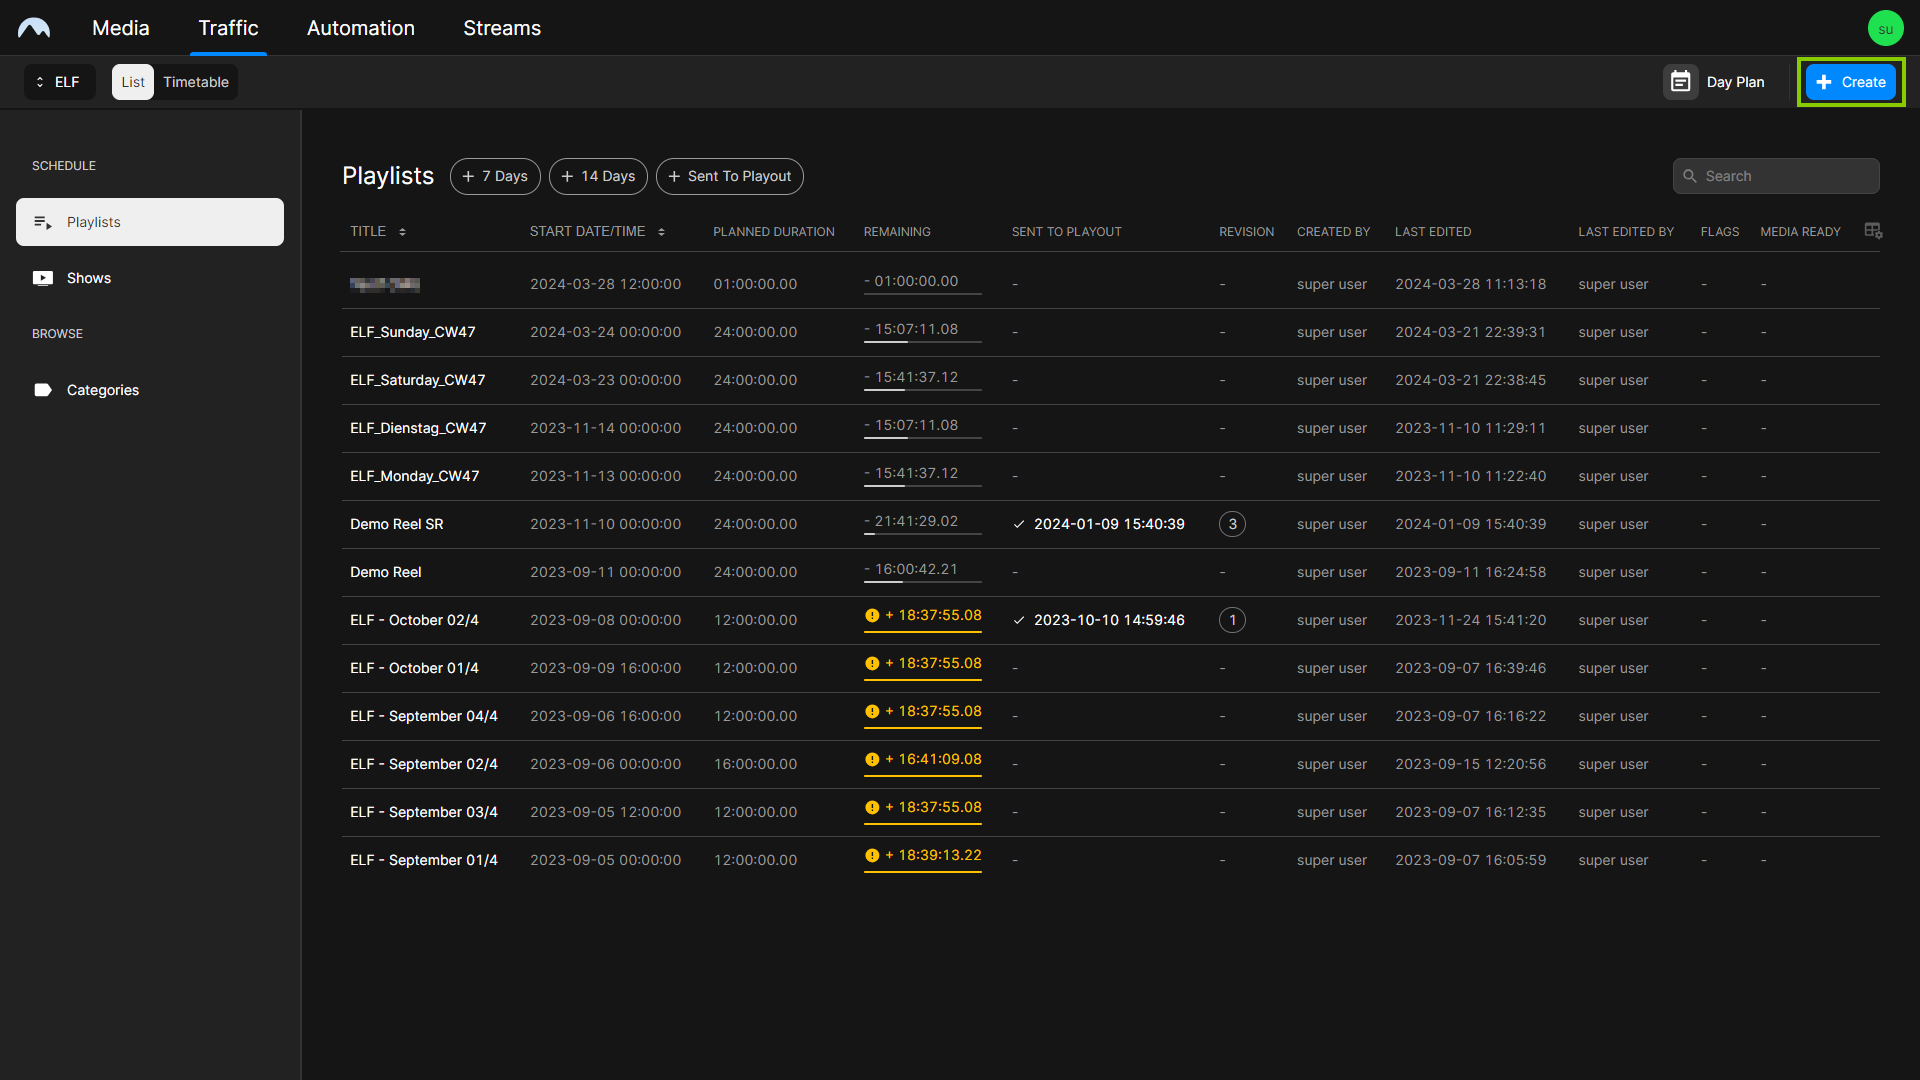
Traffic - Create playlist Tip
If you are using the Timetable view instead of the List view, either click Create new at the top center or the Plus icon, which appears when you hover your mouse over a free time slot on a day.
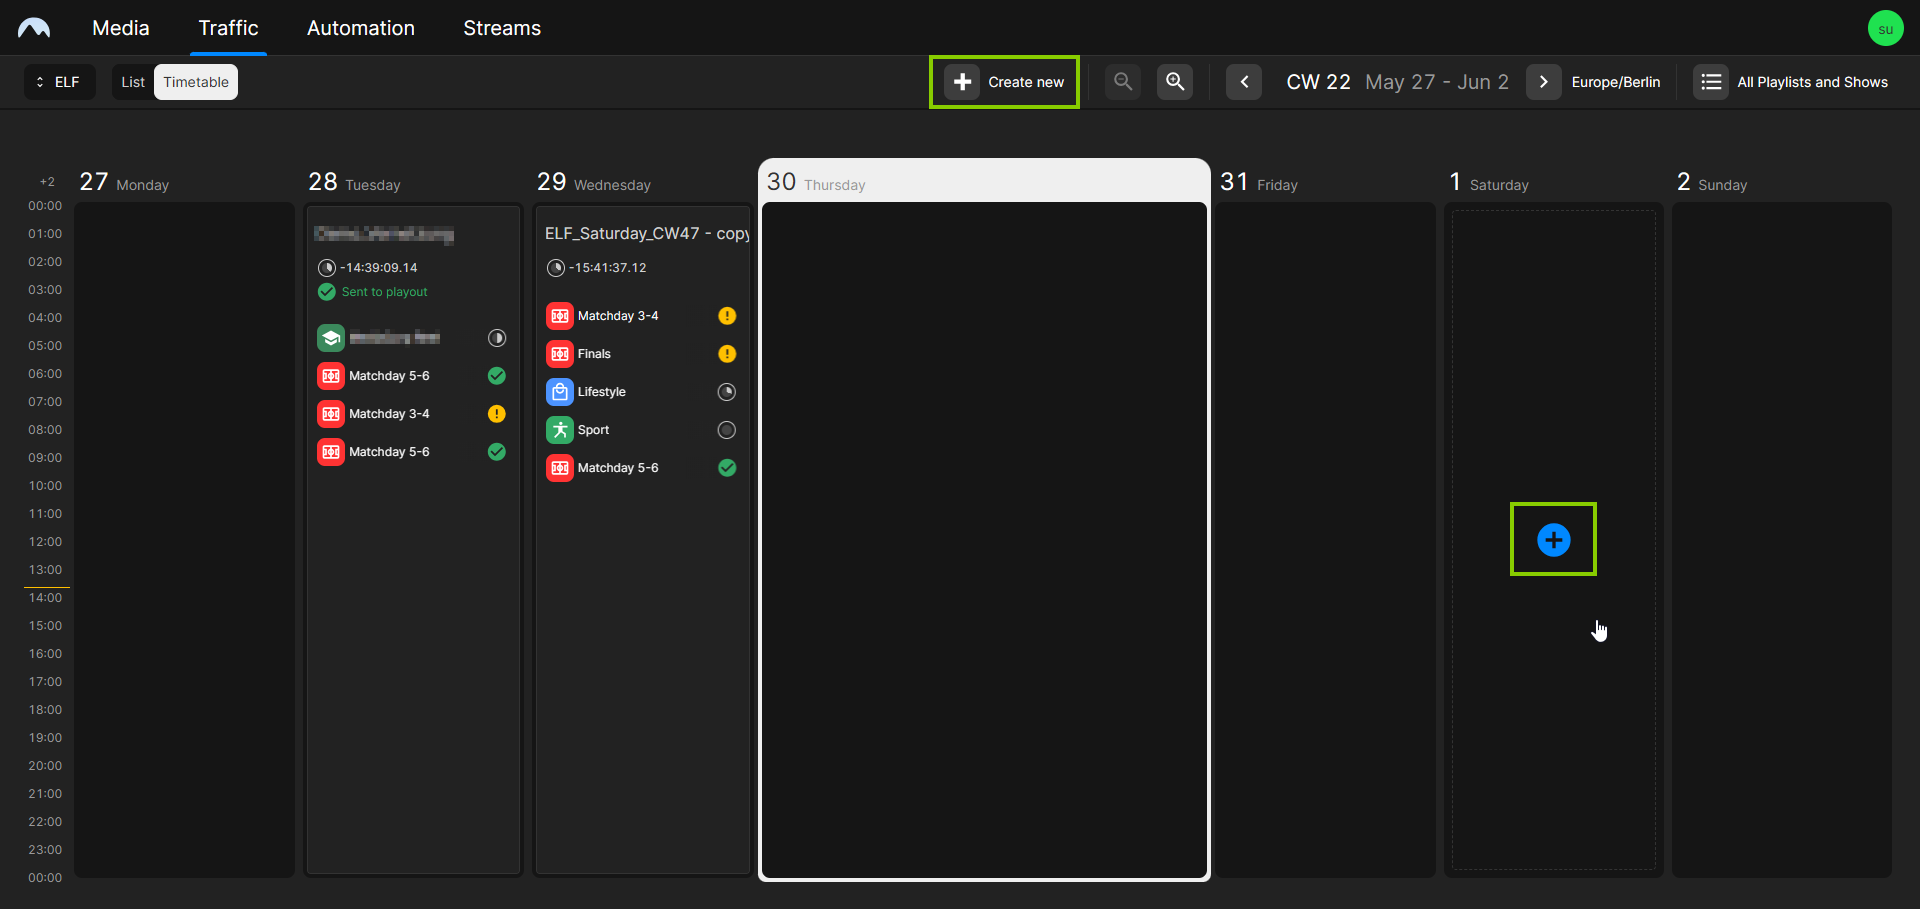
Traffic - Create playlist in Timetable view Tip
If you are using the Timetable view instead of the List view, you can also add an existing playlist directly to the timetable from the library, by using drag and drop. To do this, proceed as follows:
-
Open the list of available shows, by clicking All Playlists and Shows at the top right.
-
At the top of the list select Playlists.
-
Use the search menu above the list to search for a specific playlist.
-
Drag a playlist from the list and drop it on a free time slot in the timetable.
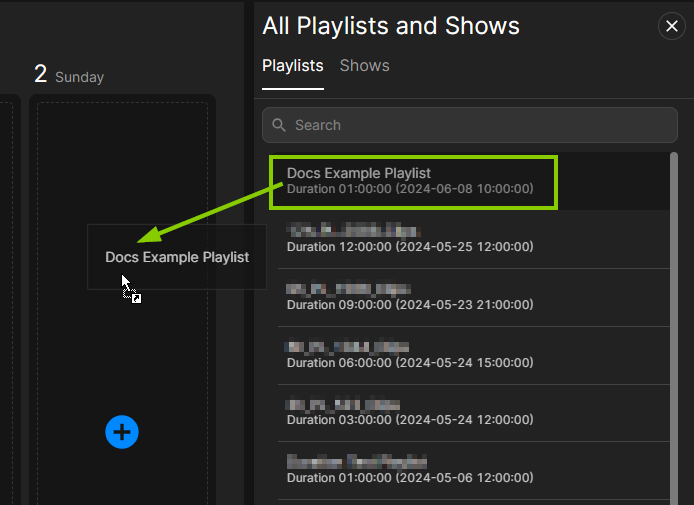
Traffic - Add playlist to timetable The selected playlist is added to the timetable.
The Create menu is displayed.
-
-
In the Playlist tab, set the basic playlist properties and fill in all required fields.
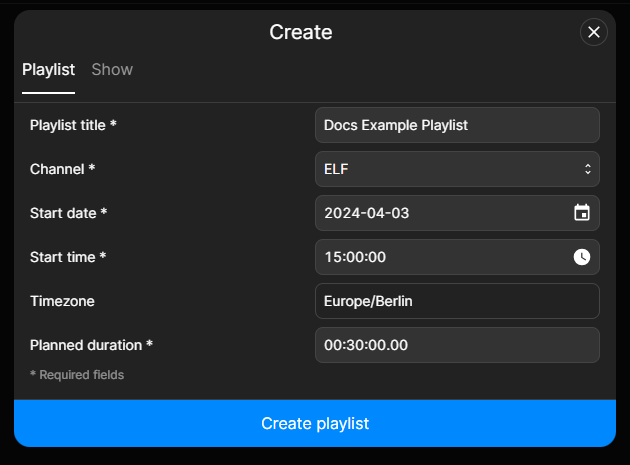
Traffic - Set basic playlist properties -
To create the playlist with the selected properties, click Create playlist.
The playlist is created, and the list of available playlists is displayed again.
Tip
If you are using the Timetable view instead of the List view, the Timetable view is displayed again.
Since the newly created playlist is initially empty, the next step is to add a show to the playlist.
To add a show to a playlist, proceed as follows:
-
Open the playlist by selecting it in the list of available playlists and clicking Open at the right end of the corresponding row.
Tip
If you are using the Timetable view instead of the List view, select the playlist and click the Open icon
 in the Actions menu.
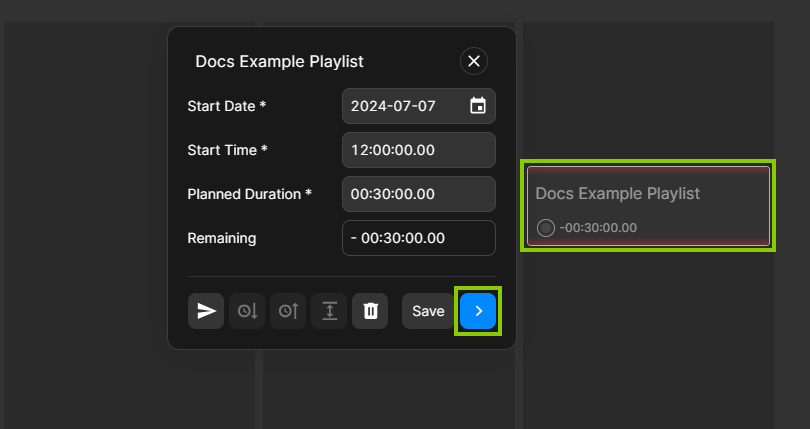
Traffic - Open playlist in Timetable view Tip
If you are using the Timetable view instead of the List view, you can also add shows directly to the playlist using drag and drop without opening the playlist first. To do this, proceed as follows:
-
Open the list of available shows by clicking All Playlists and Shows at the top right.
-
At the top of the list, select Shows.
-
Use the search menu above the list to search for a specific show.
-
Drag a show from the list and drop it on the corresponding playlist in the timetable.
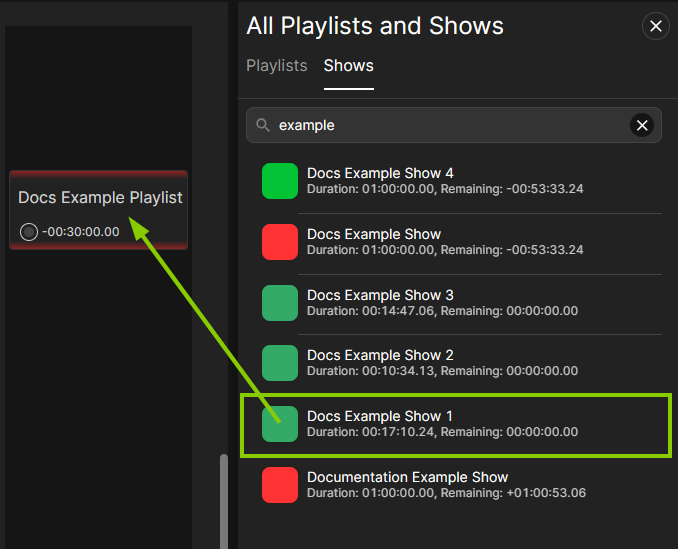
Traffic - Add show to playlist in Timetable view The selected show is added to the playlist. The displayed fill level of the playlist is updated accordingly.
The playlist is opened.
-
-
(Optional) Edit the basic playlist properties in the Properties tab and confirm your changes by clicking Apply Changes at the bottom of the screen.
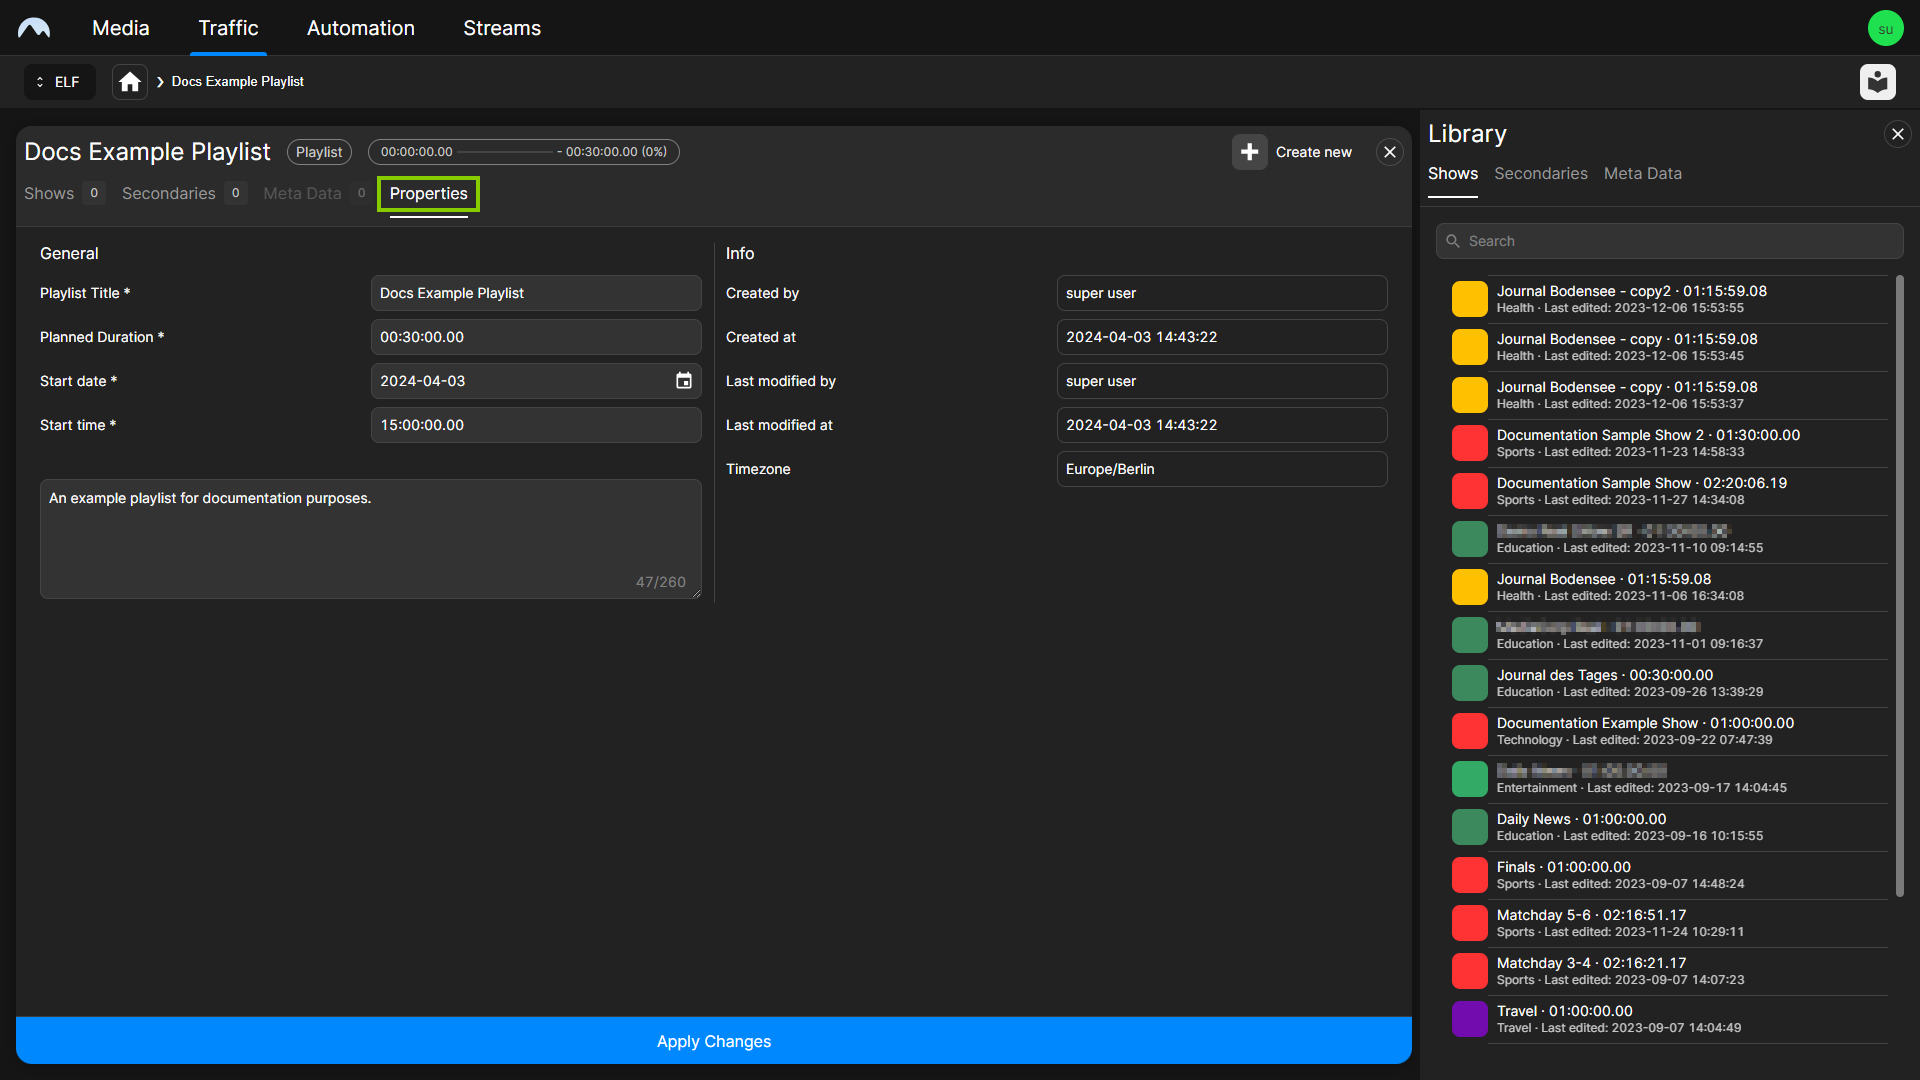
Traffic - Edit basic playlist properties -
Add one or more shows to the playlist, by either creating a new show or adding an existing show from the library.
-
(Optional) To create a new show, click Create new at the top right. In the Create menu enter the basic show details and click Create show.
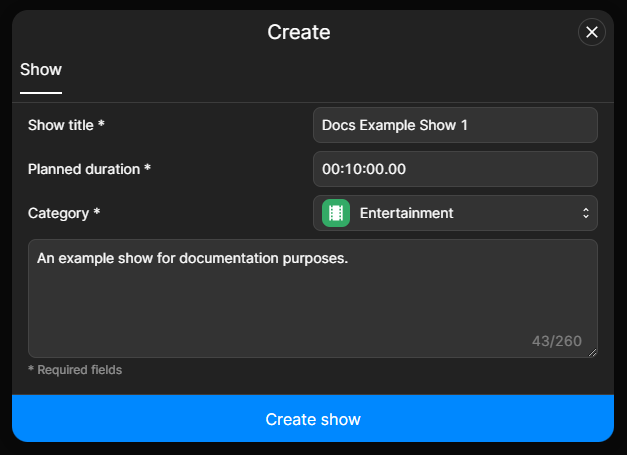
Traffic - Create new show The show is created and added to the playlist.
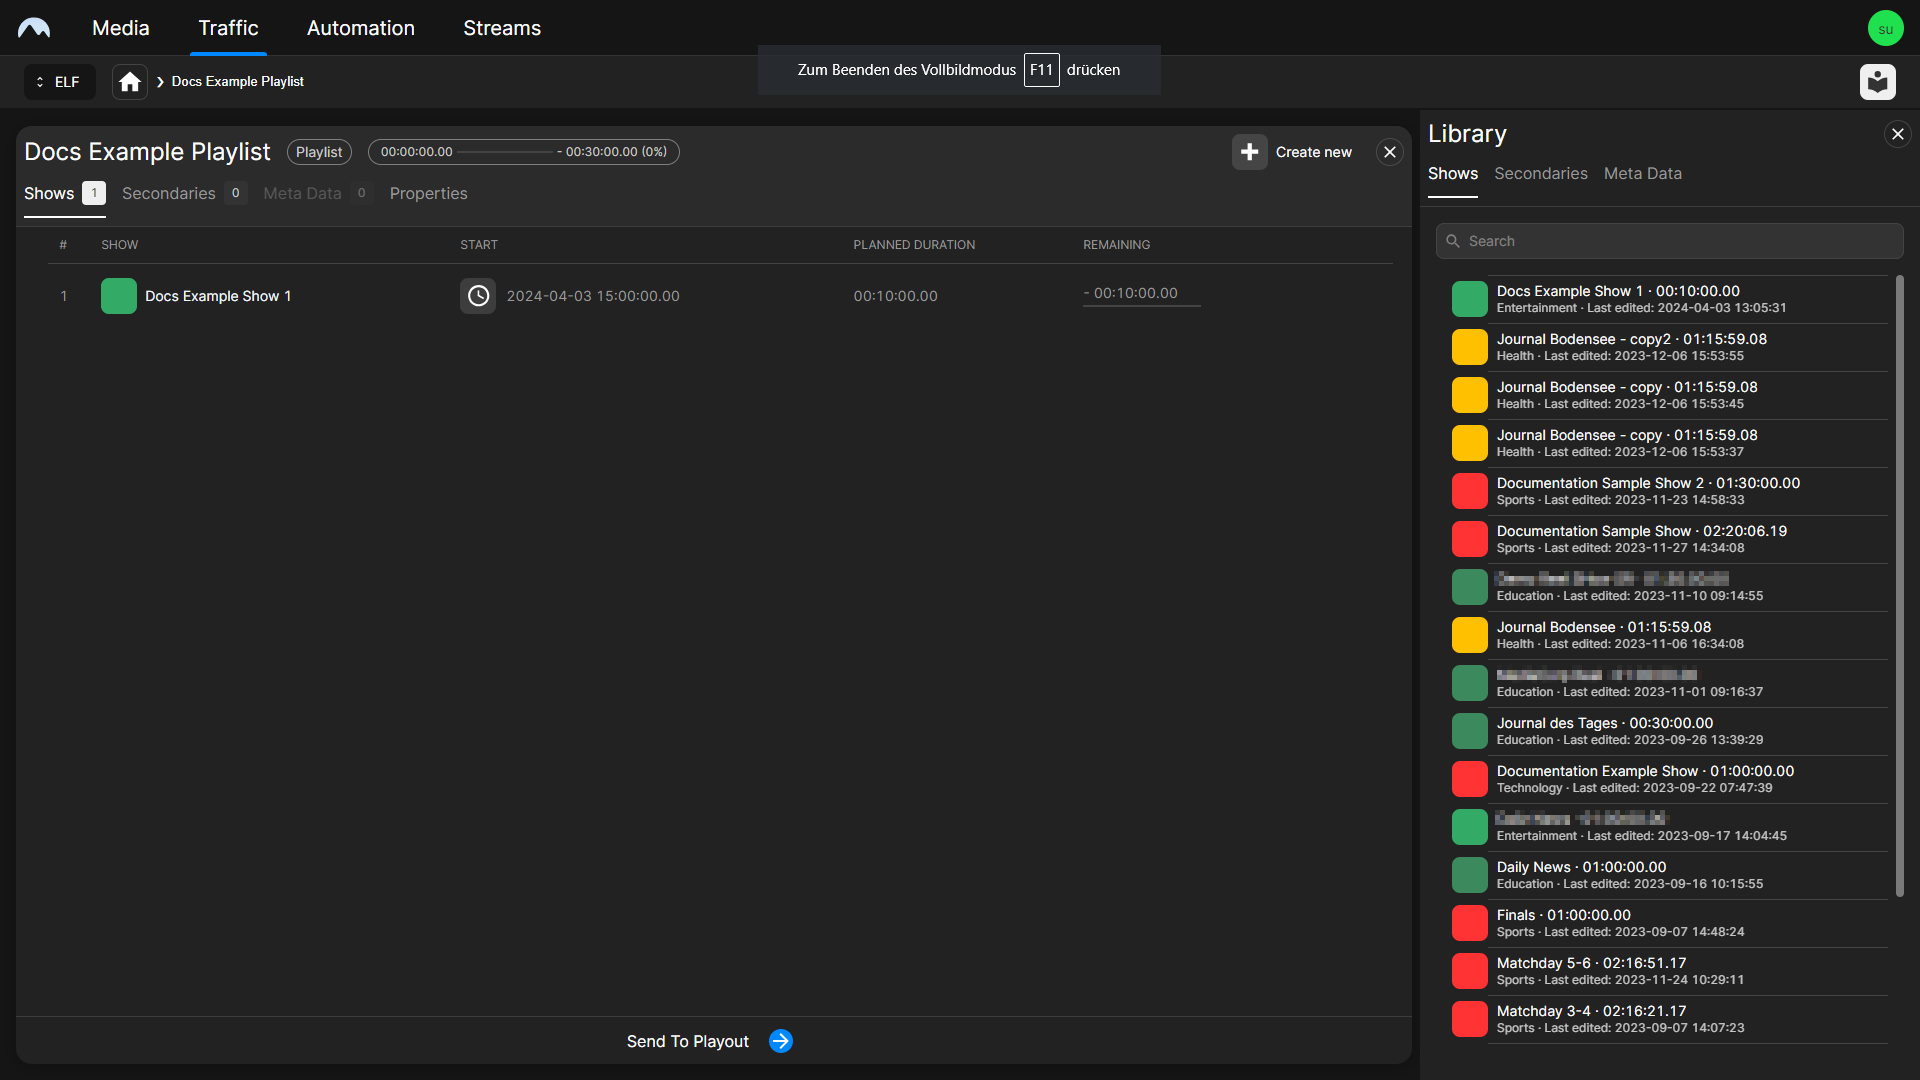
Traffic - New show created -
To add an existing show, use the Library, which is displayed on the right side. The Shows tab is selected by default, and all available shows are listed below. To filter the available shows, use the search field above the list.
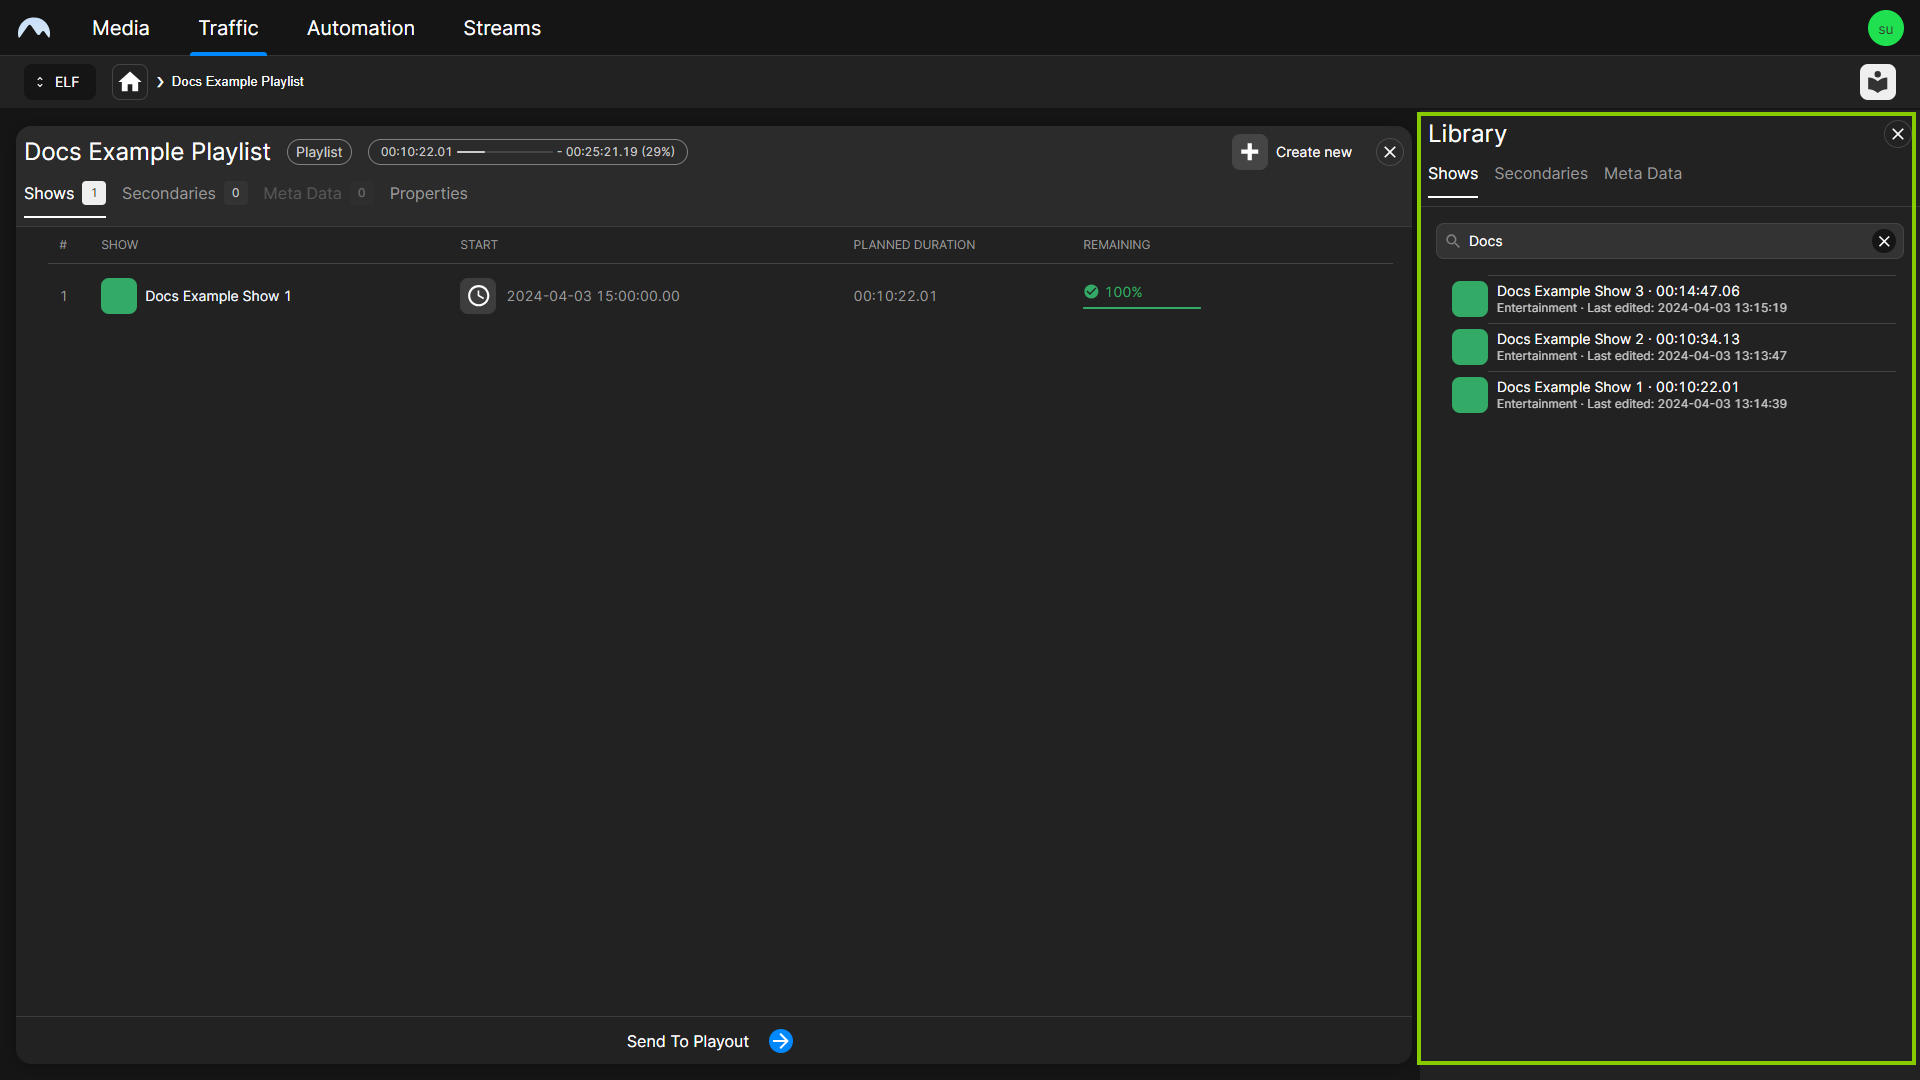
Traffic - Filtered shows -
Add a show to the playlist, for example, as last element, by dropping it in the information area at the top of the playlist. You can also insert it at a specific position within the playlist by dragging and dropping it to the desired position in the show order. Alternatively, you can select the show in the library and click the Plus icon at the right end of the corresponding row.
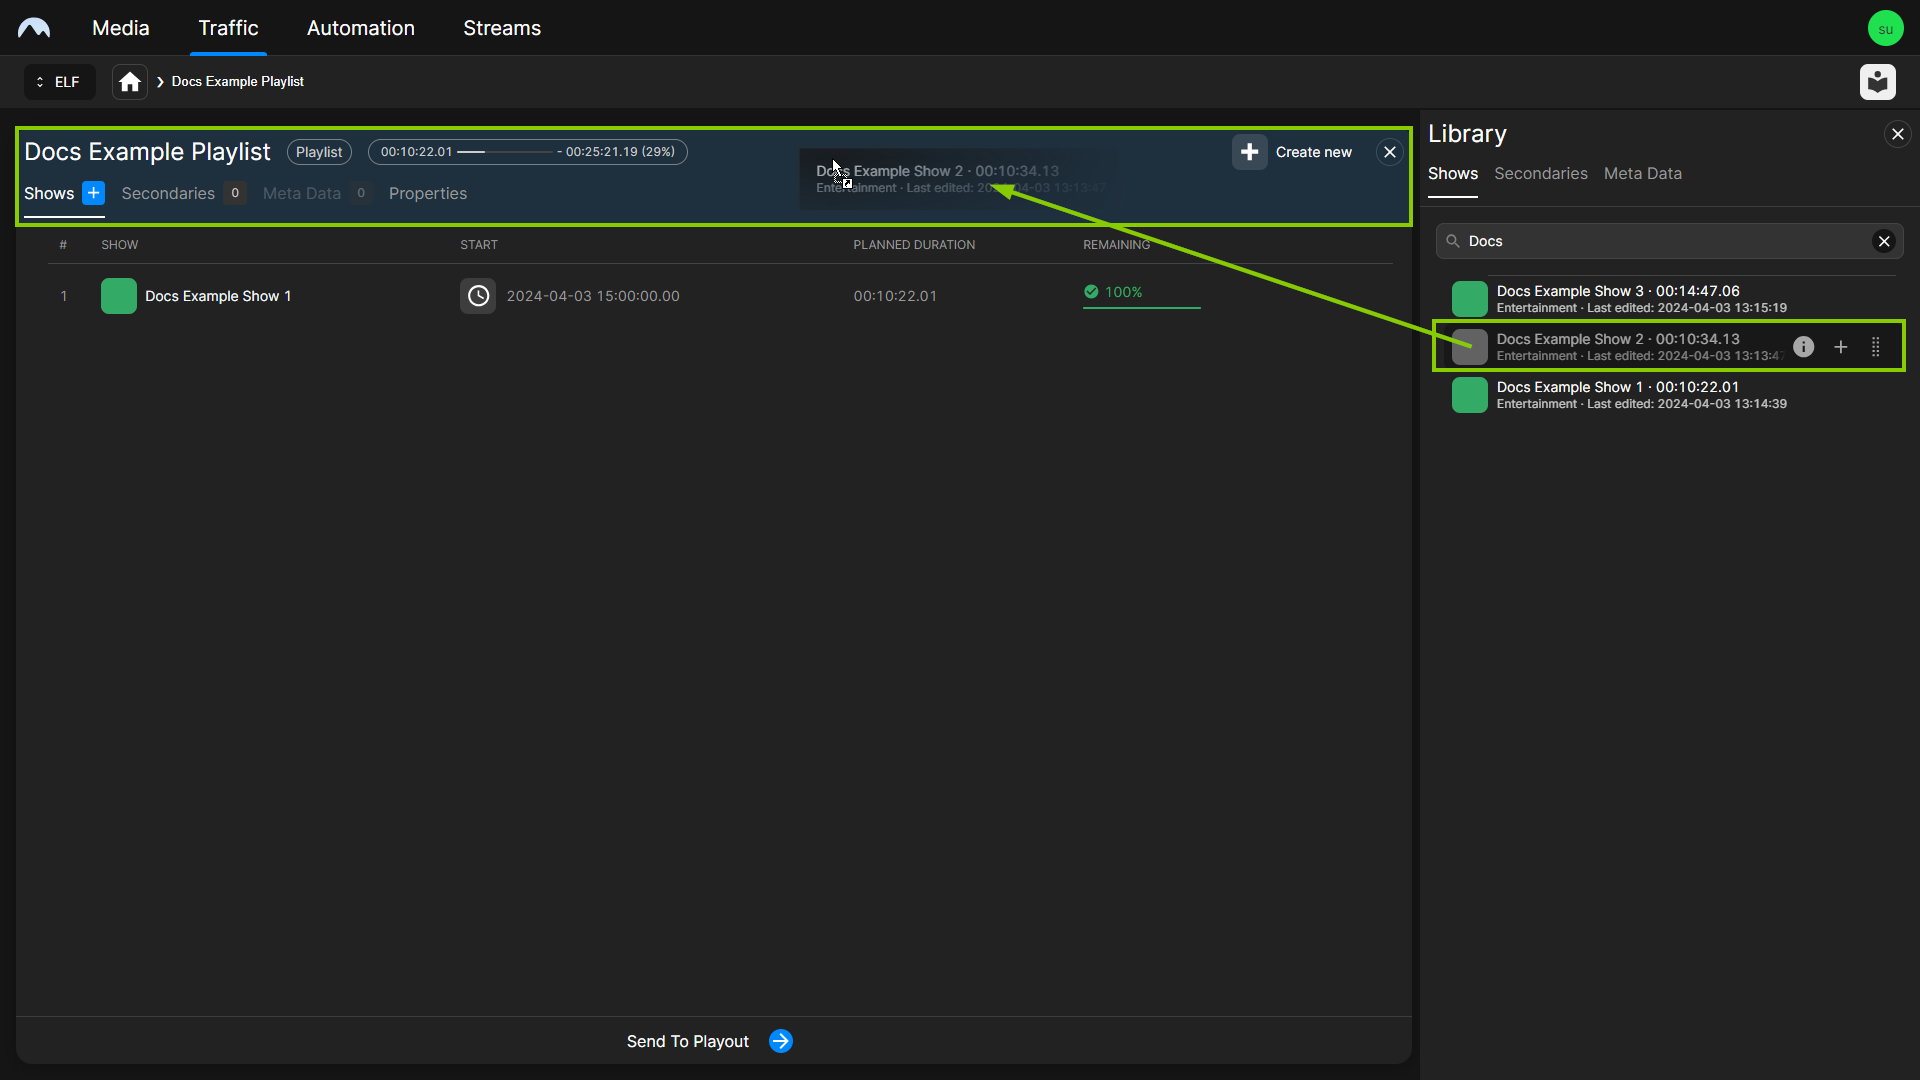
Traffic - Add shows to a playlist The show is added to the playlist. The fill level display at the top is updated accordingly.
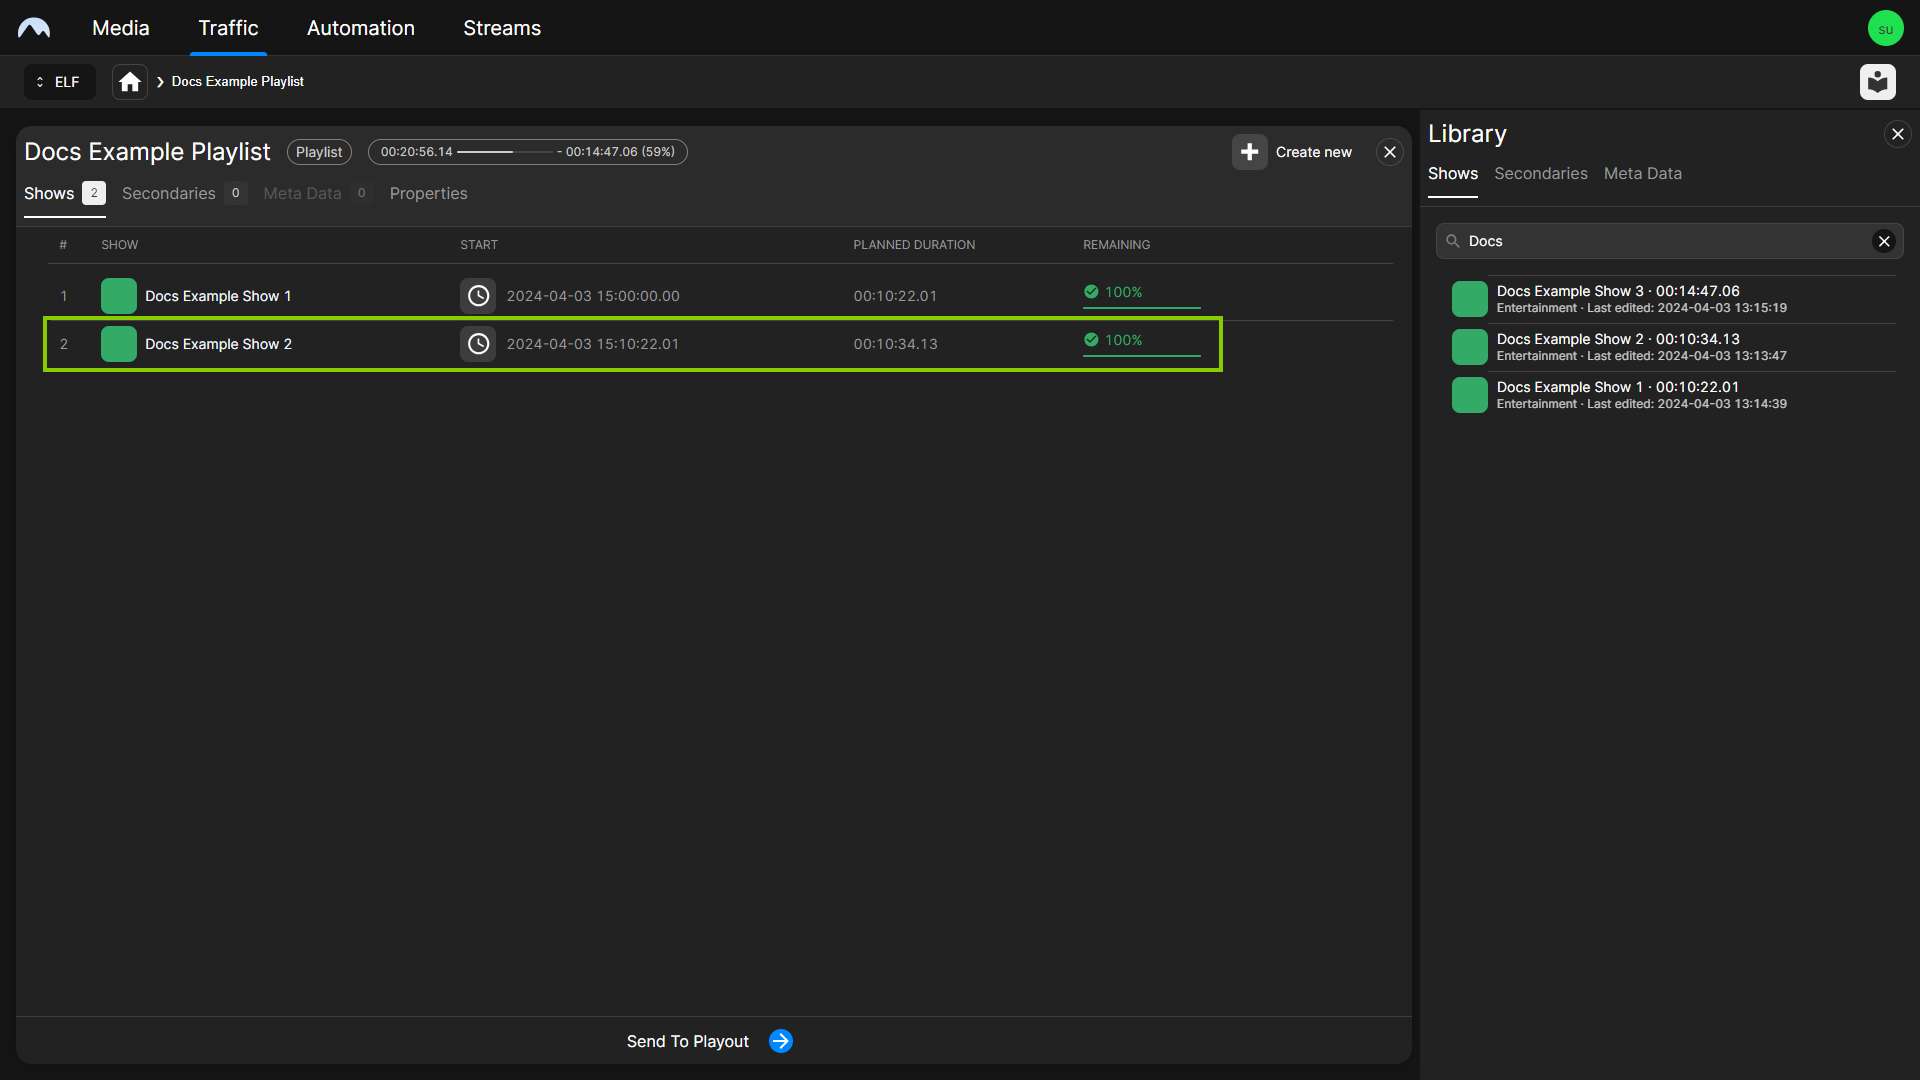
Traffic - Shows added to a playlist Tip
If the total duration of the added shows exceeds the planned duration of the playlist, the playlist counts as "overfilled" and the fill level is highlighted accordingly. If you want to extend the planned duration of the playlist to match the total duration of the added shows, click Extend to the right of the fill level display.

Traffic - Extend planned playlist duration -
(Optional) Repeat steps a to c to add more shows to the playlist.
The shows are added to the playlist. The start time of each added show is calculated accordingly, depending on the planned start time of the playlist and the duration of previously added shows.
Tip
You can manually adjust the start time of each added show. To set a fixed start time, proceed as follows:
1 - Click the Clock icon
 in the Start column of the corresponding row.
2 - In the Set fixed time dialog, set Start Date and Start Time.
3 - Click Confirm.
To deactivate the fixed start time afterward, click the Clock icon
 again.
Tip
To delete a show from the playlist, proceed as follows:
1 - Select the show to be deleted and click the Options icon
 .
.2 - Select Remove.
3 - In the confirmation dialog, click Remove.
Tip
To change the show order of the playlist, proceed as follows:
1 - Select the show to be moved.
2 - Move it up or down within the show order via drag and drop.
Tip
To replace a show in the playlist with another show, proceed as follows:
1 - On the right side in the Library, select the Shows tab.
2 - Search the show to be used as a replacement.
3 - Drag the show from the library and drop it on the show in the playlist to be replaced.
4 - Confirm the replacement, by clicking Replace.
5 - (Optional) If the show to be replaced is used multiple times in the playlist, you can decide if you want to replace only this specific show or all its occurrences in the playlist. To replace only the show on which you dropped the new show, click Replace One. To replace all occurrences of the show in the playlist, click Replace All.
Tip
To open and edit a show directly from the playlist, select a show in the playlist and click Open at the right end of the corresponding row.
-
-
(Optional) Add secondary events to the playlist.
Notice
Graphics secondary events can be added to playlists, shows, and clips. If you add graphics to a playlist, they are displayed in addition to added show and clip graphics.
-
On the right side in the Library, select the Secondaries tab and below the type of secondary event you want to add (for example, Graphics, Splicing, Recordings, or Scripts).
Available secondary events of the selected type are displayed below.
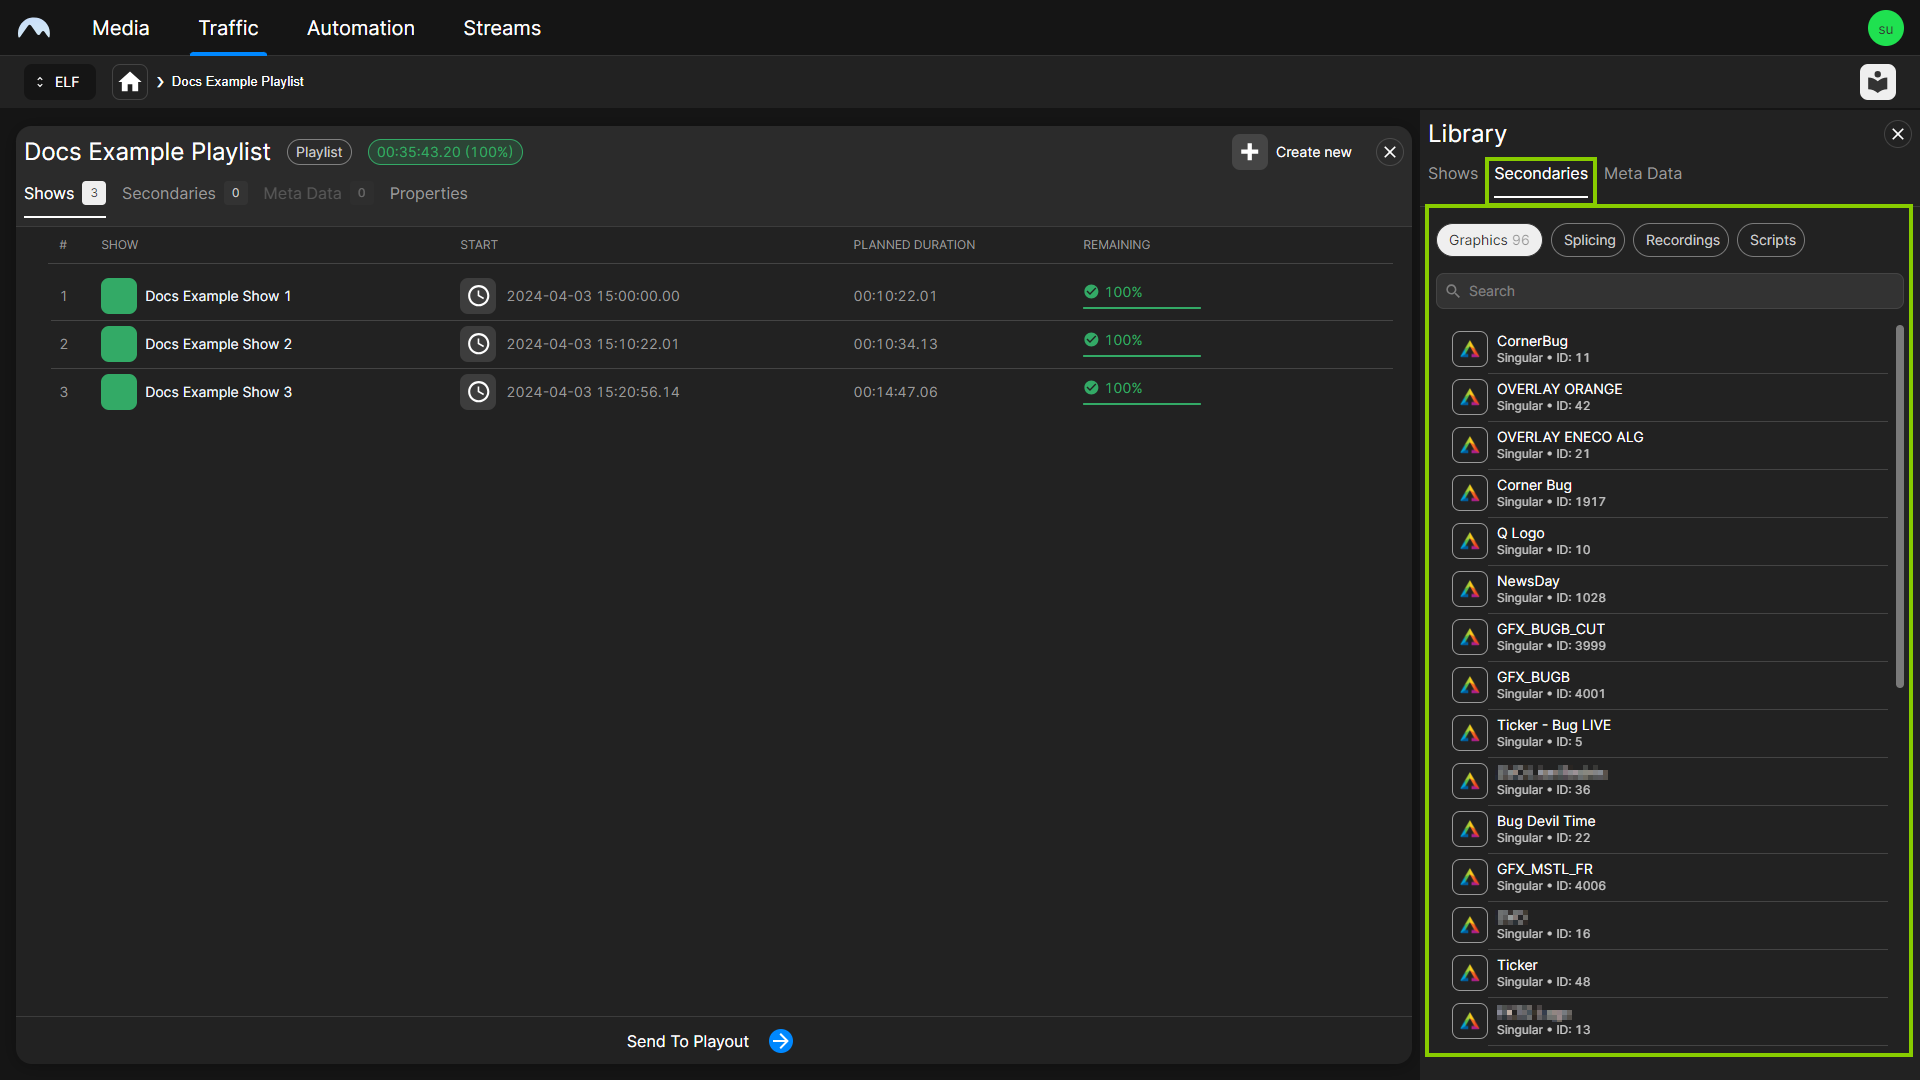
Traffic - Secondary events -
(Optional) To search for secondary events, use the search field above the list of available secondary events.
-
To add a secondary event to the playlist, drag it from the library to the playlist information area. Alternatively, you can select the secondary event in the library and click the Plus icon at the right end of the corresponding row.
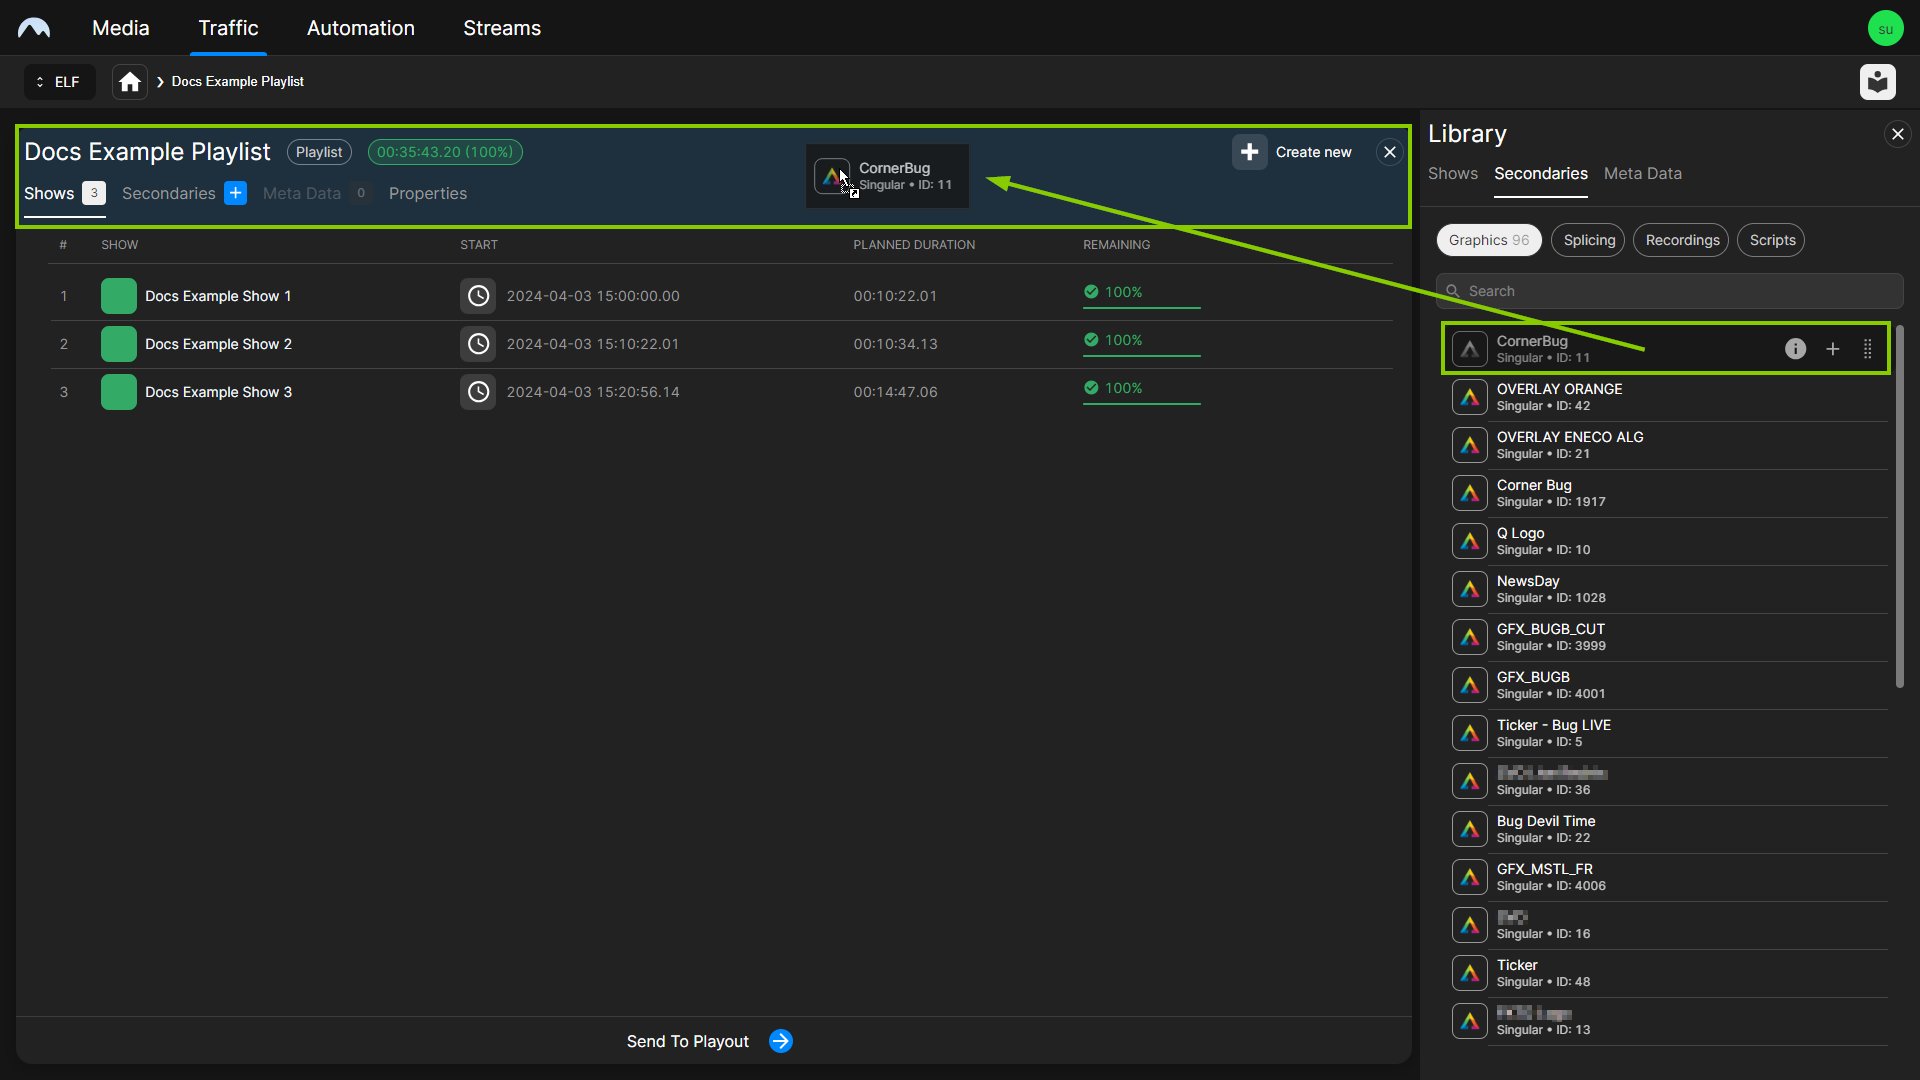
Traffic - Add a secondary event to a playlist The secondary event is added to the playlist.
-
(Optional) Repeat the previous two steps to add more secondary events to the playlist.
-
(Optional) To edit the properties of the added secondary event, select the Secondaries tab in the playlist information area. All added secondary events are listed below. Click Open at the right end of the row of the secondary event to be edited. The secondary event properties are displayed on the right side. Edit the properties as required and apply your changes, by clicking Save.
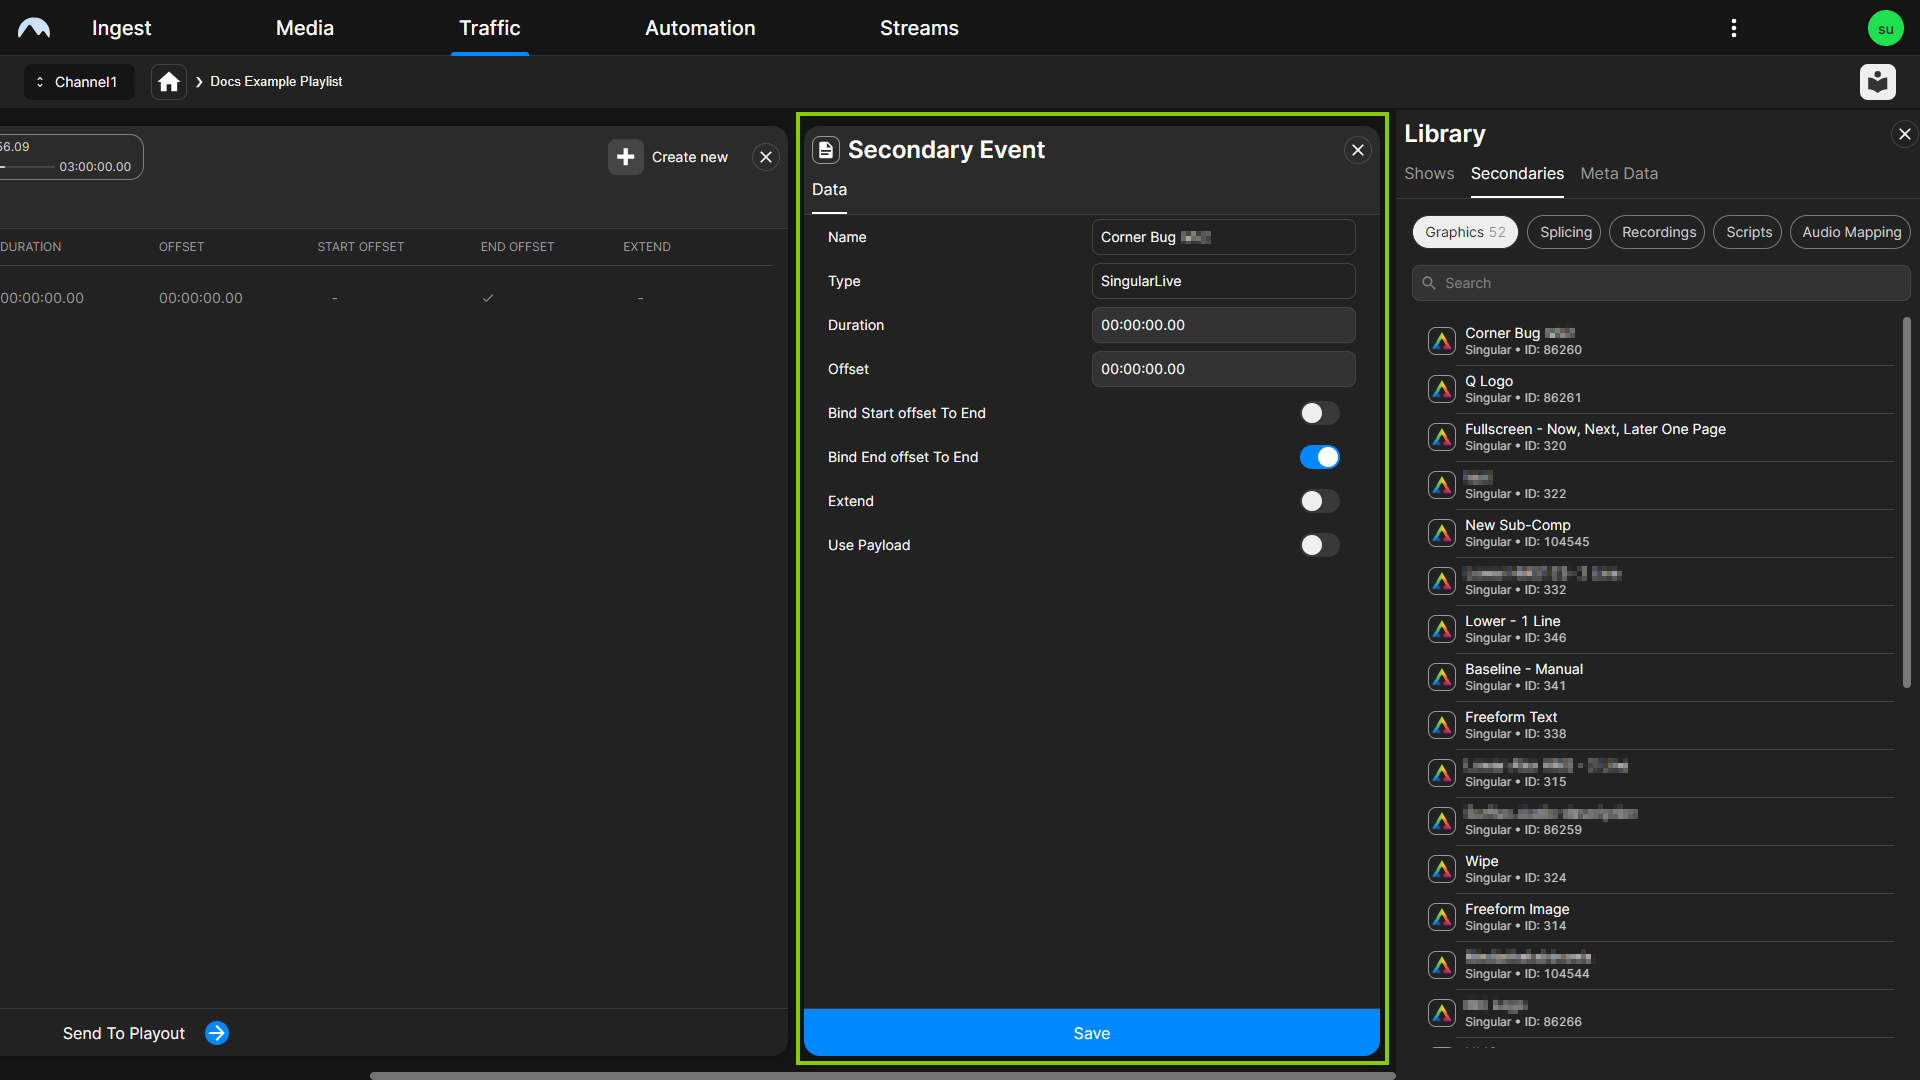
Traffic - Edit secondary event properties Tip
To delete an added secondary event, proceed as follows:
1 - Click the Delete icon
 at the right end of the corresponding secondary event row.
2 - In the subsequently displayed dialog, click Remove.
-
-
(Optional) Add metadata to the playlist.
-
On the right side in the Library, select the Meta Data tab and below the type Playlist.
Available metadata keysets of the selected type are listed below.

Traffic - Available metadata keysets -
To add a metadata keyset to the playlist, drag it from the library and drop it on the playlist information area.

Traffic - Add a metadata keyset to a playlist The metadata keyset is added to the playlist.
Tip
To display a list of metadata keysets already added to the playlist, select the Meta Data tab in the playlist information area. The number displayed after the tab title indicates the number of metadata keysets currently added to the playlist.

Traffic - Metadata keyset added to a playlist Tip
If the added metadata keyset includes one or more mandatory properties/fields that are currently empty (not filled out), a warning icon is displayed after the Meta Data tab title and the name of the corresponding metadata keyset. To remove this warning, edit the metadata keyset as described in step 5d, fill out the mandatory properties/fields, and save your changes.
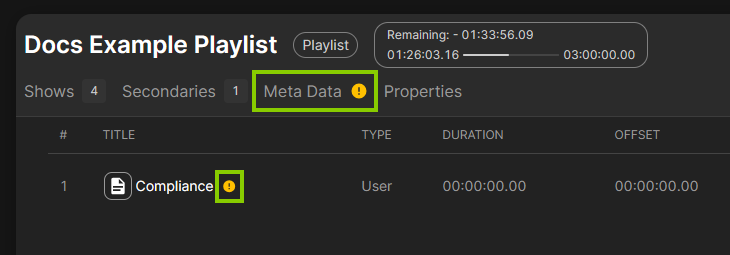
Traffic - Empty mandatory property/field warning -
(Optional) Repeat the previous two steps to add more metadata keysets to the playlist.
-
(Optional) To edit the properties of the added metadata keyset, select the Meta Data tab in the playlist information area. All added metadata keysets are listed below. Click Open at the right end of the row of the metadata keyset to be edited. The metadata keyset properties are displayed on the right side. Edit the properties as required and apply your changes by clicking Save.
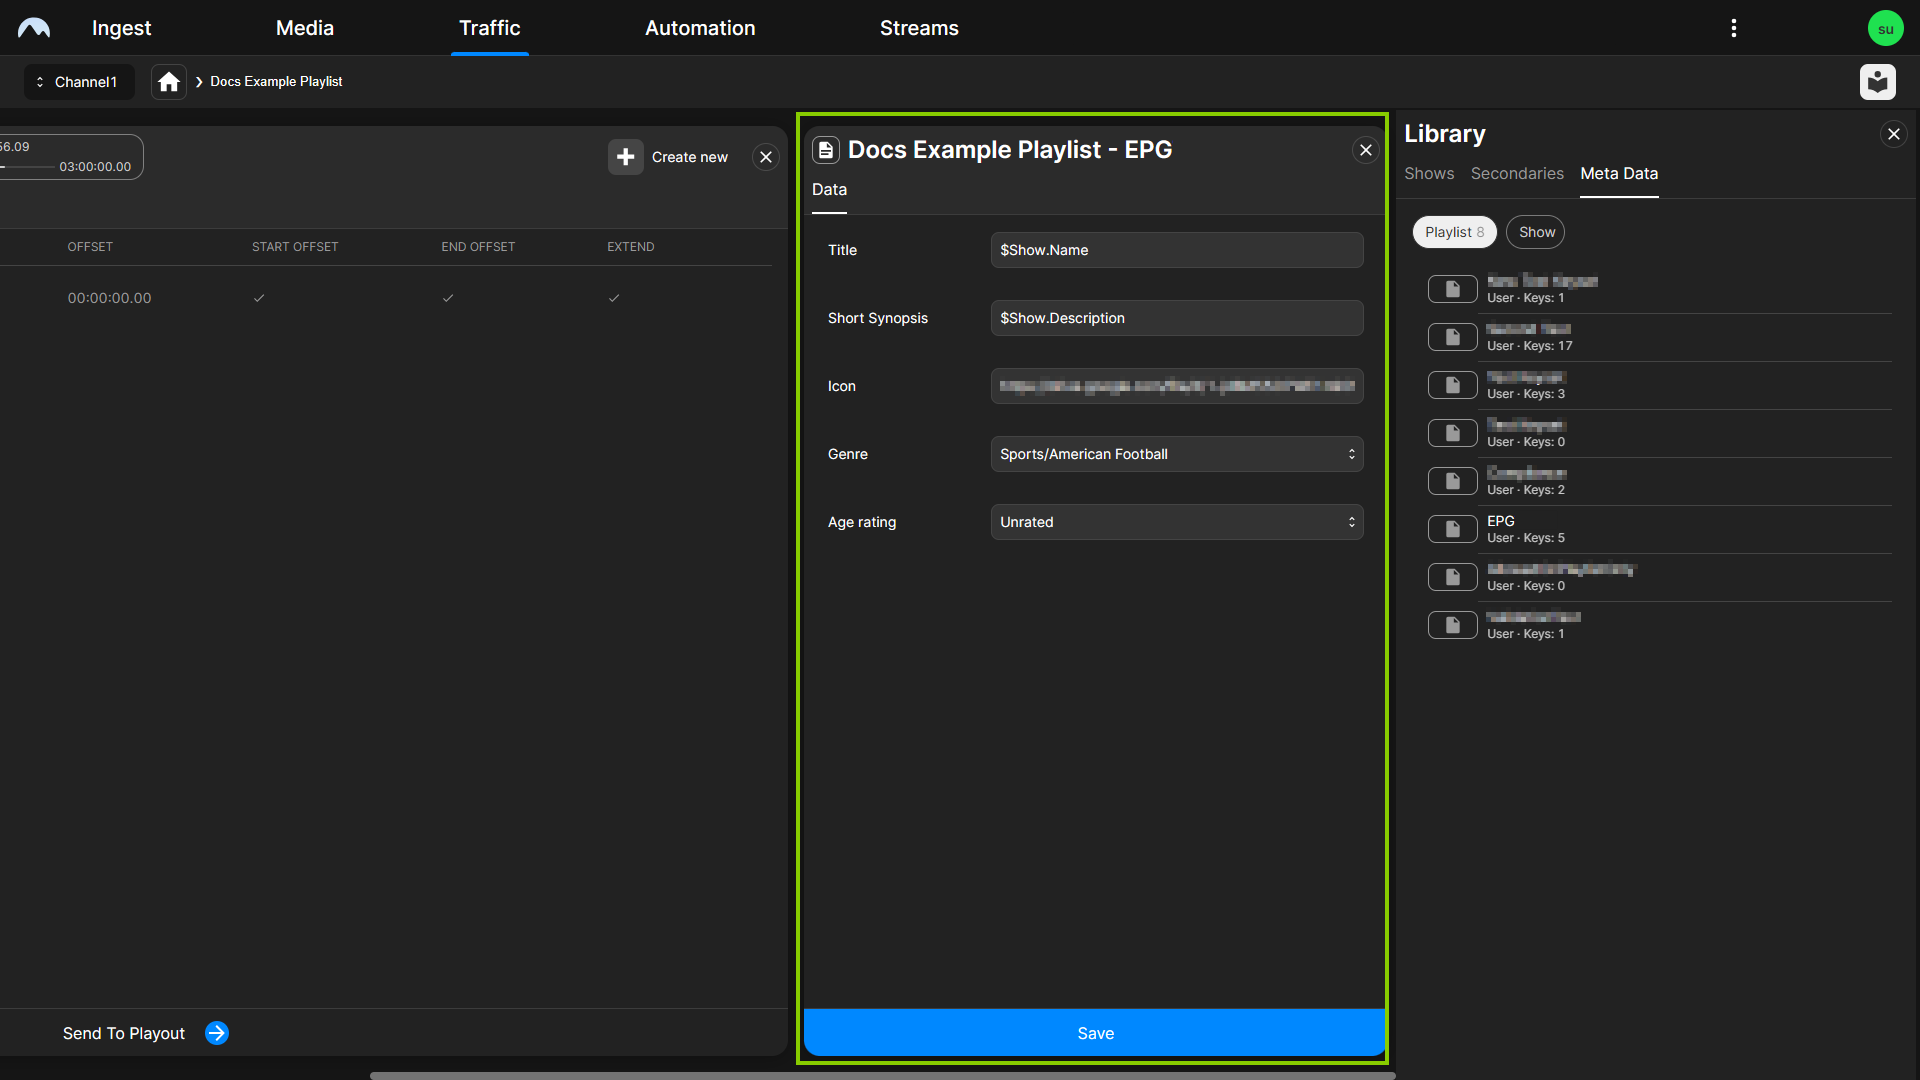
Traffic - Edit metadata properties Tip
To delete an added metadata keyset, proceed as follows:
1 - Click the Delete icon
 at the right end of the corresponding metadata keyset row.
2 - In the subsequently displayed dialog, click Remove.
-
The playlist is saved automatically.
Sending a playlist to playout
Before a playlist can be added to the rundown of a channel (see the section Adding an existing playlist to the rundown), it must first be sent to the playout.
To send a playlist to playout, proceed as follows:
-
In the sidebar on the left, select Playlists.
All available playlists for the currently selected channel are listed in the middle.
-
Select the playlist to be sent to playout and click the Options icon
 .
. -
Select Send to Playout.

Traffic - Send playlist to playout
The playlist is sent to playout. The transfer time is displayed in the Sent to playout column.
Notice
If you edit a playlist, that was already sent to playout and you export it again, the existing playlist is updated and can be used for the corresponding playout channel.
Editing a playlist in List view
To edit a playlist in List view, proceed as follows:
-
In the sidebar on the left, select Playlists.
All available playlists for the currently selected channel are listed in the middle.
-
Select the playlist to be edited and click Open at the right end of the corresponding row.
The playlist details are displayed.
-
Edit the playlist, assigned secondary events, and/or metadata as described in section Creating a playlist.
The playlist is saved automatically.
Editing a playlist in Timetable view
Editing playlist details works similarly in both the Timetable and List views. Using the Timetable view provides you with the following additional functions:
- You can edit the time properties of a selected playlist directly in the Timetable view via the Actions menu, either by entering specific time code values or by using the Snap backward/forward or Extend functions.
- You can add playlists to the timetable and add shows to playlists directly via drag and drop from the library, without opening the detail view of a playlist first.
Editing playlist details
To edit playlist details in Timetable view, proceed as follows:
-
In the sidebar on the left, select Playlists.
All available playlists for the currently selected channel are listed in the middle.
-
In the View selector at the top left, select Timetable.
The Timetable view is displayed.
-
Use the controls above the timetable to select the week that contains the playlist you want to edit.
-
Select the playlist to be edited and click the Open icon
 in the Actions menu.
The playlist details are displayed.
-
Edit the playlist, assigned secondary events, and/or metadata as described in section Creating a playlist.
The playlist is saved automatically.
Moving a playlist
To move a playlist within the timetable to close a gap to the previous or next playlist, you can use the Snap backward/forward functions as follows:
-
Select the playlist to be moved.
The actions menu is displayed.
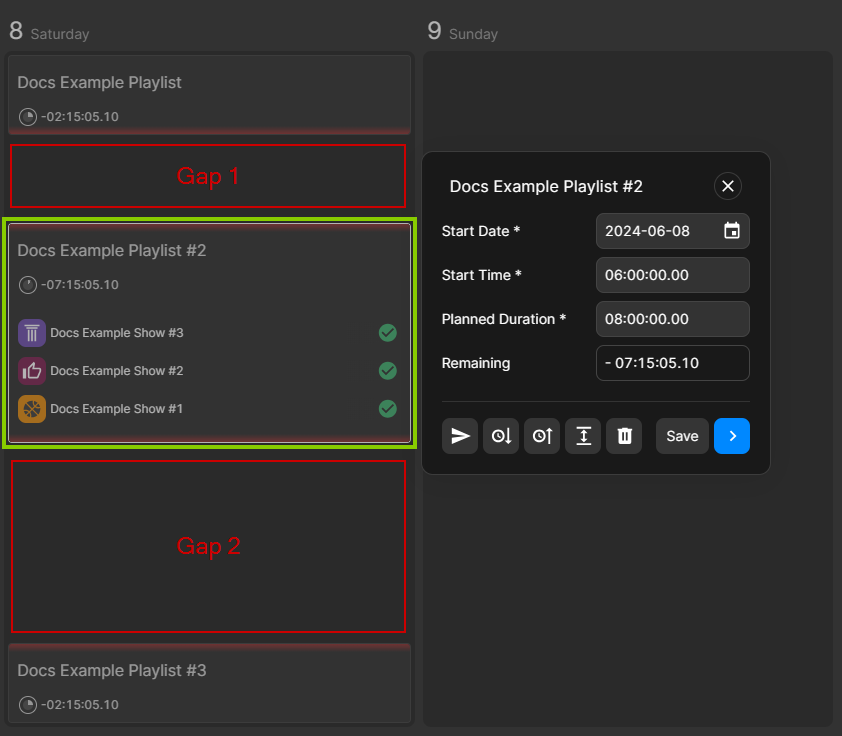
Traffic - Playlist selected -
Depending on where you want to move the playlist, continue as follows:
-
If you want to close a gap to the previous playlist (for example, "Gap 1" in the previous figure), click the Snap backward icon
 .
. -
If you want to close a gap to the next playlist (for example, "Gap 2" in the previous figure), click the Snap forward icon
 .
.
-
The selected playlist is moved accordingly (the planned start time is changed), and the gap is closed.
Expanding a playlist
To expand a playlist within the timetable to close a gap to the previous and/or next playlist, you can use the Expand function as follows:
-
Select the playlist to be expanded.
The actions menu is displayed.

Traffic - Playlist selected -
Click the Expand icon
 .
.
The start time and planned duration of the selected playlist are updated/expanded accordingly, and the gaps are closed.
Duplicating a playlist
To duplicate a single playlist, proceed as follows:
-
In the left sidebar, select Playlists.
All available playlists are listed in the middle area.
-
In the list of available playlists select the playlist to be duplicated.
-
At the right end of the corresponding row, click the Options icon
 and select Duplicate.
Traffic - Duplicate playlist The Copy Playlist dialog is displayed.
-
In the Copy Playlist dialog, enter the name to be used for the duplicated playlist.
-
Confirm your action by clicking Copy playlist.
The playlist is duplicated.
To duplicate multiple playlists, proceed as follows:
-
In the left sidebar, select Playlists.
All available playlists are listed in the middle area.
-
Hold [Ctrl] or [Shift] and in the list of available playlists select the playlists to be duplicated.
-
At the bottom of the screen, select Duplicate.
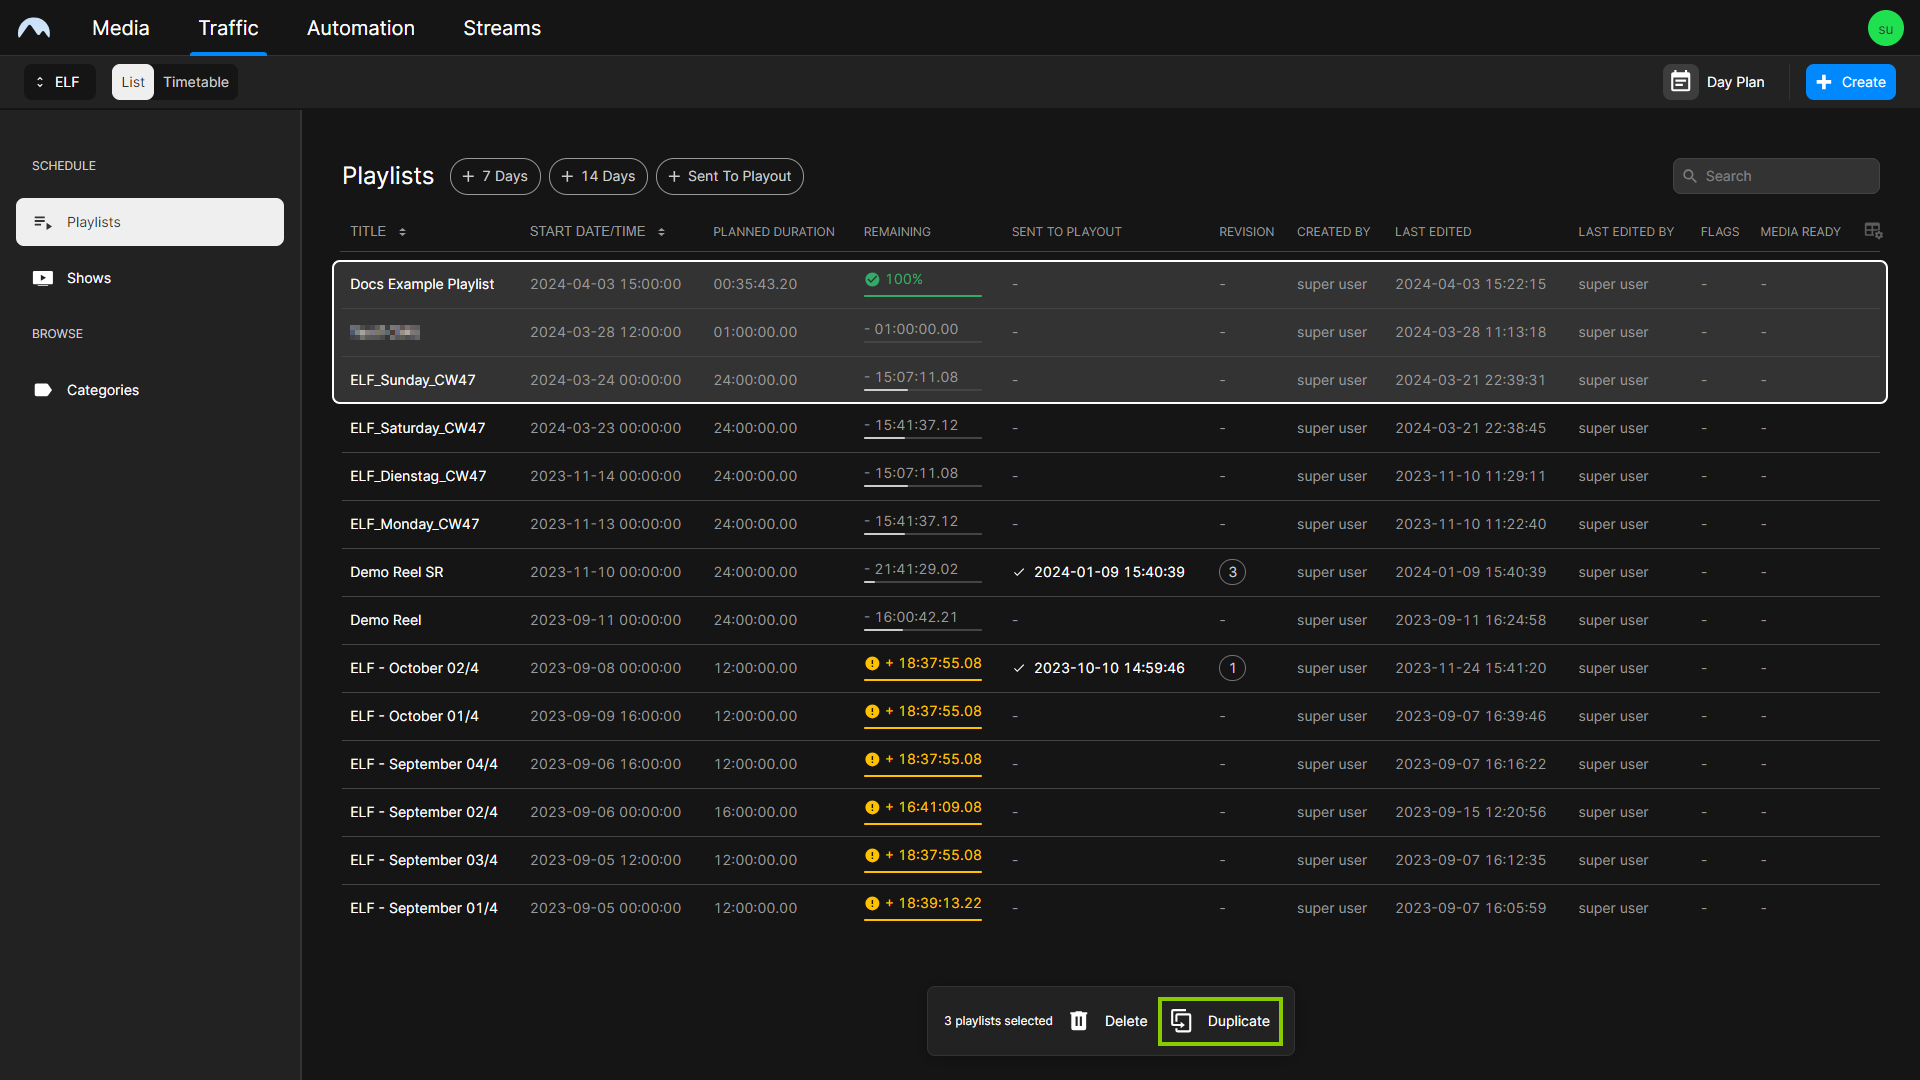
Traffic - Duplicate multiple playlists
The selected playlists are duplicated. The duplicated playlists are automatically named by appending "- copy" to the original name.
Deleting a playlist
To delete a single playlist, proceed as follows:
-
In the left sidebar, select Playlists.
All available playlists are listed in the middle area.
-
In the list of available playlists select the playlist to be deleted.
-
At the right end of the corresponding row, click the Options icon
 and select Delete.
A confirmation dialog is displayed.
-
Confirm your action by clicking Delete.

Traffic - Delete playlist
The playlist is deleted.
To delete multiple playlists, proceed as follows:
-
In the left sidebar, select Playlists.
All available playlists are listed in the middle area.
-
Hold [Ctrl] or [Shift] and in the list of available playlists select the playlists to be deleted.
-
At the bottom of the screen, select Delete.
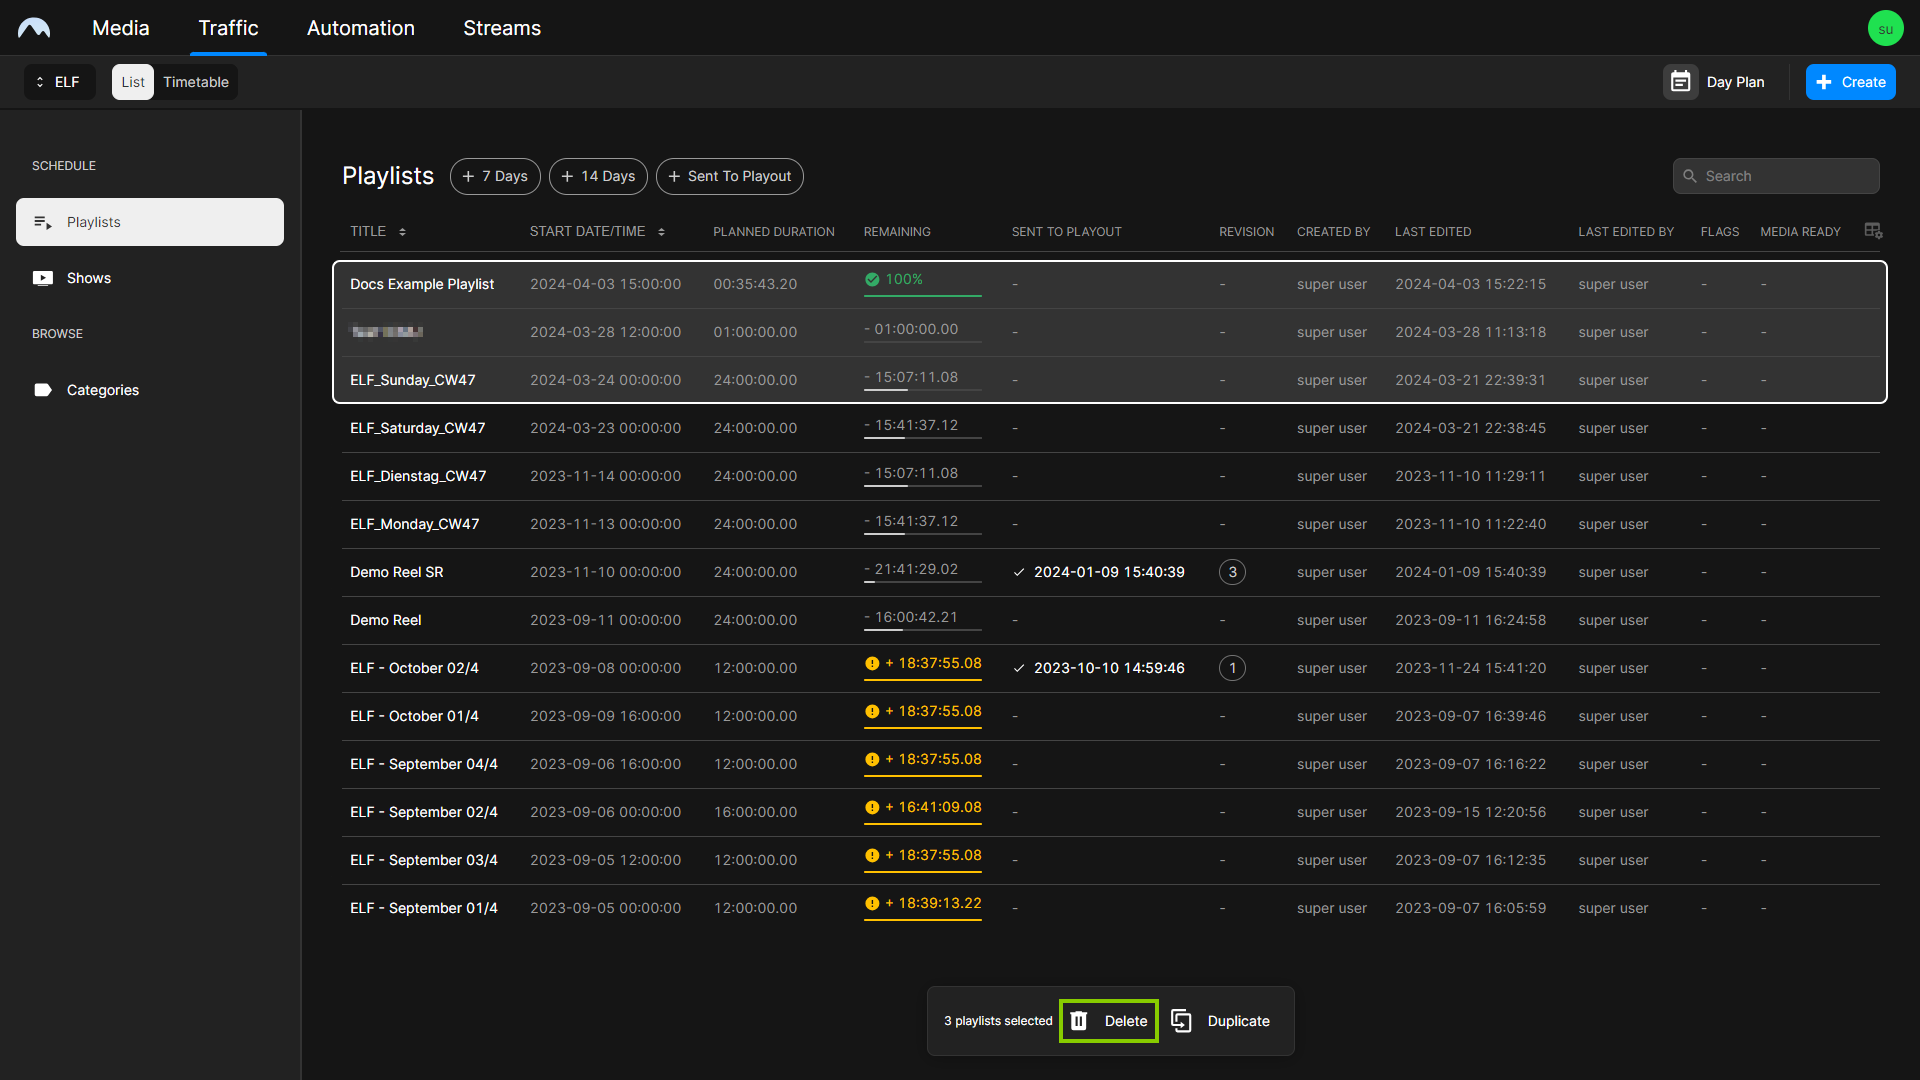
Traffic - Delete multiple playlists A confirmation dialog is displayed.
-
Confirm your action by clicking Delete.
The selected playlists are deleted.
Playlist properties
The following table provides an overview of all available playlist properties:
Notice
Time-related properties use a frame-accurate notation in the format hh:mm:ss.ff. The frame rate time base is part of the global system configuration. Makalu supports the frame rates 25, 29.97, 30, 50, and 60 fps.
| Property | Description |
|---|---|
| Playlist Title | Title of the playlist |
| Planned Duration | Planned duration of the playlist |
| Start Date | Planned start date of the playlist |
| Start Time | Planned start time of the playlist |
| Description | Text description for the playlist |
