Ingest
The purpose of the ingest workflow is to provide new media files for playout. Each new file must first be uploaded to the central ingest storage. After each successful upload, the corresponding file is automatically processed by Makalu (for more information, see the section File processing). When this internal file processing is completed, the uploaded file is registered in Makalu and can be scheduled for playout. Once scheduled (added to the rundown as part of a show in a playlist), each file is automatically transferred from the central ingest storage to the local playout storage. For more information, see the section File transfer.
Uploading files
The ingest process starts with the file upload. To upload files, use the Makalu Asset Uploader app. With Asset Uploader, you can either upload a new file to the system, creating a completely new media asset, or assign the file to be uploaded to an existing placeholder asset.
Notice
A placeholder is a virtual element that can be used to schedule a file for playout that is not yet available, for example, because the physical file has not been created yet. By using this concept, playlists can already be prepared in the planning component Makalu Traffic (for more information, see the section Schedule), even if the actual files used in them are created later. As a result, the uploaded file replaces the selected placeholder everywhere it is used in the system.
To upload a file:
-
Open Makalu Asset Uploader by either:
-
Opening the Makalu Automation Detailed Channel View and selecting the Asset Uploader tab, or by
-
Opening the Makalu Asset Uploader in the Makalu Hub.
The Asset Uploader UI is opened.

Asset Uploader - UI -
-
Open the sidebar by clicking the Folder icon
 on the right.
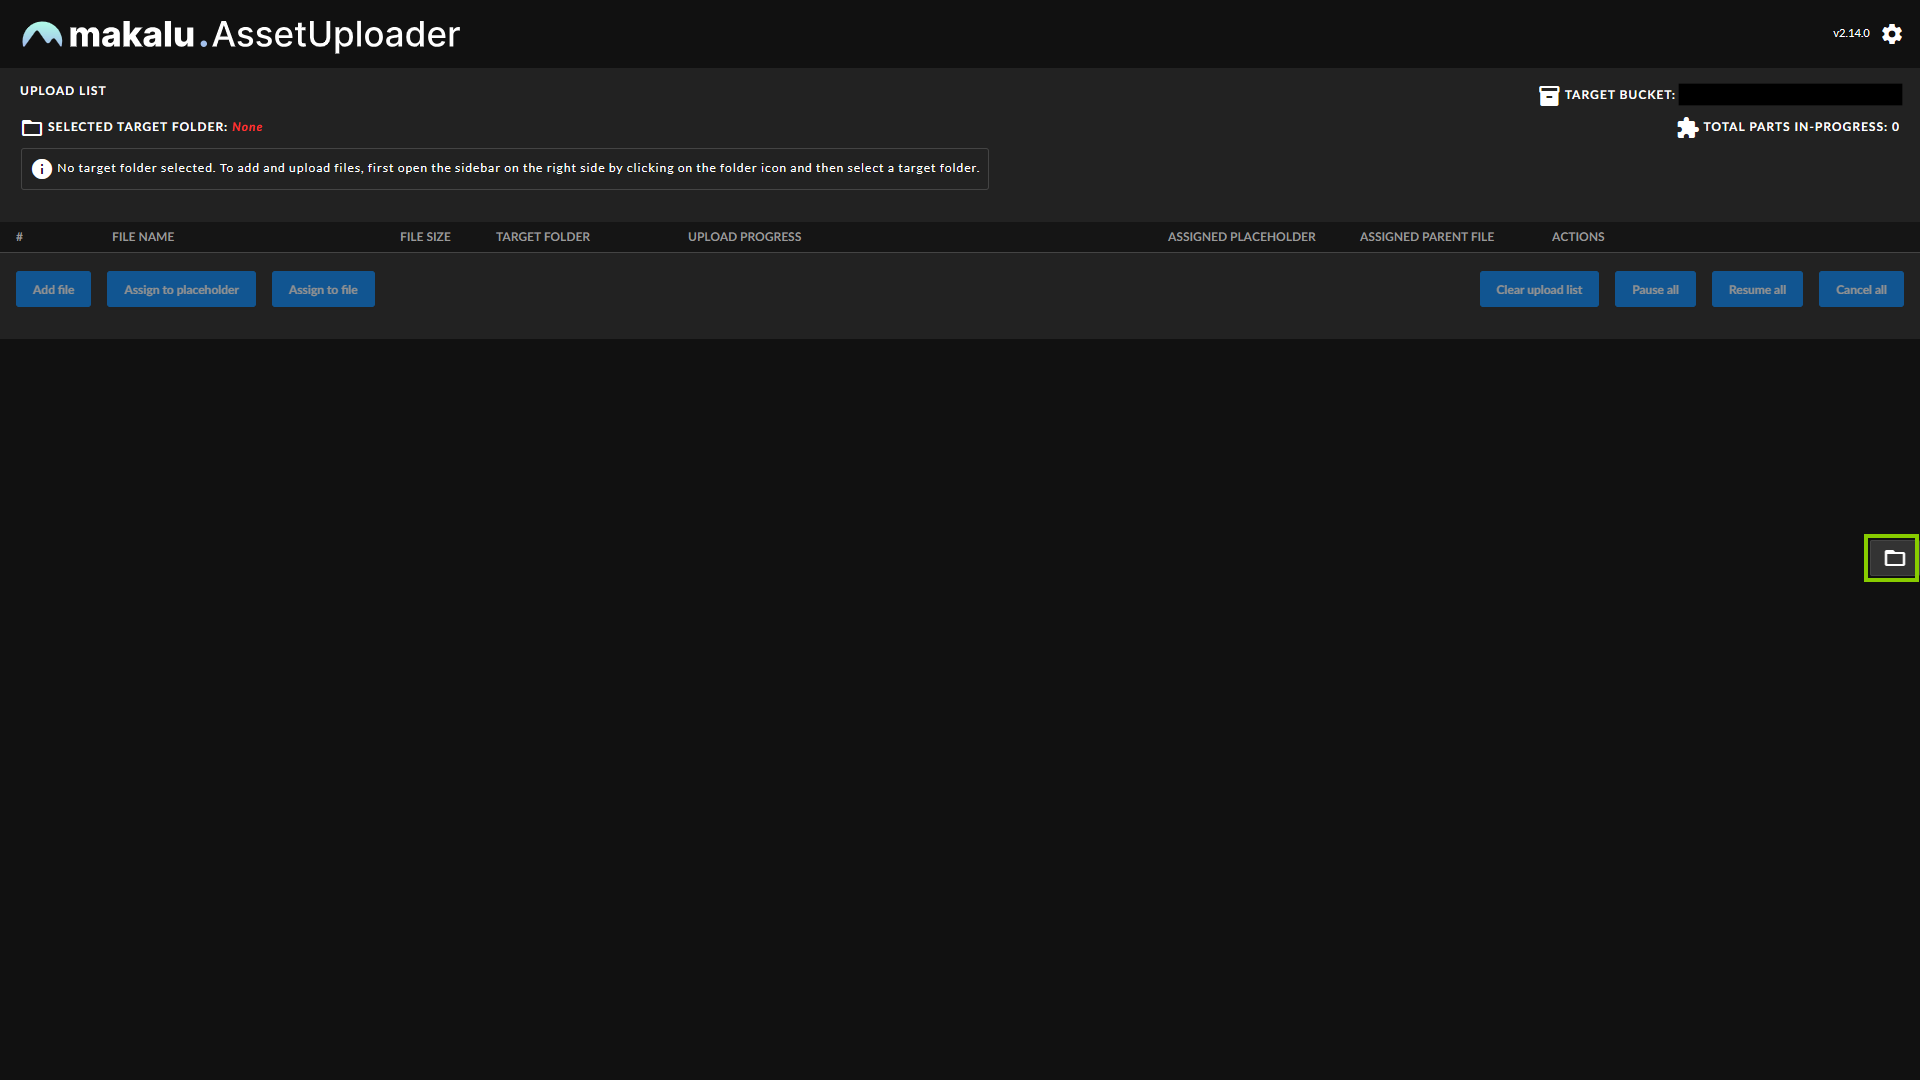
Asset Uploader - Open sidebar -
Select the folder on the ingest storage to be used as the target for your upload by clicking the corresponding folder icon or name.
Notice
Which folders are available in the list depends on your access permissions. Folders marked with a Lock icon
 cannot be selected as upload targets. By default, this applies to the top-level root folder.
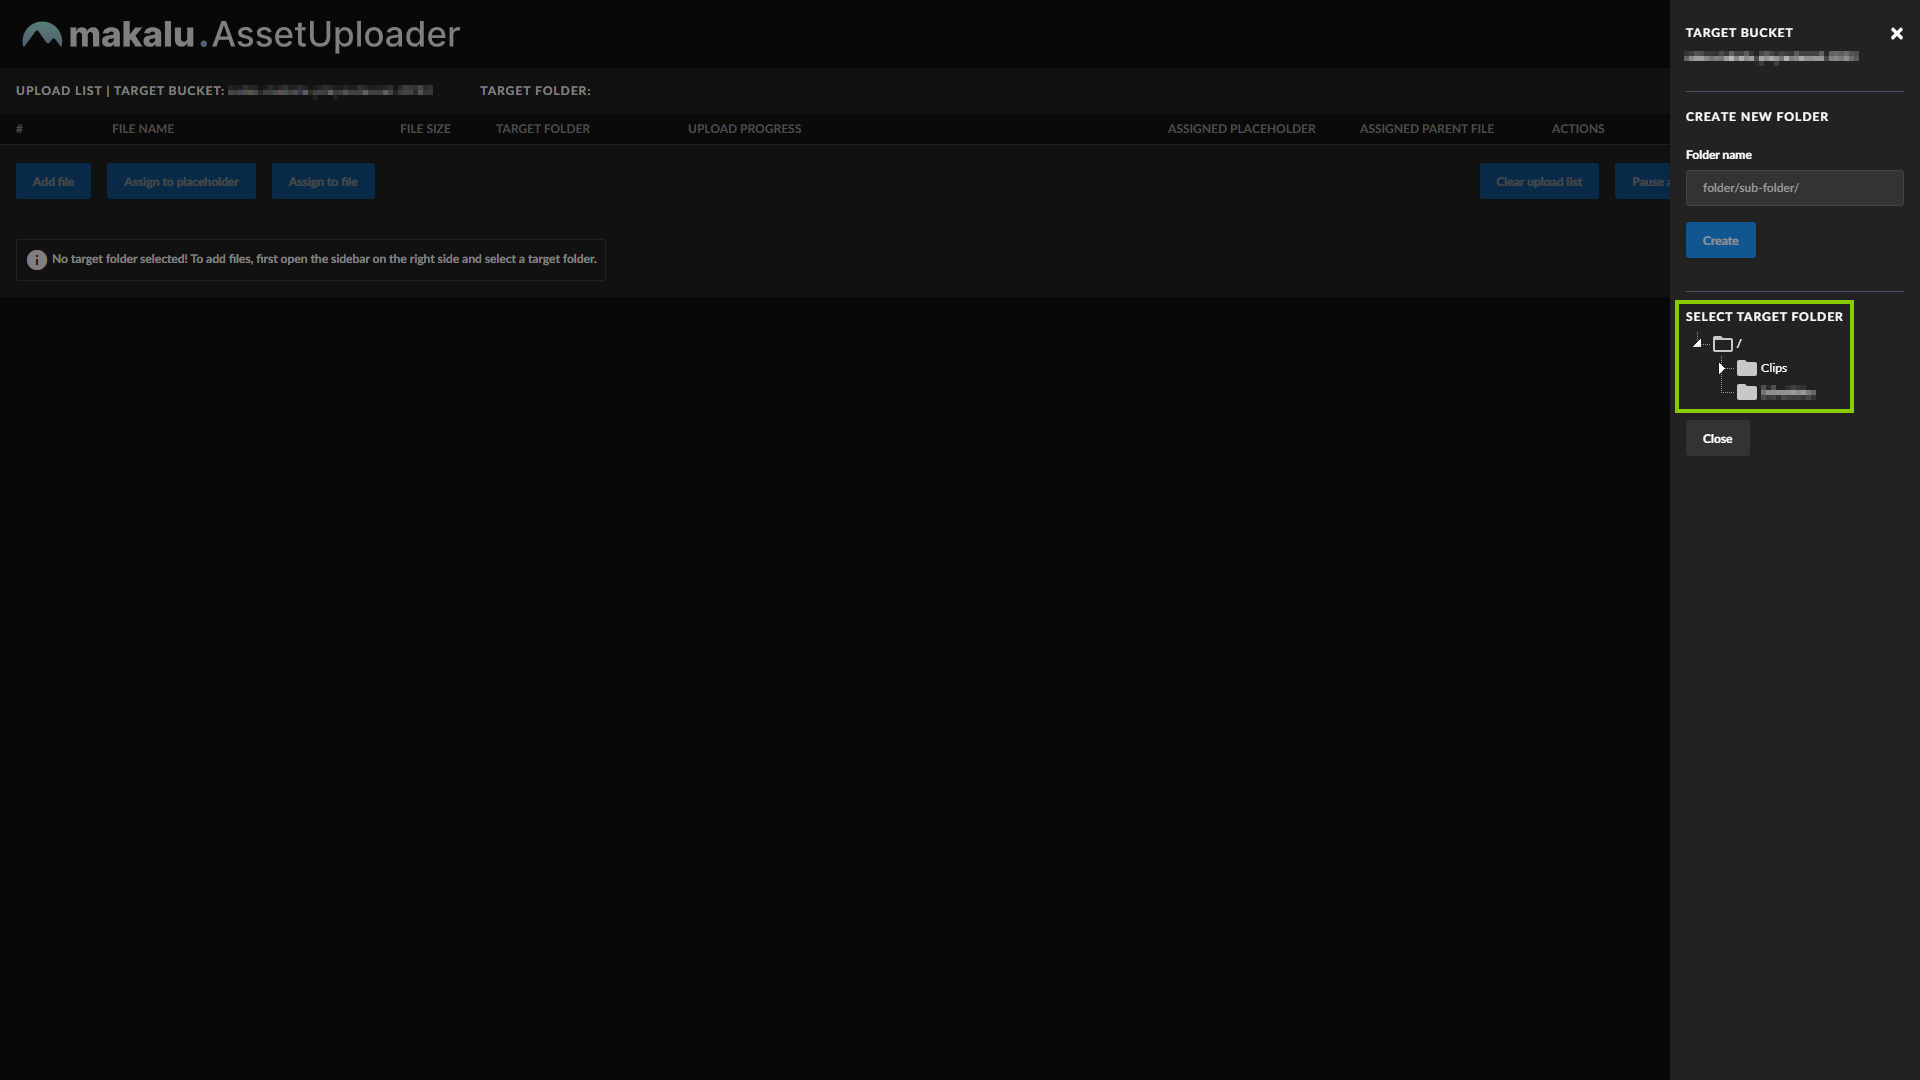
Asset Uploader - Selecting the target folder The folder is selected, and the sidebar is closed. The name of the selected folder is displayed above the upload list.

Asset Uploader - Target folder selected Tip
You can also create a new folder on the ingest storage by using the Create new folder area in the target folder sidebar.
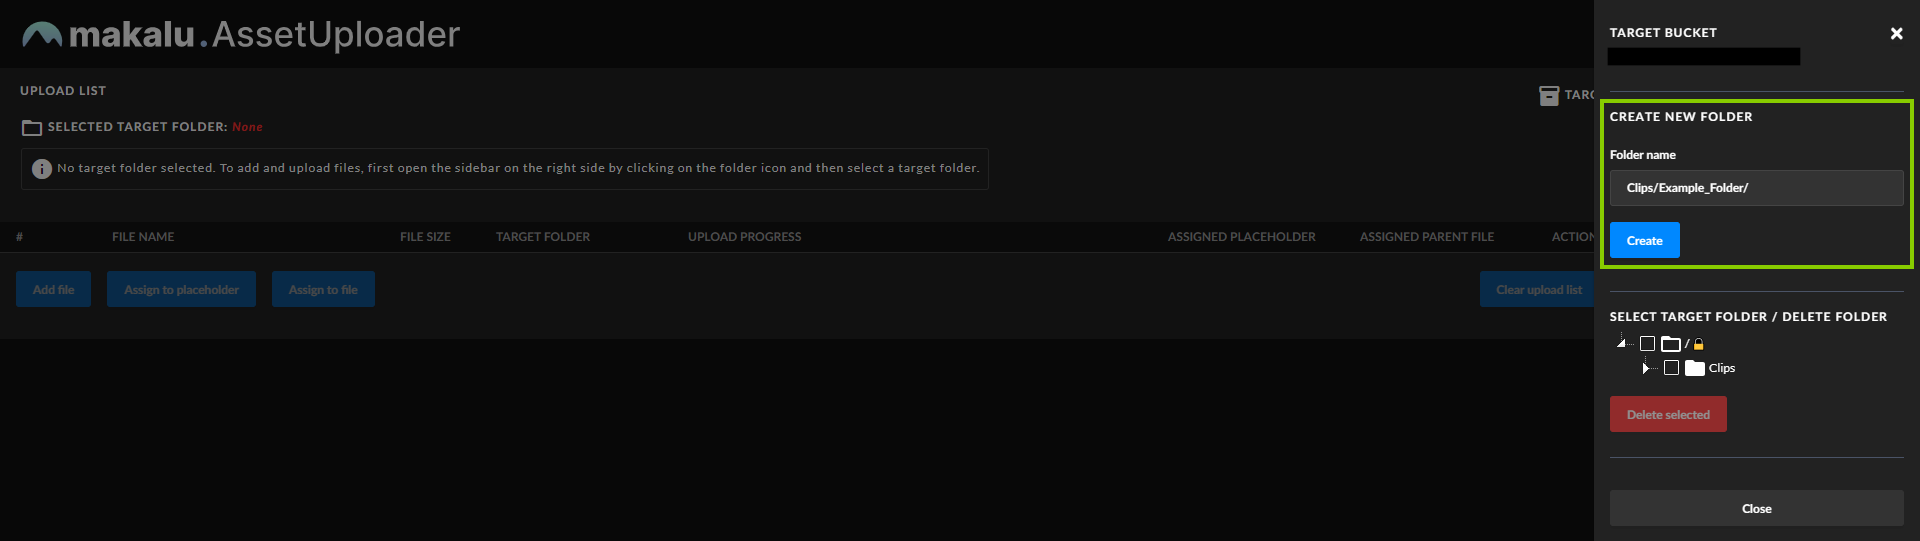
Asset Uploader - Create new folder When creating a new folder, the following restrictions apply to the folder path and name:
- By default, you can only create subfolders in folders you are allowed to access:
- ✔ Valid example (accessible subfolder):
Clips/Example-Channel/New-example-folder/ - ✘ Invalid example (inaccessible top-level folder):
New-example-folder/
- ✔ Valid example (accessible subfolder):
- Do not use a leading slash, but append a closing slash:
- ✔ Valid example:
folder/subfolder/ - ✘ Invalid example:
/folder/subfolder
- ✔ Valid example:
- Use only permitted characters and folder names:
- ✔ Permitted characters are letters (
a-z,A-Z), numbers (0-9), hyphen (-), and underscore (_) - ✘ Not permitted (system-reserved) top-level folder names are
Live,live,Placeholder, andplaceholder
- ✔ Permitted characters are letters (
To create a new folder:
-
Enter a valid path and name for the new folder in the Folder name field.
-
Click Create.
The folder list is updated and you can select the newly created folder as the target.
- By default, you can only create subfolders in folders you are allowed to access:
-
(Optional) If you want to assign the file to be uploaded to an already existing placeholder asset, select a placeholder as follows:
-
Click Assign to placeholder.
A list of available placeholders is displayed.

Asset Uploader - List of available placeholders -
Use the Search field and/or the paging buttons to search for a specific placeholder.
-
Select a placeholder.
-
Click Ok.
The list of placeholders is closed, and the name of the selected placeholder is displayed to the right of the Assign to file button.

Asset Uploader - Placeholder selected
-
-
To select the file to be uploaded, click Add file.
The file selection window opens.
-
In the file selection window, select one or more files and click Open.
Notice
If you selected a placeholder (to assign the uploaded file to) as described in the optional step 3, you can only select a single file. If no placeholder is selected, you can select multiple files.
Notice
Depending on how the Makalu Asset Uploader is configured, only permitted file types can be selected and uploaded. It is possible to allow any file type or to restrict the permitted file types (for example, MP4 files only). In this case, only files of this type are displayed in the selection window.
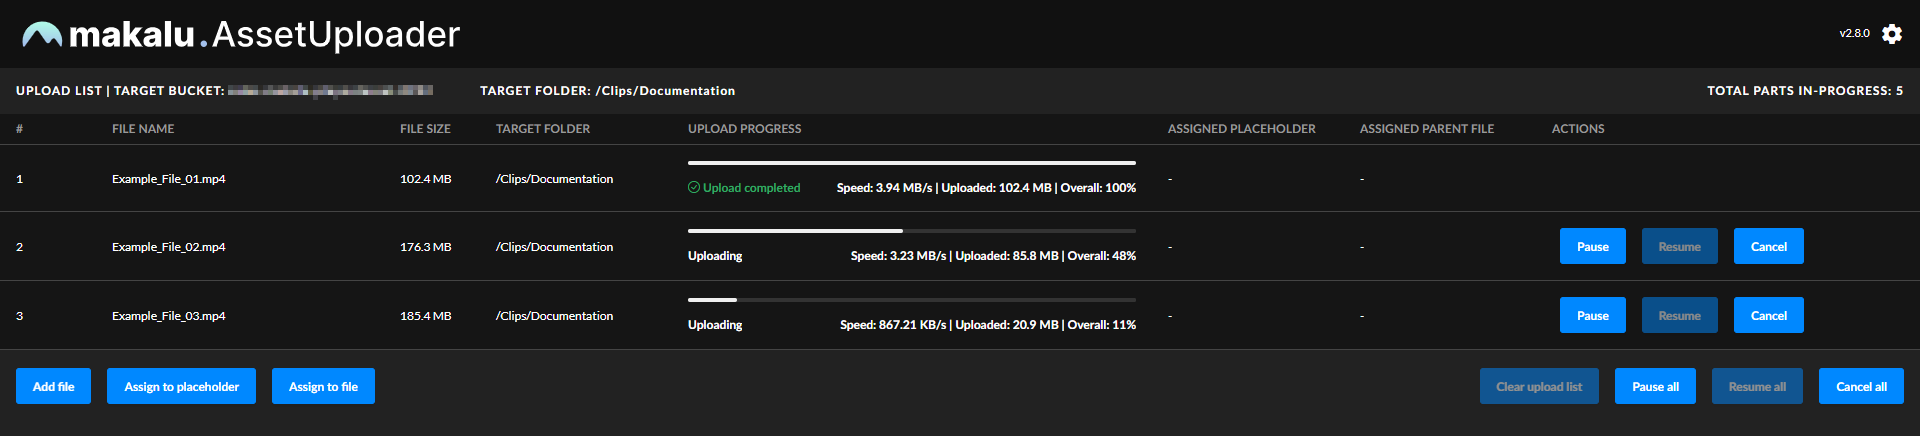
The selected files are added to the upload list, and the upload starts automatically.
Asset Uploader - Upload started Asset Uploader provides an optional feature that (if enabled) checks whether a file with the same name already exists in the selected target folder on the ingest storage. It can be used to avoid duplicate uploads and overwriting a file unnecessarily, even if it has not changed. In this case, the selected file is not uploaded, and a corresponding notice is displayed. The check can also be extended only to allow overwriting an existing file if its modification date has exceeded a certain age.
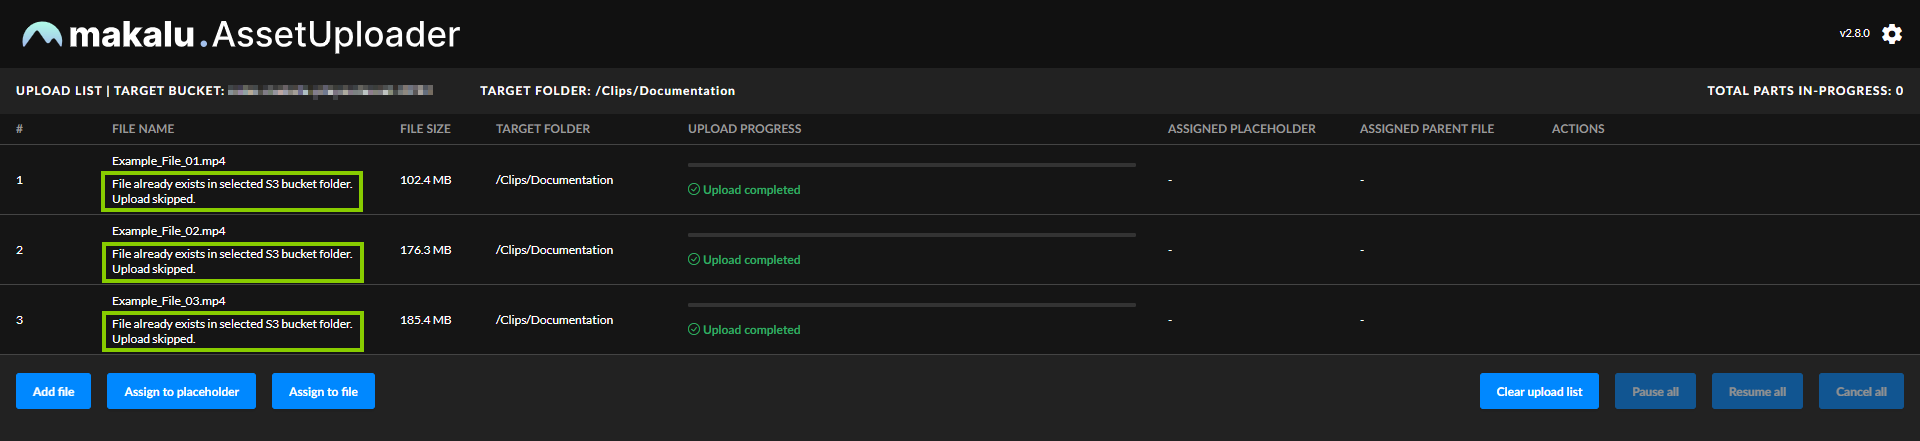
Asset Uploader - Upload prevented because the file already exists Notice
During the upload process, the progress of each upload is displayed, including the current upload speed, the amount of uploaded data, and the overall upload percentage. At the top right, the number of file parts ("chunks") currently being uploaded is displayed. The upload speed is not limited. Asset Uploader will use the full upload bandwidth currently available on the client side.
Tip
While uploads are in progress, you can either pause, resume, or cancel individual or all uploads using the corresponding buttons on the right in the Actions column and below the upload list.
Warning
Do not close your browser while uploads are in progress! Otherwise, your current upload progress will be lost.
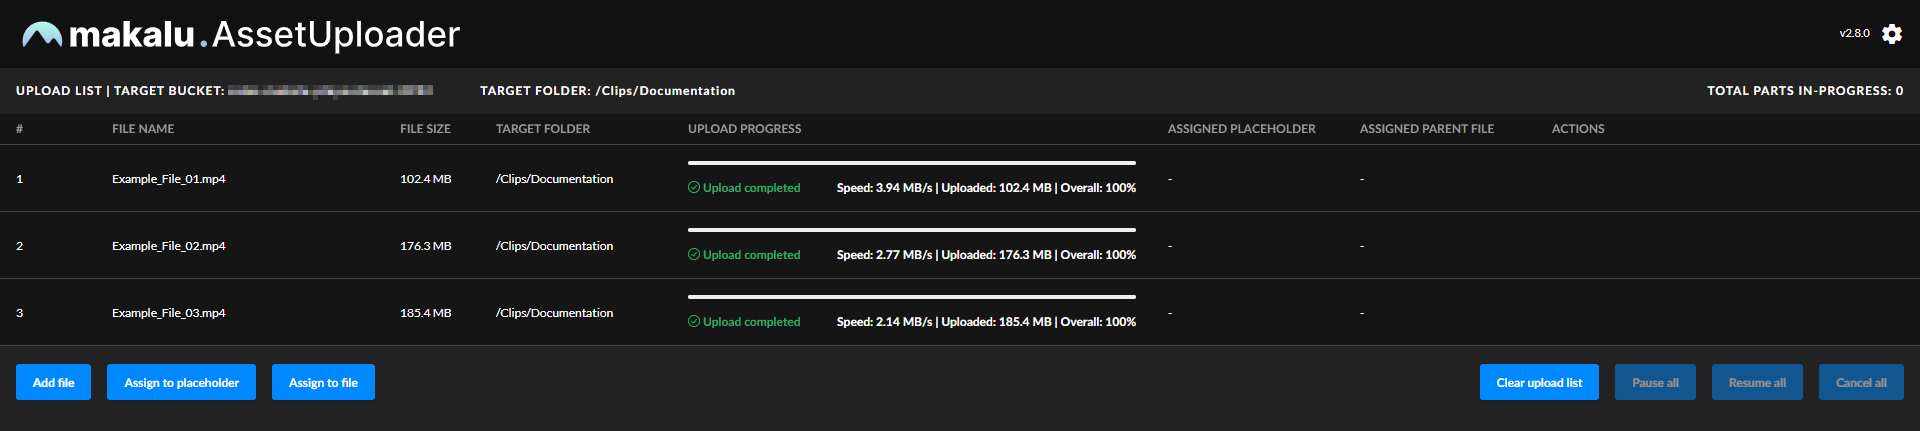
Asset Uploader - Upload completed
After the file upload is completed, the file processing starts automatically.
File processing
After each successful upload, the internal file processing is automatically triggered. When the file processing is completed, the uploaded files are registered in Makalu and can be scheduled for playout.
File processing includes the following sub-processes:
| Sub-process | Purpose | Input (uploaded) file format | Output file format |
|---|---|---|---|
| Creating a low-res (proxy) video file Notice: This is only necessary if original files are uploaded in a format other than MP4. | Web-based preview of the video file | MXF or any other supported source video format | MP4 |
| Creating a thumbnail image | Display the image in the UI | Created from the uploaded source video file | PNG |
| Creating a proxy subtitle file Notice: This is only necessary if matching subtitles are uploaded for the original video file. | Web-based preview of the video file, including subtitles | SRT, STL, TTML | VTT |
| Determining technical metadata | Optimized internal file processing and displaying file information in the UI | Created from the uploaded source files | - |
| Creating a checksum for original and proxy files | Check if files were correctly transferred from ingest storage to playout nodes | - | - |
For more information, see the sections Transfer and File processing.
Previewing uploaded files
For previewing uploaded files, Makalu includes the Asset Viewer app. It lists all uploaded and processed video files (assets) according to the directory structure in which they were uploaded to the ingest storage and registered in Makalu. Asset Viewer provides a preview for playable assets (including subtitles) in the Content tab. The Metadata tab shows all available technical metadata and provides an option to download the original file. Asset Viewer also lists placeholder assets with basic metadata and the option to delete them.
Tip
You can also preview files in the Makalu Automation Detailed Channel View.
To preview uploaded and processed files:
-
Open the Makalu Hub as described in section Accessing the Makalu Hub.
-
In the app list in the left column, in the section Assets, select Media.
The Asset Viewer is opened in the Media tab of the Makalu UI.

Asset Viewer - UI -
Use the folder tree on the left to select the folder that contains the file you want to preview.
Notice
Which folders are available in the folder tree depends on your access permissions.
All video files included in the selected folder are listed in the Parent Assets area.
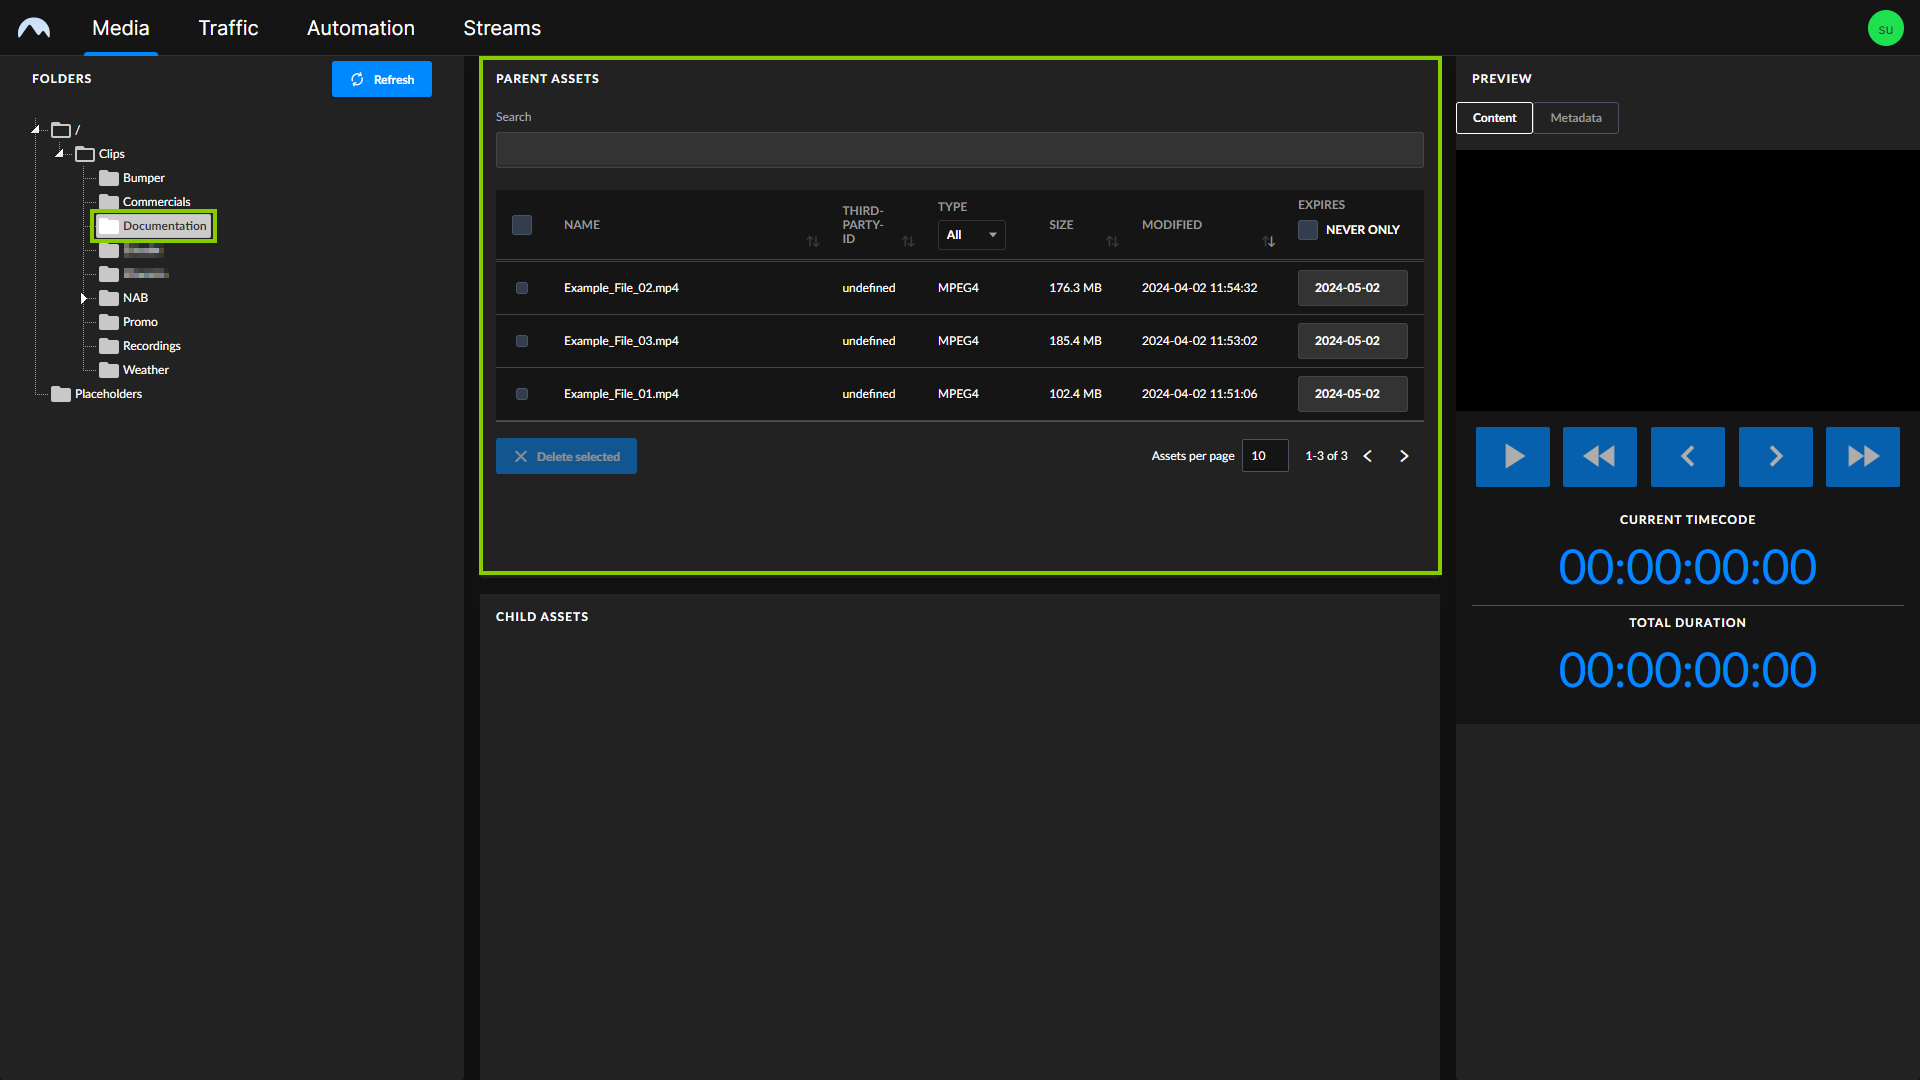
Asset Viewer - Folder selected -
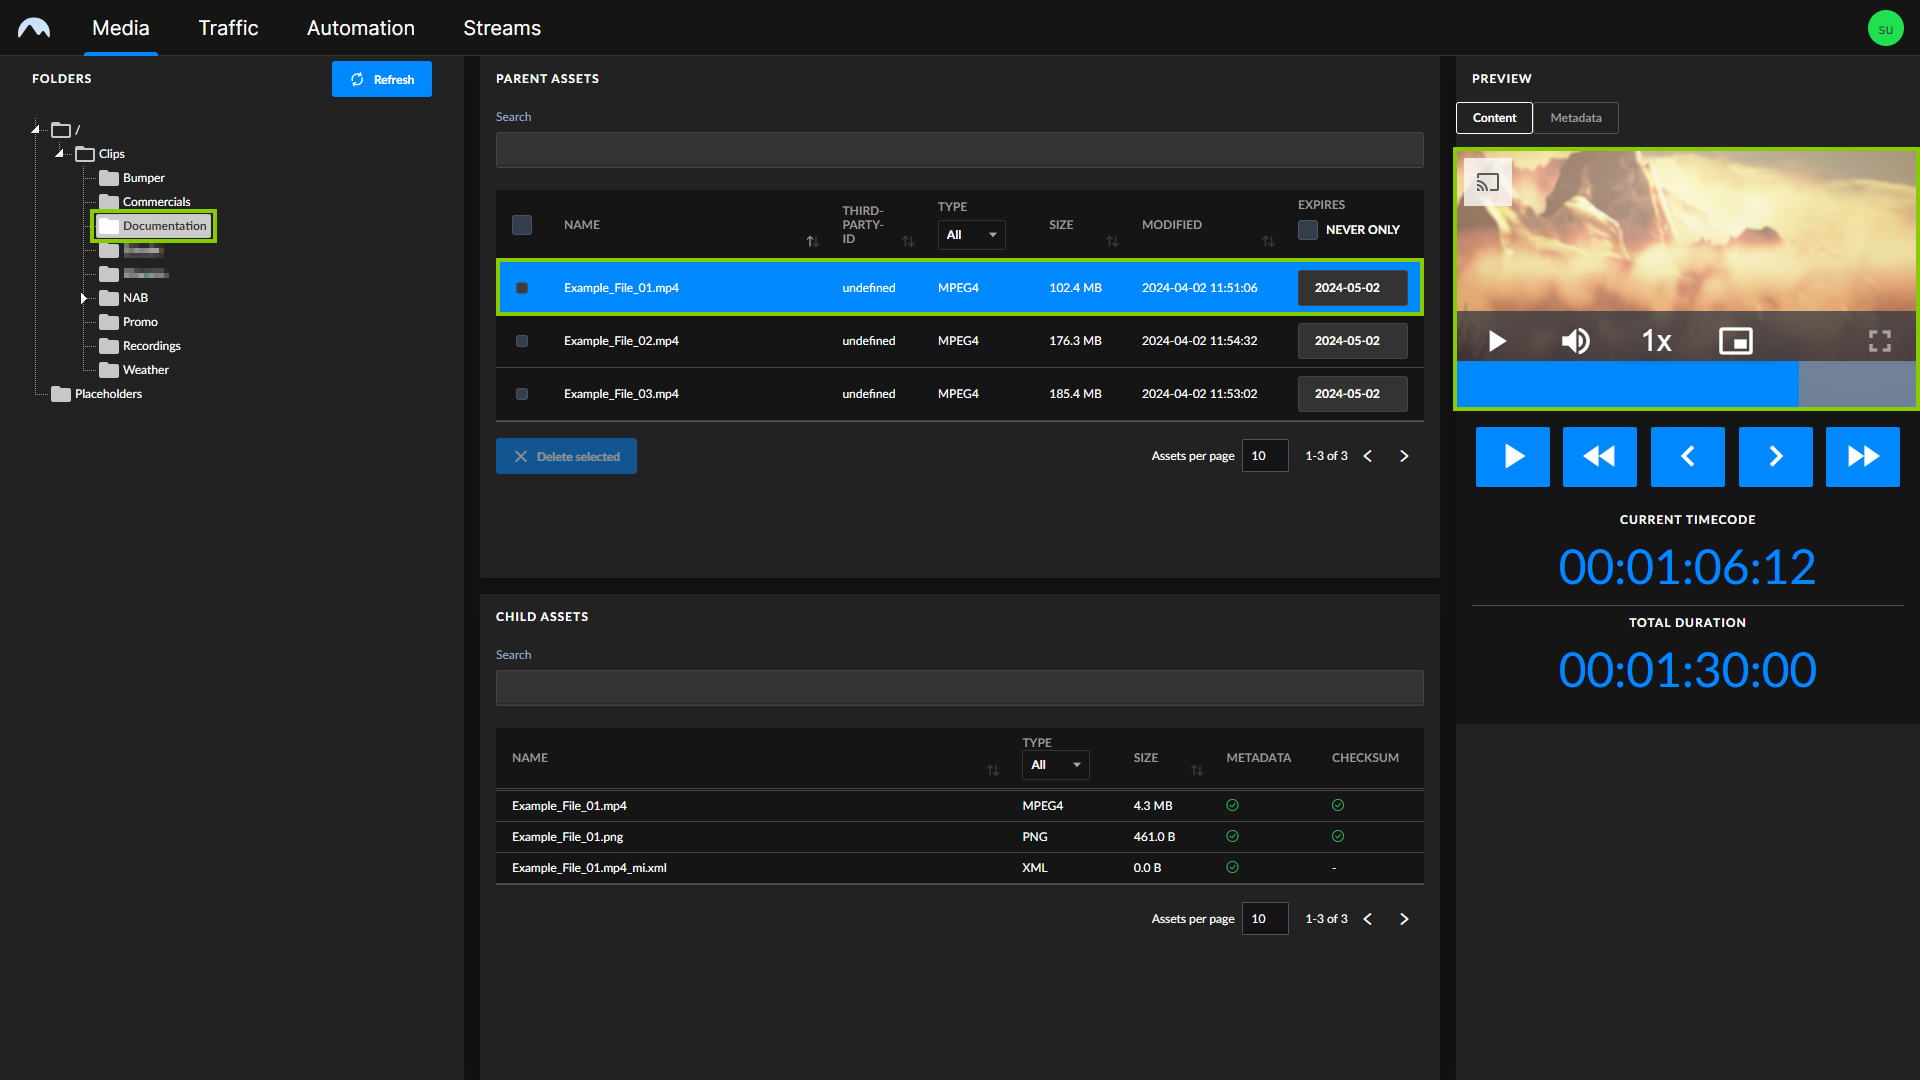
Select the file to be previewed from the Parent Assets list.
The selected file is opened in the preview player on the right. Corresponding files are listed below in the Child Assets area.
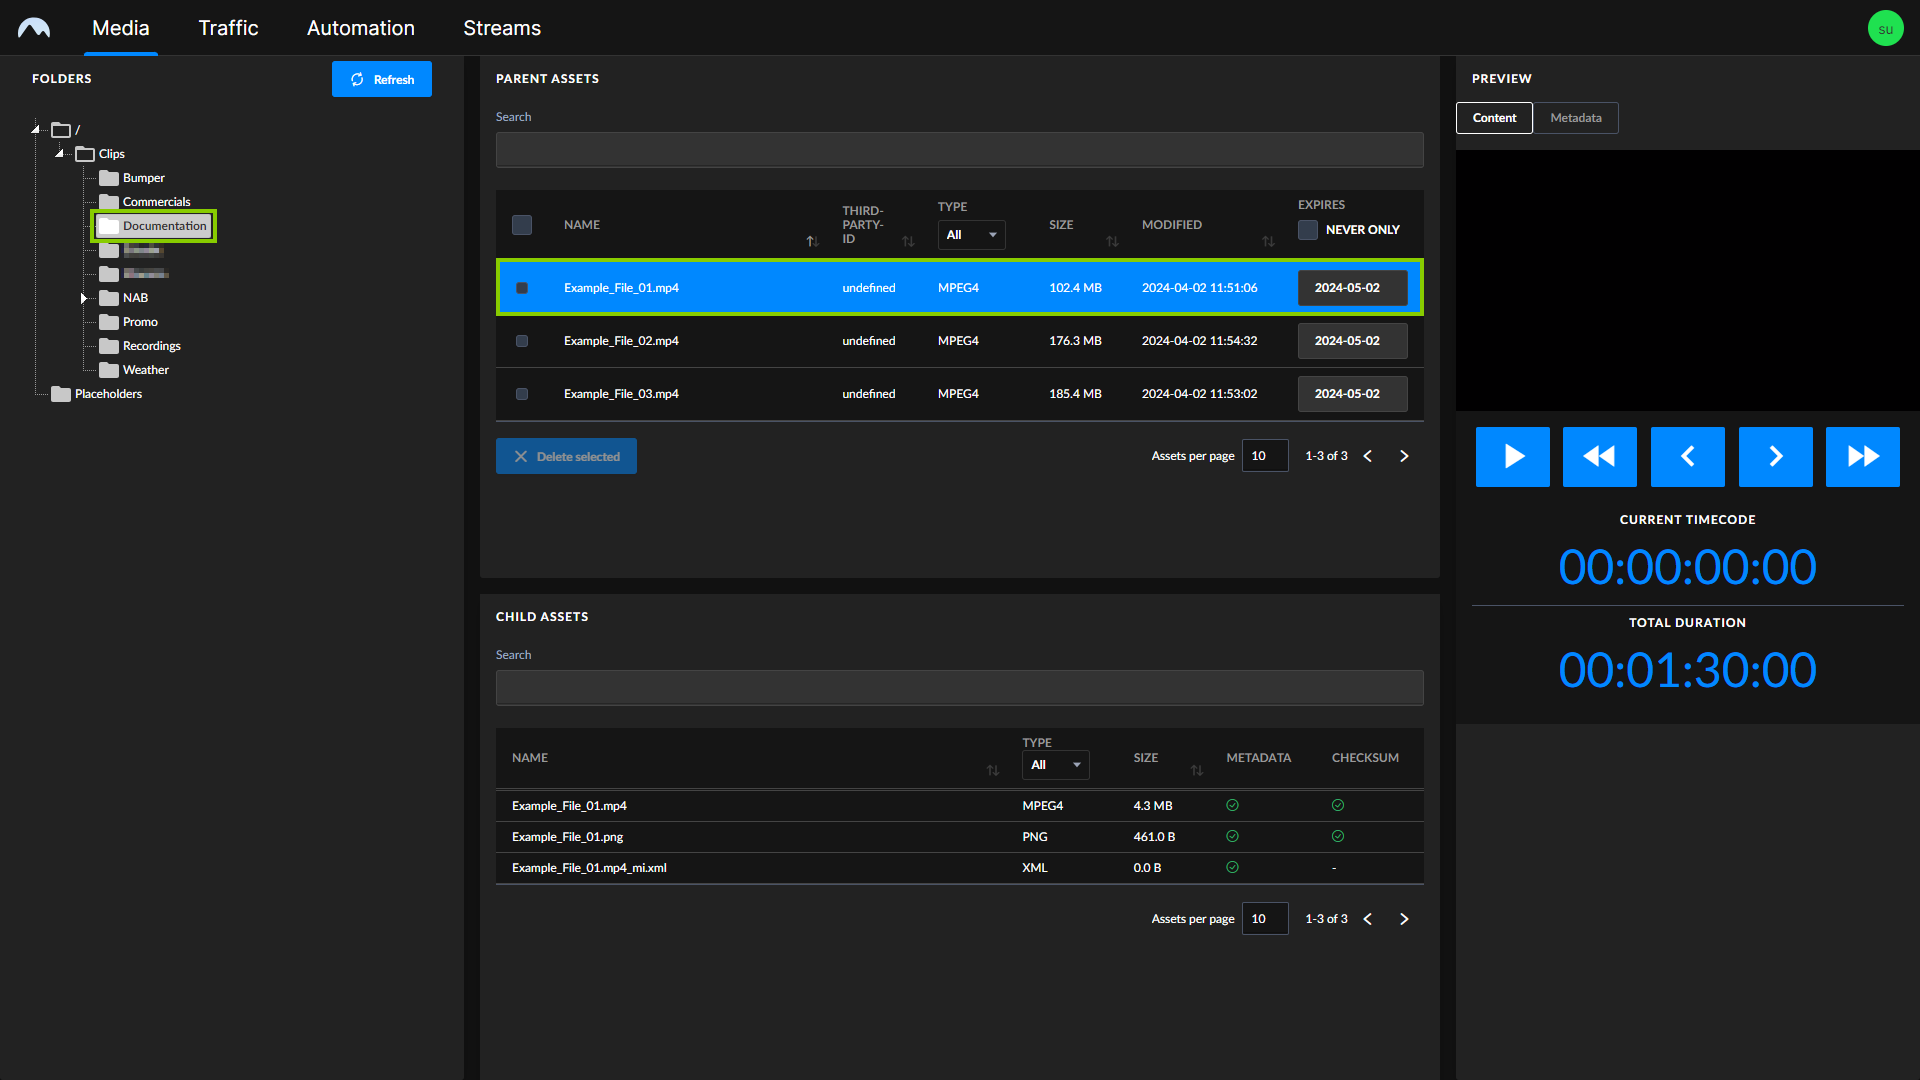
Asset Viewer - File selected -
Use the player controls to preview the file.
The preview playback is started.
Tip
If subtitles were uploaded for the selected file, a CC icon is displayed in the player controls. To select the subtitle language to be used in the preview or to enable/disable the subtitle display, click the CC icon and select the corresponding option.
Housekeeping
Within the scope of storage/file housekeeping, Makalu provides two workflows for deleting files that are no longer needed: automatic and manual housekeeping.
Both workflows include the following steps:
-
Removing the file internally from the Makalu system by removing all corresponding database entries
-
Deleting the file from the central ingest storage
-
Deleting the file from the local storage on playout nodes
Additionally, folders can be deleted from the central ingest storage independently of files.
Automatic file housekeeping
Automatic file housekeeping deletes files on the central ingest storage automatically based on their expiry date and files on the local playout node storage based on their aging date. These time periods are configured globally, and the actual expiry date is calculated individually for each uploaded file based on these settings. When the expiry date is reached, a configurable grace period starts. After the end of this period, the corresponding file is automatically deleted the next time the housekeeping process is executed.
It is possible to configure protected folders that are excluded from housekeeping. Files uploaded to these folders are never automatically deleted, even if the global expiry date is reached.
Manual file housekeeping
Manual file housekeeping allows you to delete uploaded files at any time (regardless of the global expiry date) using Makalu Asset Viewer.
To delete a file manually:
-
Open the Makalu Hub as described in section Accessing the Makalu Hub.
-
In the app list in the left column, in the section Assets, select Media.
The Asset Viewer is opened in the Media tab of the Makalu UI.
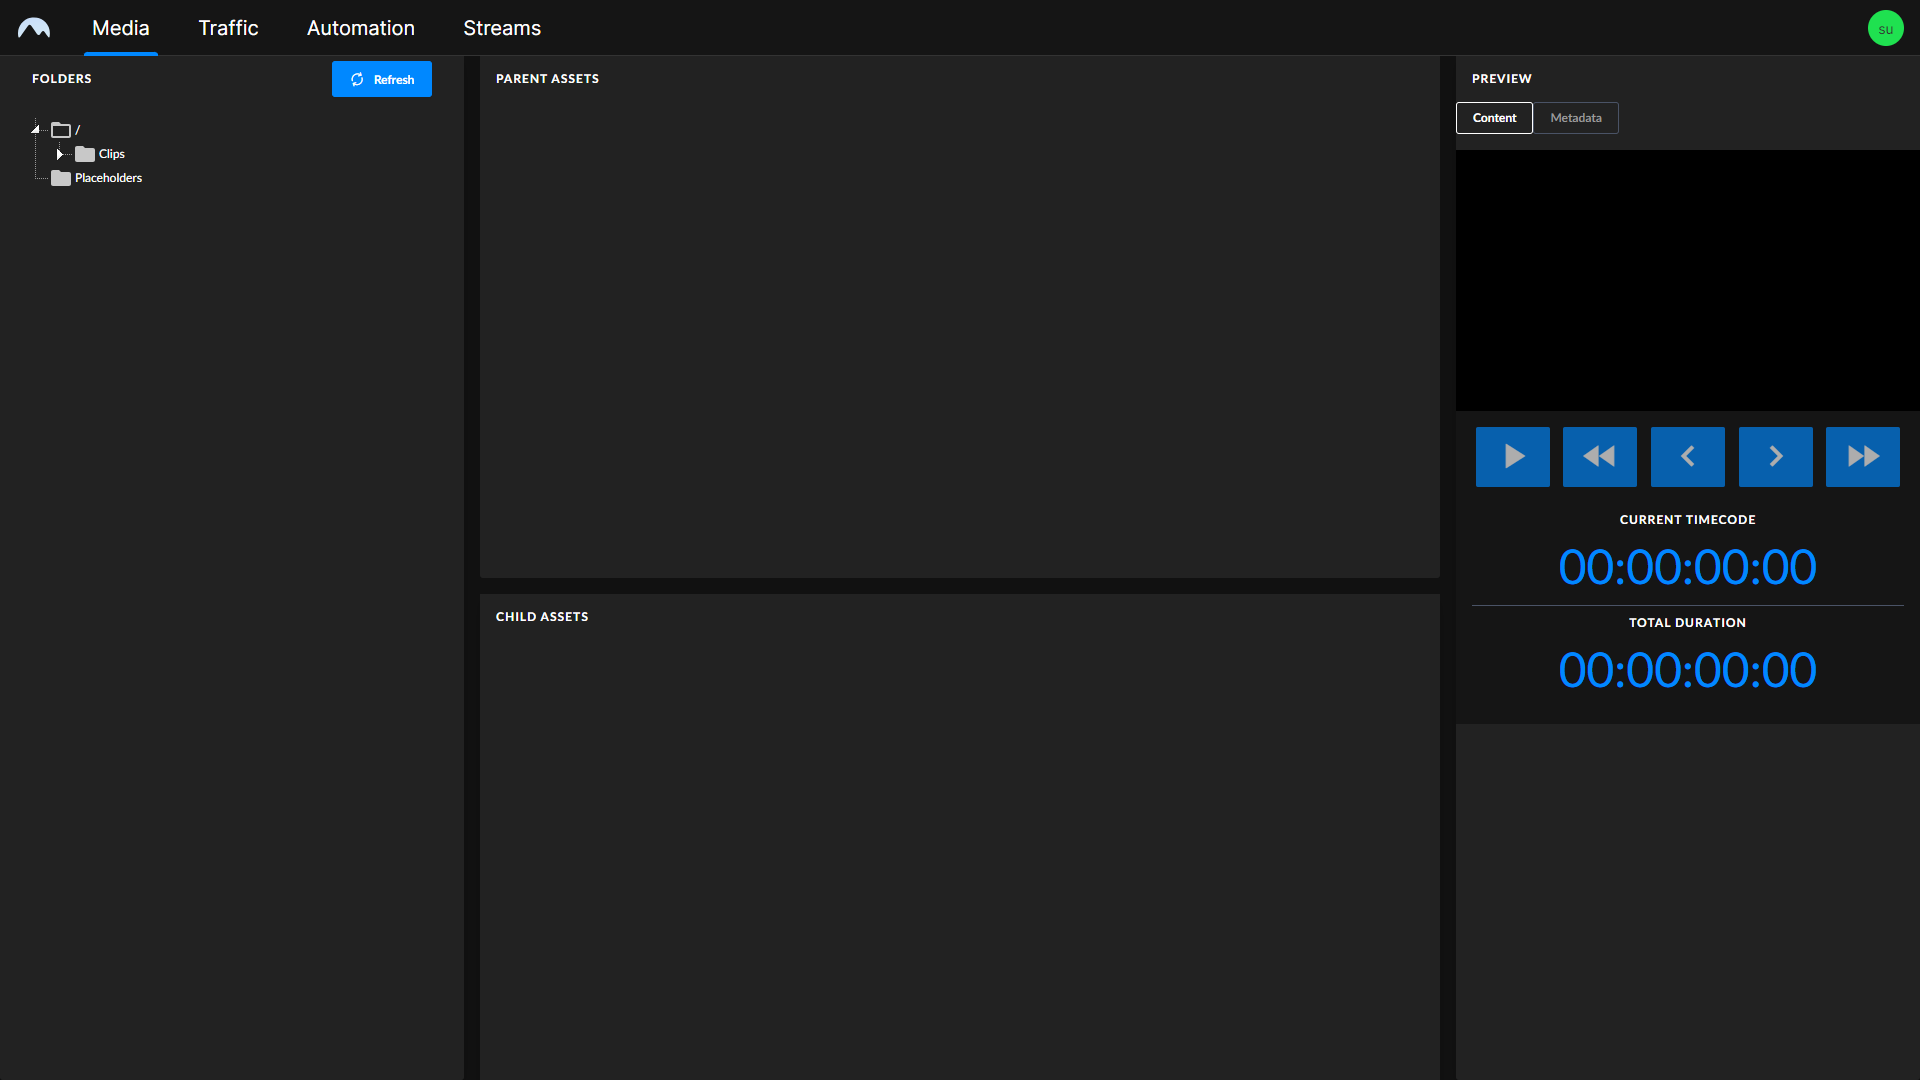
Asset Viewer - UI -
Use the folder tree on the left to select the folder that contains the file you want to delete.
All video files included in the selected folder are listed in the Parent Assets area.
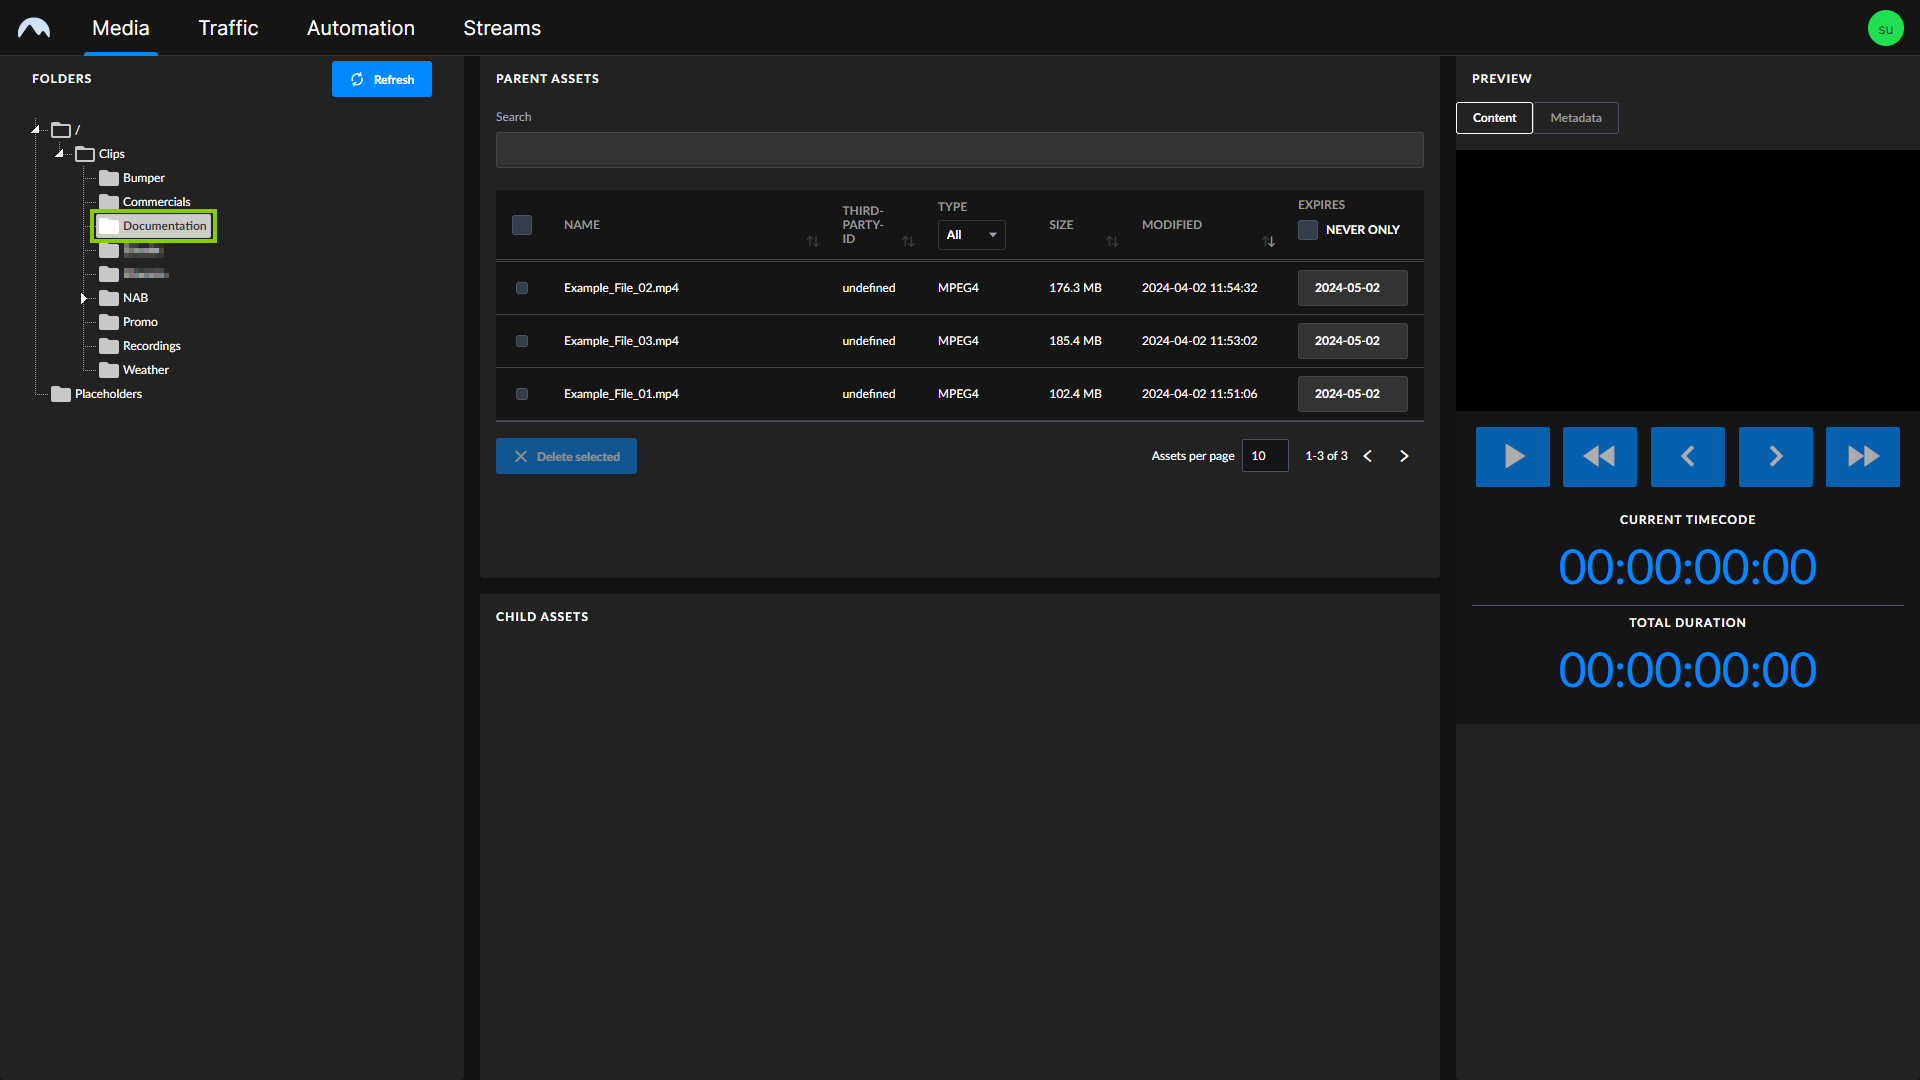
Asset Viewer - Folder selected -
Select one or more files to be deleted from the Parent Assets list.
-
Click Delete selected.
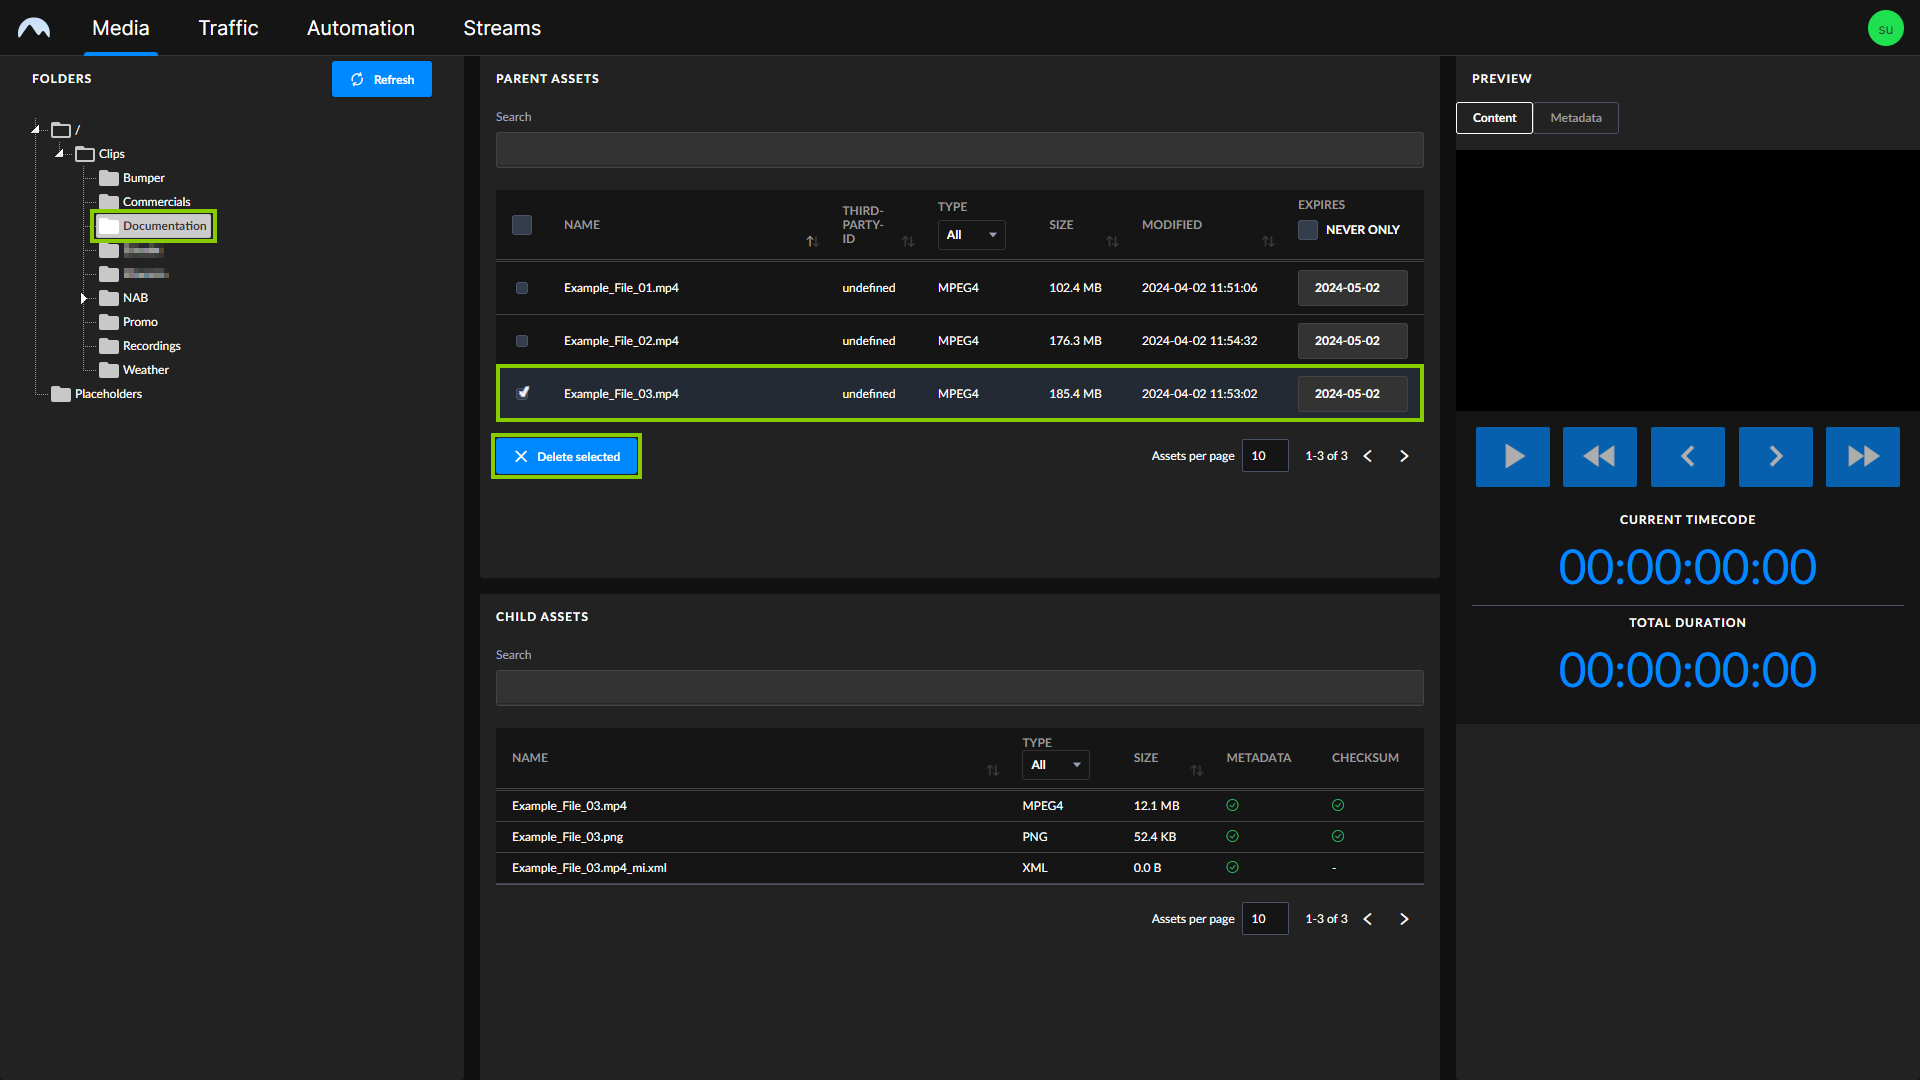
Asset Viewer - Delete files -
Confirm the dialog by clicking Delete.
The selected files are deleted.
Instead of deleting a file immediately, you can also set the expiry date manually. As a result, the file is deleted at a later time when the expiry date and grace period have expired.
To set the expiry date manually:
-
Repeat steps 1 to 3 as described under Manual housekeeping.
-
In the Parent Assets list, click the expiry date of the corresponding file in the Expires column.
A date picker is displayed.
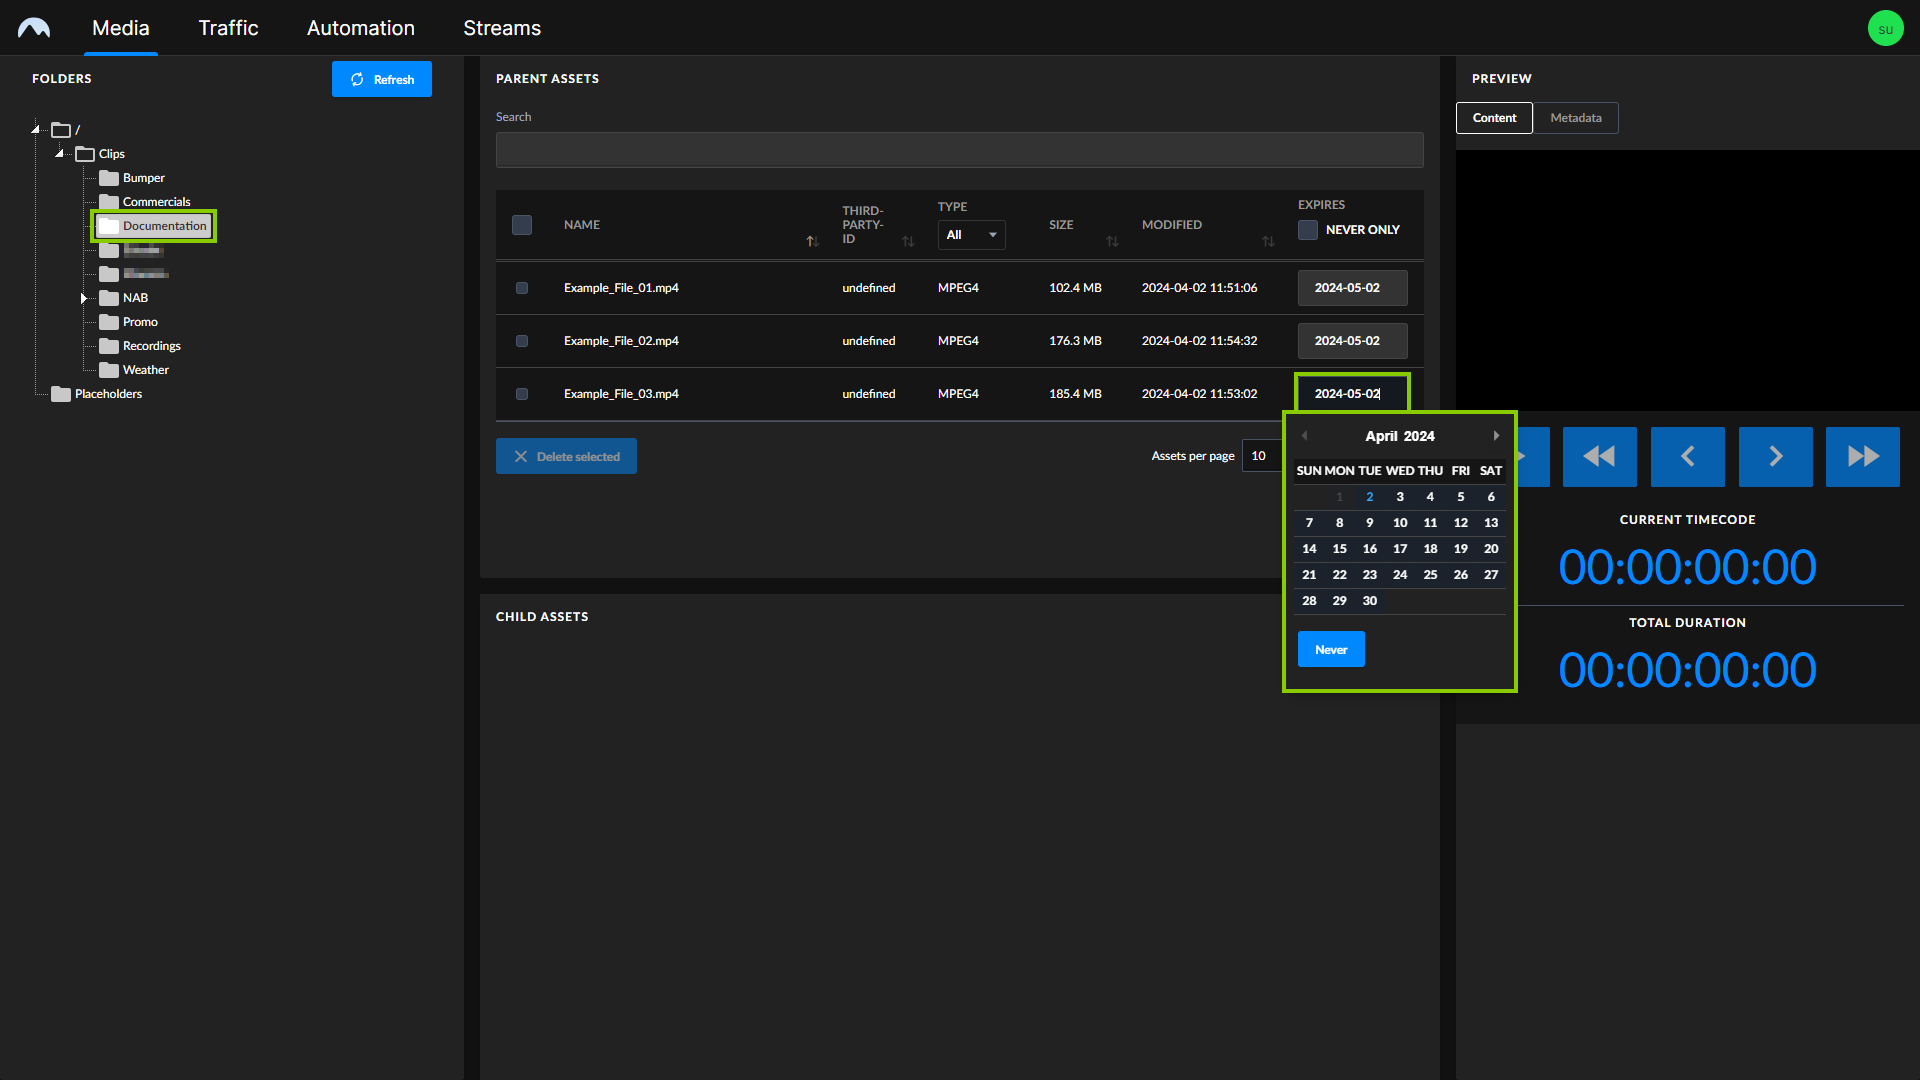
Asset Viewer - Set the expiry date of a file manually -
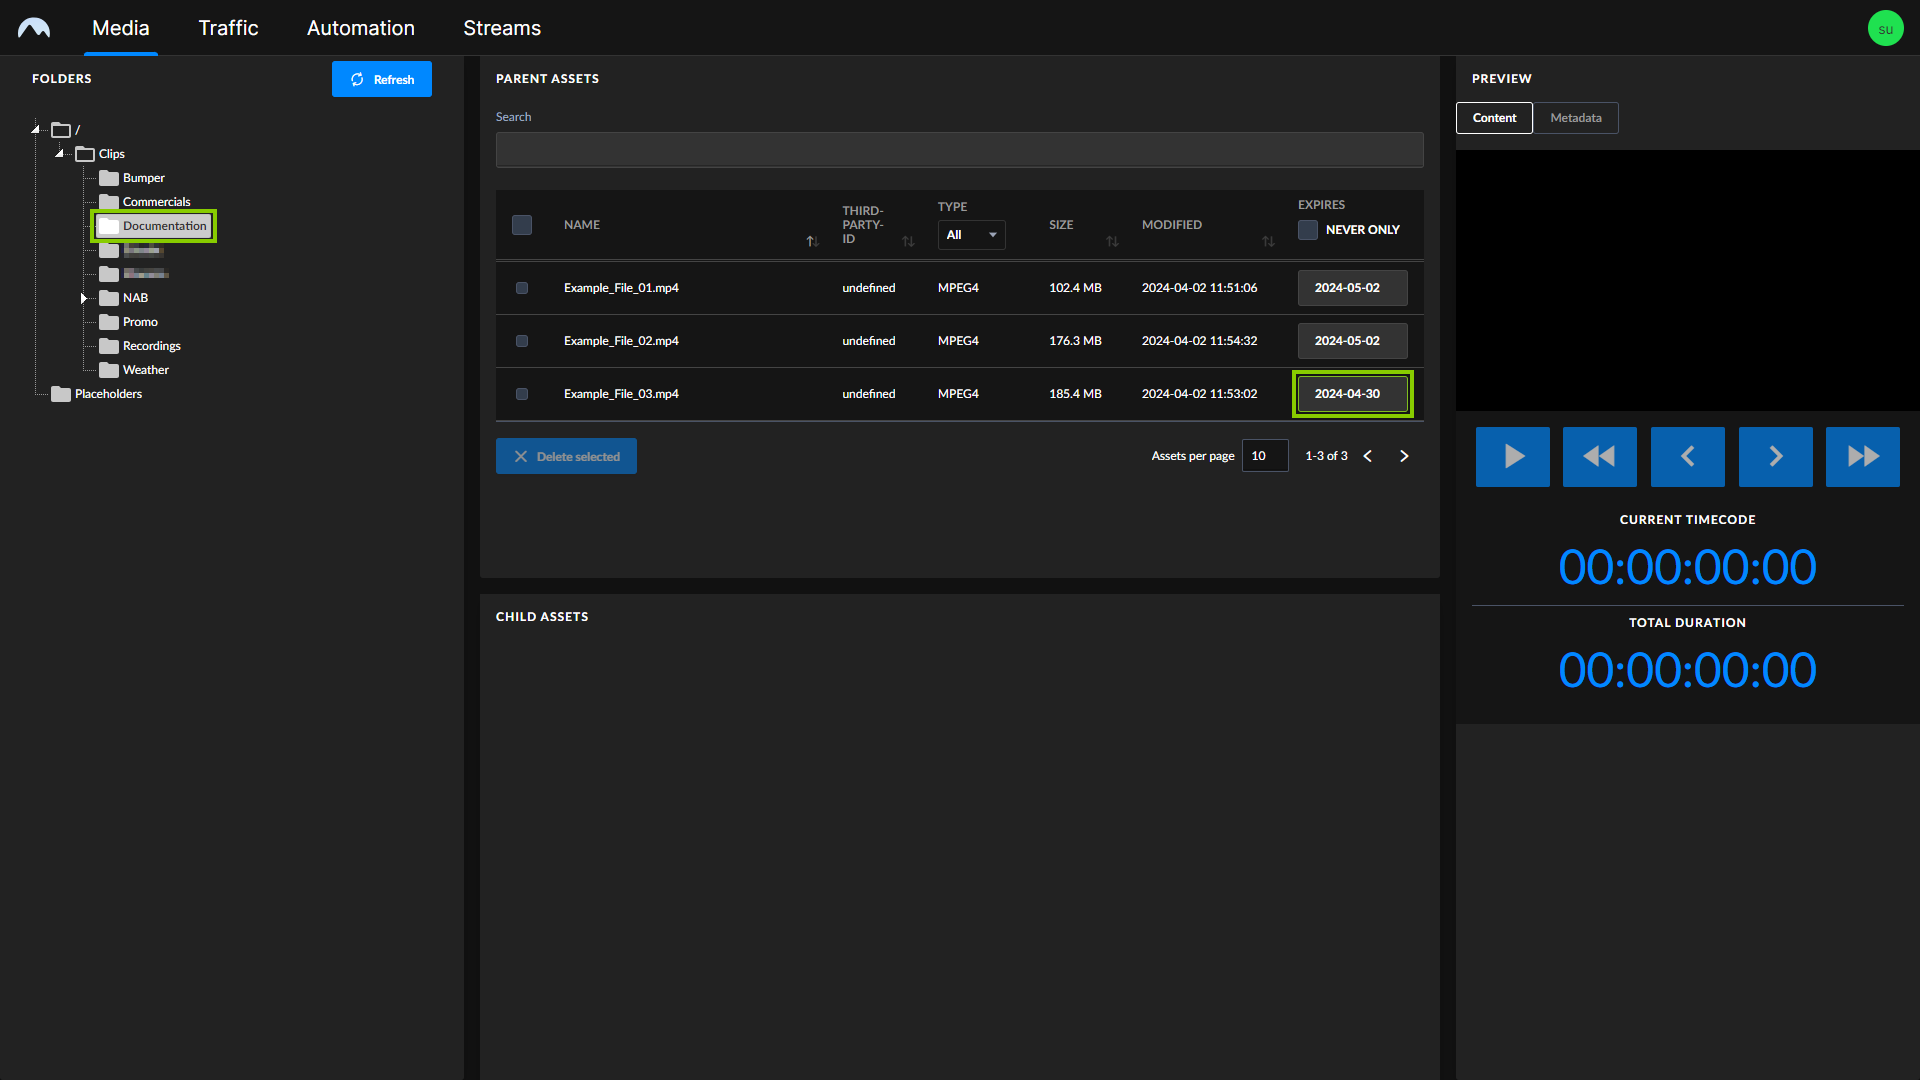
Select the new expiry date.
The expiry date is updated.
Tip
Alternatively, you can prevent a file from being deleted by automatic housekeeping. To do this, set the expiry date to Never by clicking the corresponding button in the date picker.
Manual folder housekeeping
Manual folder housekeeping allows you to delete empty folders from the central ingest storage using Makalu Asset Uploader.
To delete a folder manually:
-
Open Makalu Asset Uploader by either:
-
Opening the Makalu Automation Detailed Channel View and selecting the Asset Uploader tab, or by
-
Opening the Makalu Asset Uploader in the Makalu Hub.
The Asset Uploader UI is opened.
Asset Uploader - UI -
-
Open the sidebar by clicking the Folder icon
on the right. Asset Uploader - Open sidebar The sidebar is expanded, and all available folders are listed.
Notice
Which folders are available in the list depends on your access permissions.
Asset Uploader - Sidebar expanded -
Expand the folder list and select one or more empty folders to be deleted by activating their checkboxes.
Notice
You can only select and delete empty folders. Folders are considered empty if they do not contain any files or only empty subfolders. They can be recognized by a yellow folder icon. Non-empty folders are recognizable by a white folder icon.
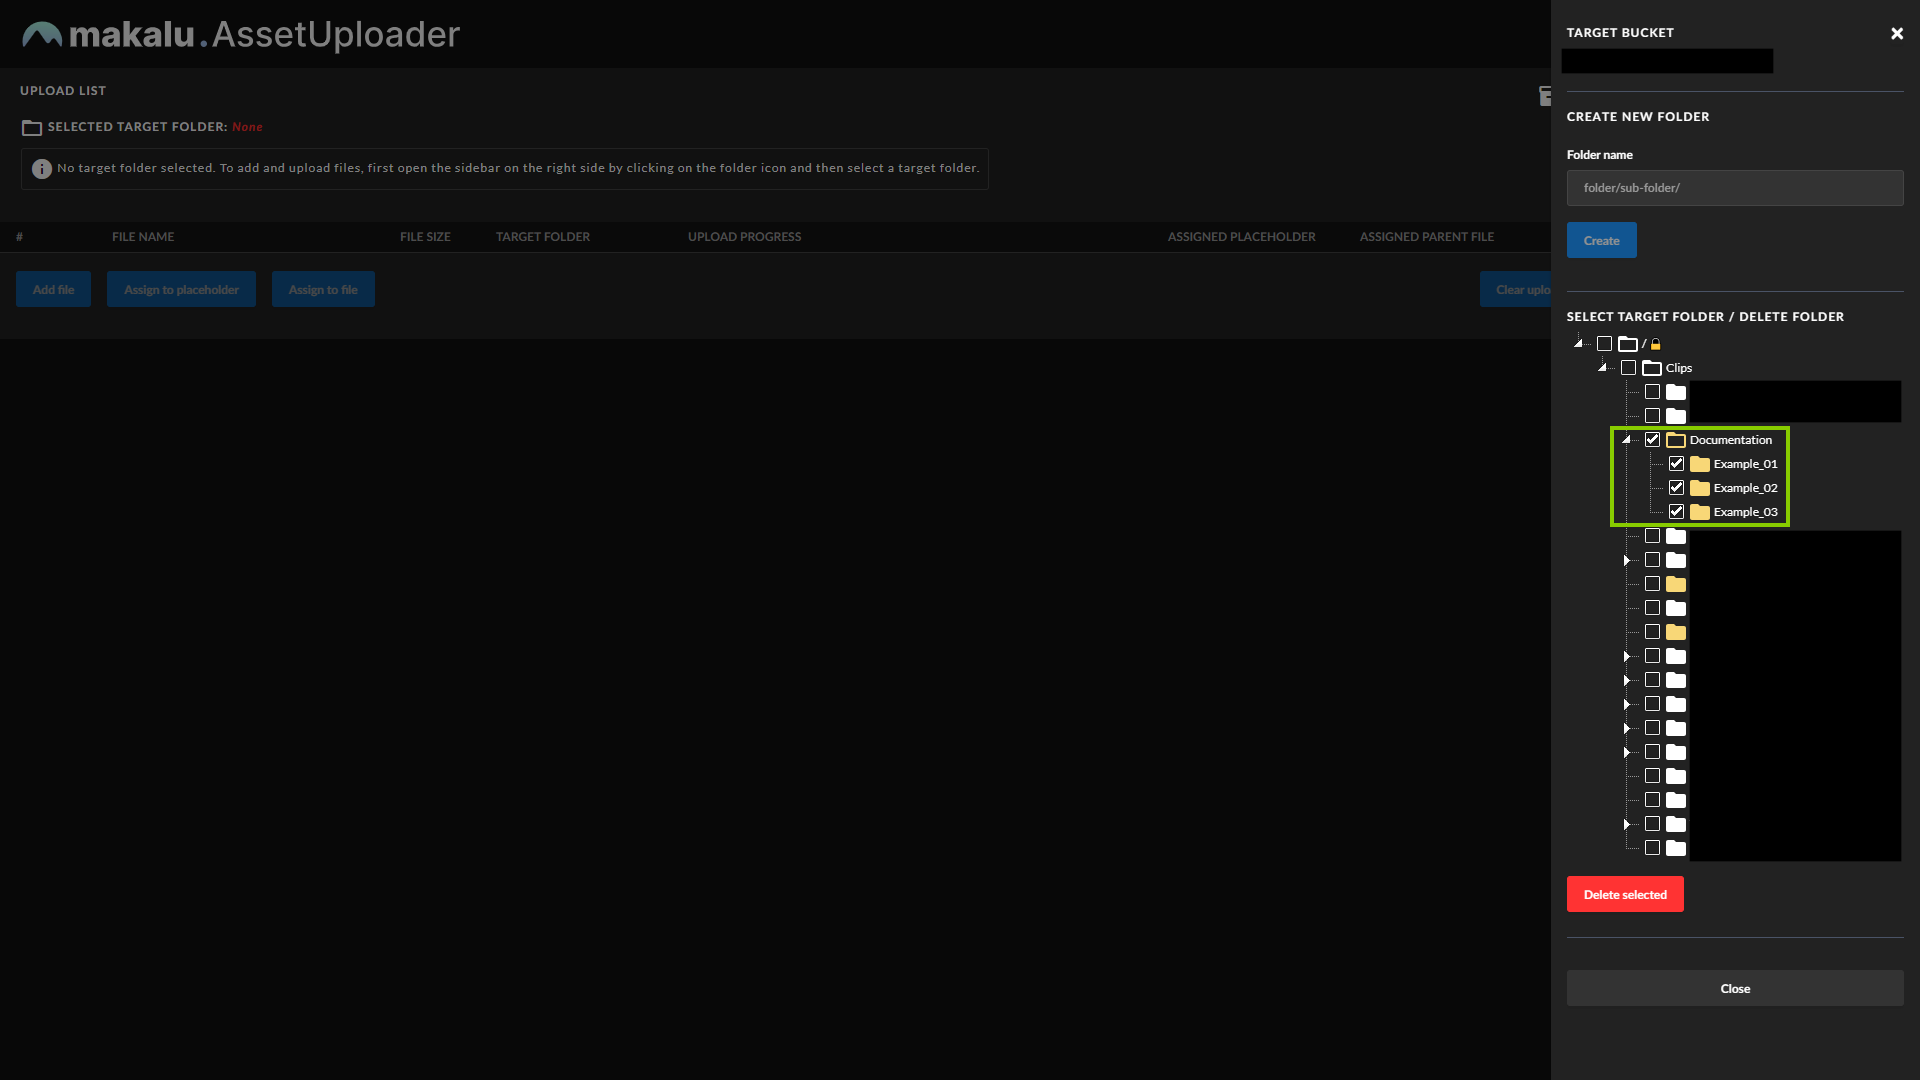
Asset Uploader - Select folders to be deleted -
Click Delete selected.
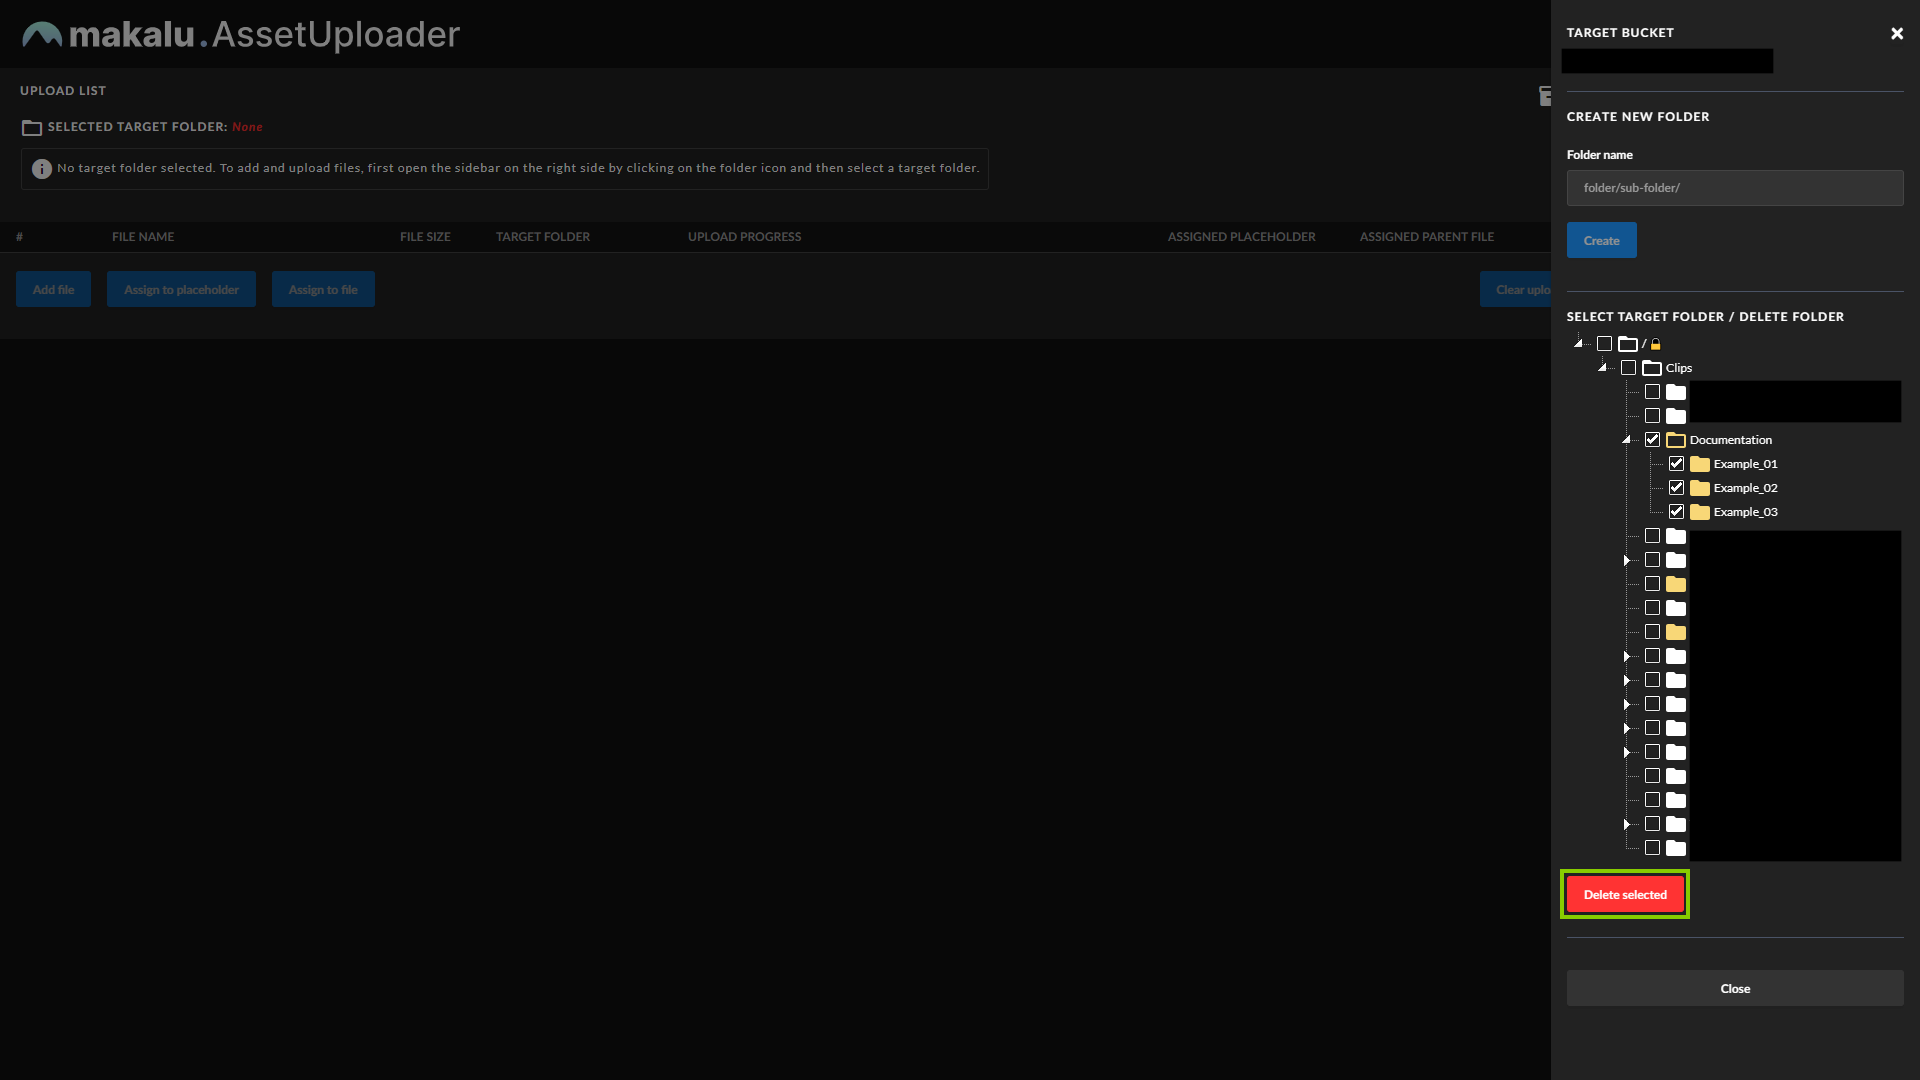
Asset Uploader - Delete selected empty folders A confirmation dialog is displayed that lists all selected folders.
-
Confirm the dialog by clicking Delete.
The selected folders are deleted.