Multichannel View
Overview
When Makalu is operated as a multichannel environment, the Multichannel View is available in the Automation tab of the Makalu UI. It is a configurable view for monitoring purposes and is particularly suited for operators of multichannel environments to monitor multiple playout channels simultaneously. It is not to be confused with a multiviewer as it not only displays a preview of what is currently being played out, but also the current rundown of each channel. Additionally, it provides access to the detailed view of each channel (see the section Detailed Channel View).
It displays channels as tiles, and each tile can be displayed either expanded or collapsed. When all channels are displayed collapsed, up to ten channels can be displayed simultaneously on a monitor with a resolution of 1920 x 1080 px. Which channels are available depends on the access permissions of the current user.
If an error or problem is detected on a channel, the corresponding channel tile is highlighted with a different background color. Depending on the severity of the problem, it is highlighted, for example, in yellow, orange, or red.
The Multichannel View consists of the following elements:
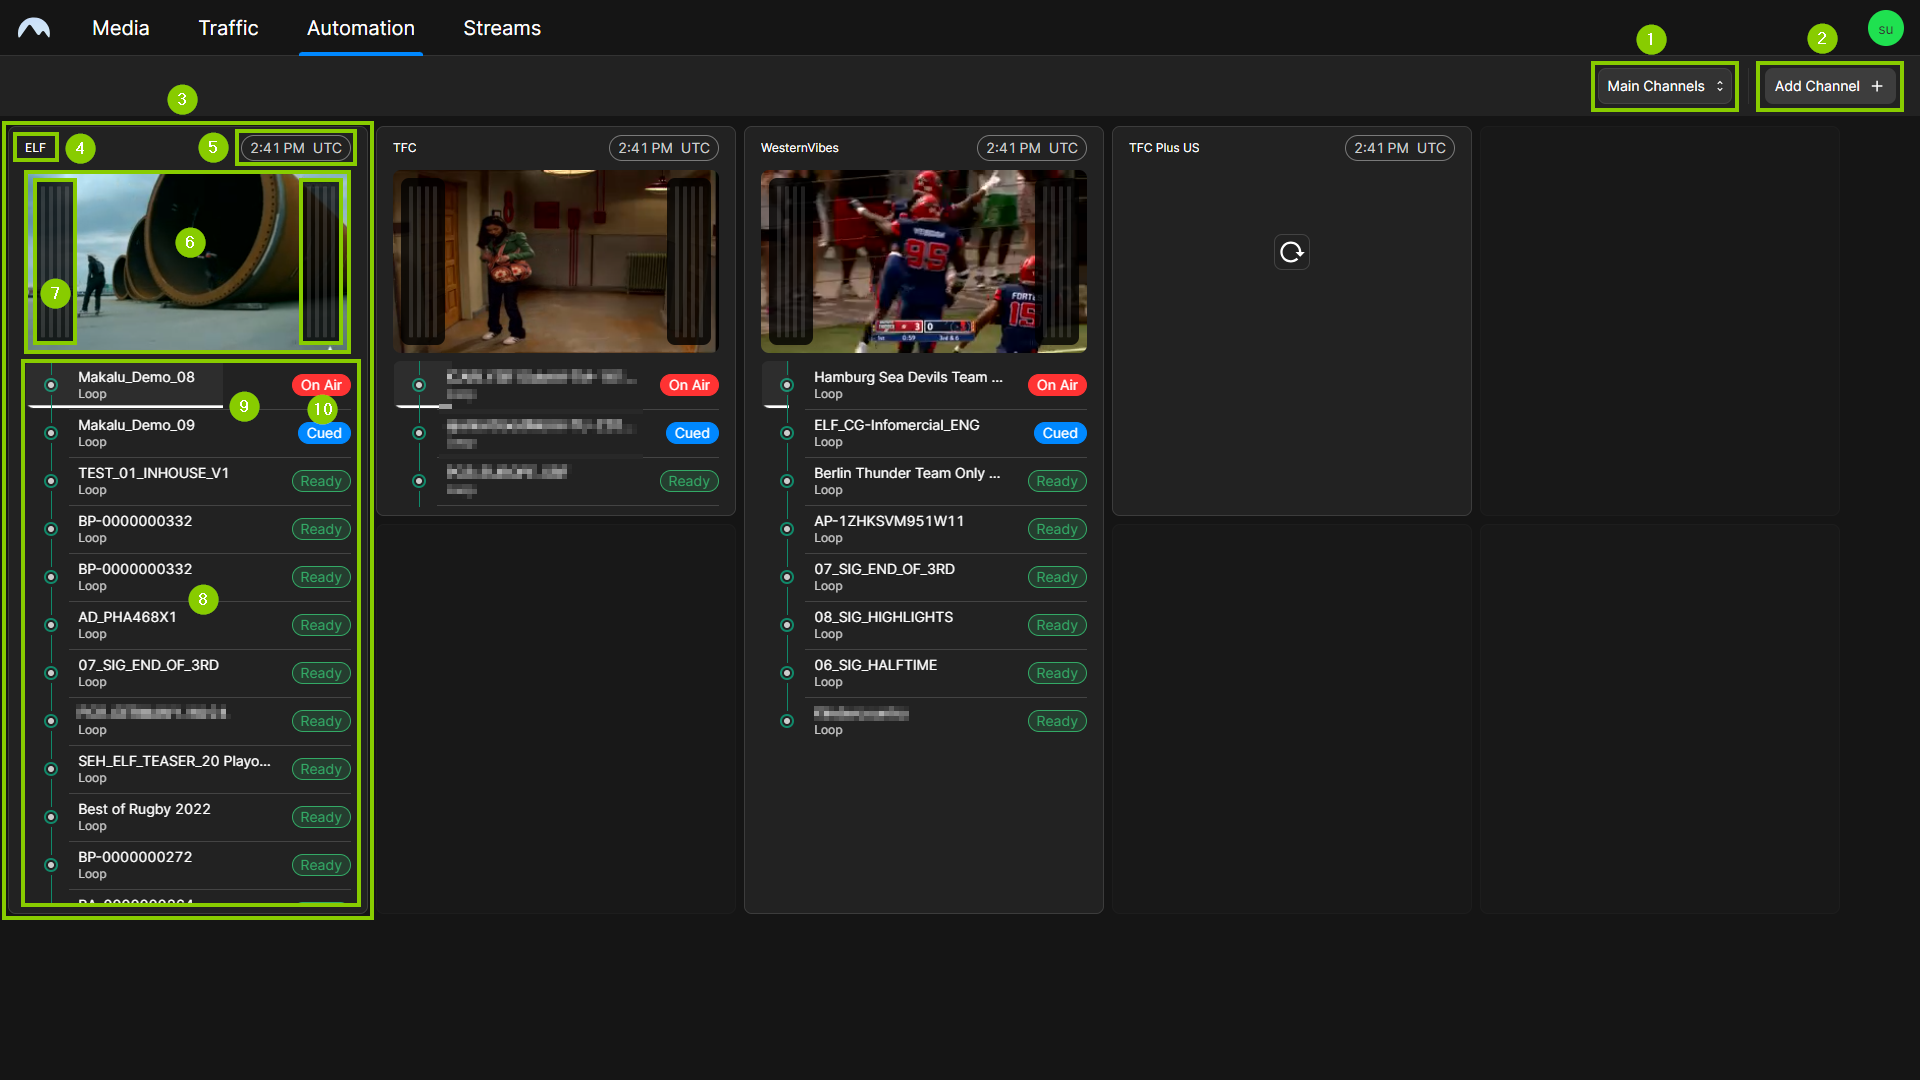
- Channel selection menu
- Channel tile
- Channel name
- Main/Backup switch (to switch between the preview output of the main or backup player of the corresponding channel)
- Local UTC time of the channel
-
Channel output preview
Notice
The preview initially only shows a thumbnail image of the current output of each channel, which is automatically updated at a configurable interval. This keeps the network load on the client side as low as possible, especially if a large number of channels are displayed simultaneously. If required, the actual preview playback can be started, paused, and resumed manually per channel by clicking the Play or Pause icon in the preview player area.
-
Rundown (starting with the clip currently being played and followed by the next clips scheduled in the rundown, also across shows)
- Playback progress of the clip currently being played
- Clip status (see the section Channel rundown)
Accessing the Multichannel View
To access the Multichannel View:
-
Open the Makalu Hub as described in section Accessing the Makalu Hub.
-
Select the Applications tab.
-
In the application list in the left column, select Automation > Makalu Automation.
The main Makalu UI is opened in a new browser tab, and the Automation tab with the Multichannel View is displayed.
Customizing the channel selection
To customize the channel selection:
-
Open the Multichannel View as described in section Accessing the Multichannel View.
-
At the top right, click Add Channel.
The channel selection menu is displayed, which contains an alphabetically sorted list of all available channels.
-
Select the channels to be displayed from the channel list.
Tip
You can search for specific channel names by using the Search menu above the channel list.
-
Confirm your selection by clicking Apply.
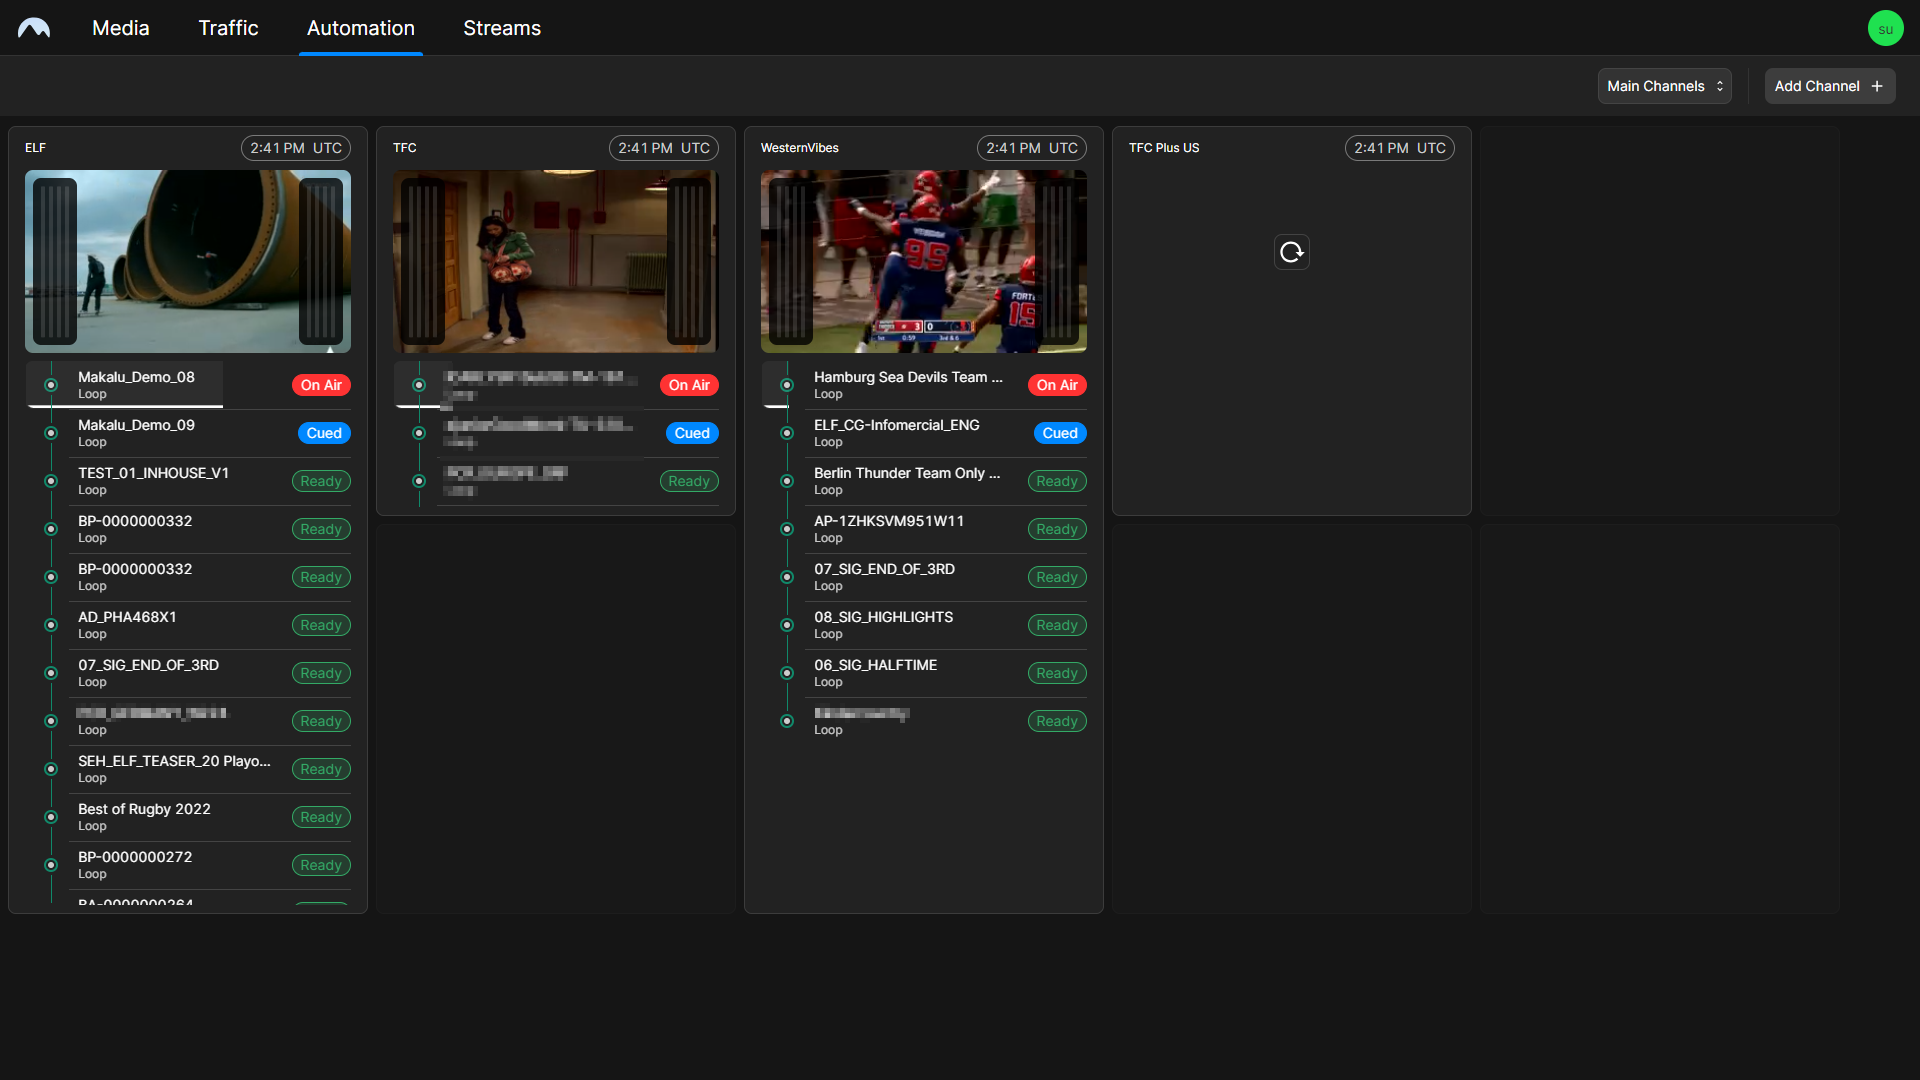
The selected channels are displayed as tiles and can be monitored.
Tip
You can manually change the order of the tiles displayed by moving them to the desired position via drag and drop.
Customizing a channel tile
The display of the tiles can be customized. The rundown and audio level peak meter can be either shown or hidden. Additionally, the rundown can be displayed either collapsed or expanded.
To customize a channel tile:
-
Open the Multichannel View as described in section Accessing the Multichannel View.
-
Select the channel tile you want to customize.
The tile is highlighted with a white border.
-
To expand or collapse the channel rundown display, click the Expand/Collapse icon
 at the bottom right corner of the tile.
 -
Click the Settings icon
 at the bottom center of the screen.
A settings menu is displayed that enables you to show or hide the rundown and audio level peak meter.
-
In the settings menu, select the elements to be displayed and deselect the elements to hide.
The tile display is updated based on the selected elements.