Operation modes
Makalu channels run in one of two operation modes: Regular mode or LED wall mode. The mode is set during channel creation and configuration.
Regular mode
Regular mode is the standard operation mode for broadcast channels. It covers the 24/7 playout workflow for TV stations described throughout the rest of this manual.
Notice
For a general overview of the available functional areas, see the section Functional overview. For information about the day-to-day scheduling workflow and how to use the automation, see the sections Schedule and Automation.
LED wall mode
LED wall mode lets you use a Makalu channel to play content on almost any type of display medium, for example:
- LED walls
- Ribbon displays in stadiums
- Pillars, floor stands, and POI/POS (Point of Interest / Point of Sale) systems in any orientation
Depending on the configuration, Makalu sends the played content to a connected downstream LED controller (an external device provided by the LED wall manufacturer), either in HD or UHD resolution. This LED controller scans the individual areas of the Makalu output image and maps them to the individual pixels of the connected LED/display modules.
Basic concepts
Rundown management and channel control
From a user's perspective, managing the rundown and controlling a Makalu channel in LED wall mode via the Detailed Channel View is almost identical to a channel in regular mode. You schedule LED wall content through playlists based on the same planning concept (for more information, see the section Schedule) and items in the rundown are nested in the same way (Playlist > Show > Clip). To control playback, follow the steps described under Controlling the rundown playback.
Clip elements
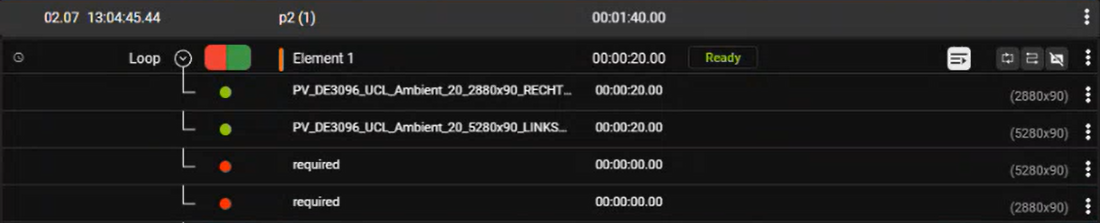
The main difference between the two modes is that LED wall mode internally uses a different playlist structure to map several assets to a single clip (unlike regular mode, which maps one asset to one clip). As a result, each clip consists of multiple clip elements. By default, clips are displayed collapsed in the rundown. Expanding a clip reveals the included elements below.
Resolution and file format
Makalu composes all assets assigned to a clip into a single output image at the resolution the downstream LED controller expects, so you do not need to pre-produce a single file in that exact resolution (for example, 1920 × 1080 pixels). This also means you can use files with resolutions that do not conform to broadcast standards, for example, 2880 × 90 pixels or 90 × 5280 pixels.
Makalu supports the MP4 file format for LED wall content, so you do not need to convert your files to a different format, such as QuickTime RLE.
Scene configuration
A Makalu channel that runs in LED wall mode is set up for a specific physical display during configuration. The configuration is based on a "scene" that defines the number of elements/segments the display consists of, the resolution each element requires, and how the individual files being played should be combined in the output. You cannot edit this structure as it is predetermined by the scene.
Tip
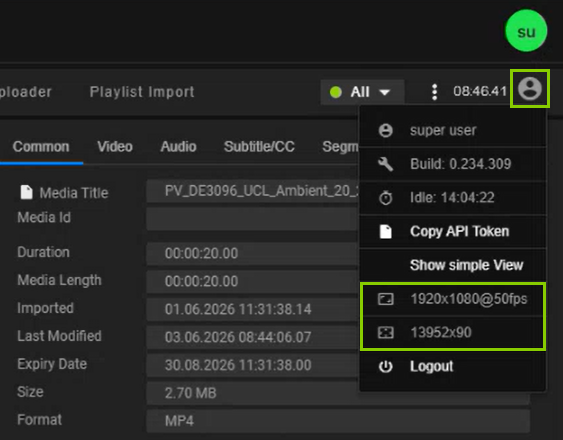
You can display information about the current channel configuration via the User menu at the top right. It includes the output resolution and frame rate as well as the target resolution of the scene.
Preview players
In the Detailed Channel View the two players above the rundown provide a preview of the currently cued clip (PVW player on the left) and a preview of the current composed output (PGM player on the right).
Technical constraints
The following general technical constraints apply to Makalu LED wall channels:
- Pixel limit: A channel can output up to 8,000,000 pixels (equivalent to a UHD screen).
- Multiple LED walls: A single core can drive up to five LED walls, using one channel per LED wall. Makalu does not synchronize playout between different LED wall channels (each channel is played individually).
- No audio output: Assets can include an audio track, but Makalu does not output audio to the connected downstream LED controller.
- Maximum resolution per file: A single MP4 file can have a maximum size of 16,000 pixels per axis. If your display exceeds this size in one dimension, you can split the content across several synchronized clip elements instead of using a single file.
Creating a playlist
Creating a playlist for an LED wall channel follows the same steps as in regular mode (see the section Creating a playlist), with the following differences:
- You set the number of included clips and their duration when you create the playlist.
- Each clip in the playlist requires as many clip elements as the scene defines.
- You can only add assets by dragging them onto clip elements that require the same resolution.
To create a new playlist:
-
Click the Add playlist icon
 in the toolbar above the rundown.
The Create Playlist menu opens.
-
Enter a Playlist Title.
-
(Optional) Enter a Show Title.
-
Set the Start date and time.
-
(Optional) To set the start date and time as fixed times, enable set fix Start Time.
-
Select the number of clip Elements the playlist should consist of.
-
Select the Duration of the clip elements, either by using one of the available presets or by selecting Individual and setting a custom duration.
-
Click Create.
The playlist is created based on your settings. It includes a show with the selected number of clips. Each clip gets the selected duration and consists of the number of elements defined in the channel's scene.

Assigning assets to clip elements
The assets available for LED wall elements are listed in the Media tab, just like regular assets, but they typically have non-standard resolutions. For example, a ribbon display with four segments and a total resolution of 16320 × 90 pixels might require two files at 2880 × 90 pixels and two files at 5280 × 90 pixels.
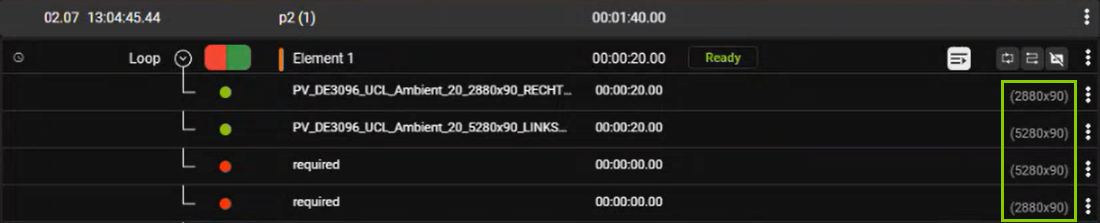
You can only assign an asset to a clip element if the asset resolution matches the resolution the element requires. The expected resolution is displayed in the rundown in the Flags column for each element when you expand a clip. If you drag an asset onto an element with a different required resolution, Makalu rejects the assignment.
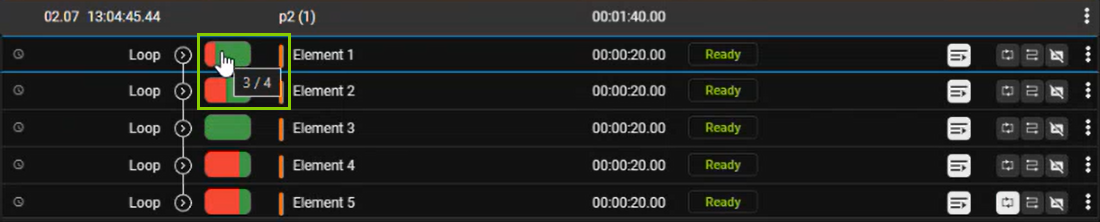
For each clip in the rundown, the fill level is indicated by a green or red bar. Green areas indicate elements that have already been assigned an asset, while red areas refer to elements without an assigned asset. Hovering over the bar displays the fill level as a progress indicator, for example, "3 / 4" if three of four elements of a clip have been assigned an asset.
When you expand a clip, a green dot indicates that the element already has a matching asset assigned, while a red dot means that no asset is assigned yet.
To assign assets to clip elements:
-
In the rundown, expand a clip, by clicking the Expand icon
 in the Link column.
All included clip elements are listed below.
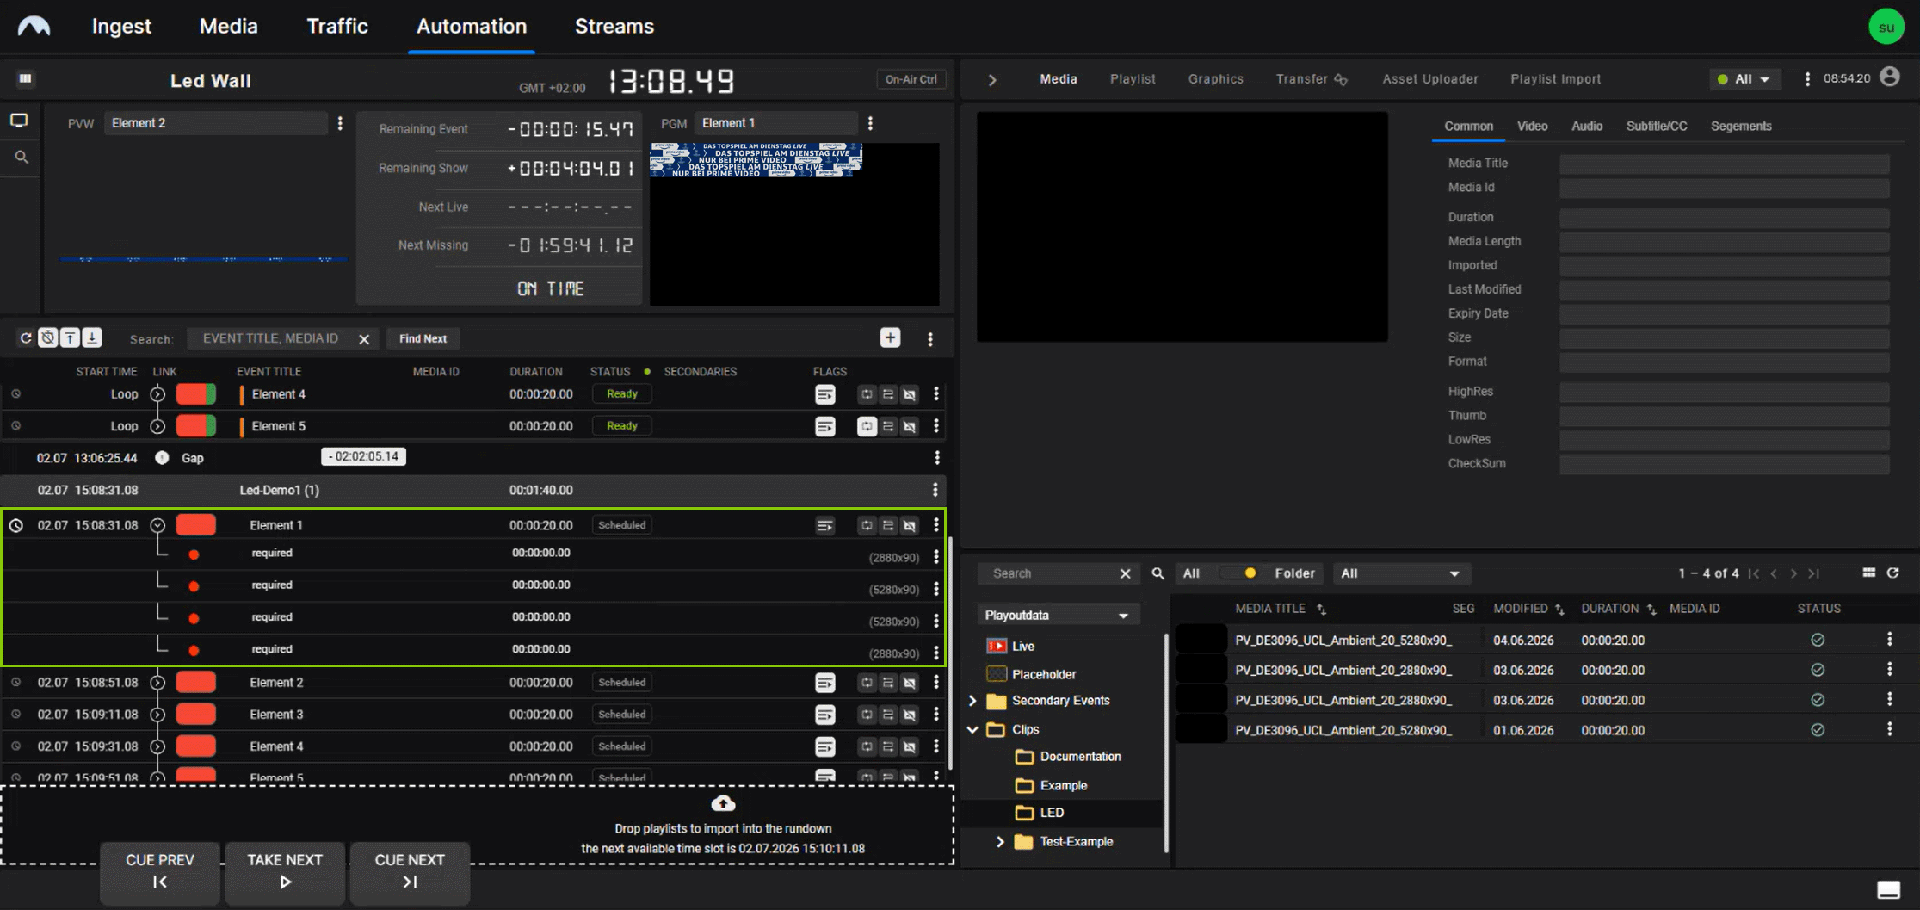
Automation - Clip expanded -
Assign an asset to an empty clip element (highlighted with a red dot and listed as "required"), by dragging an asset with the required resolution (as shown in the Flags column) from the Media tab and dropping it onto the clip element.
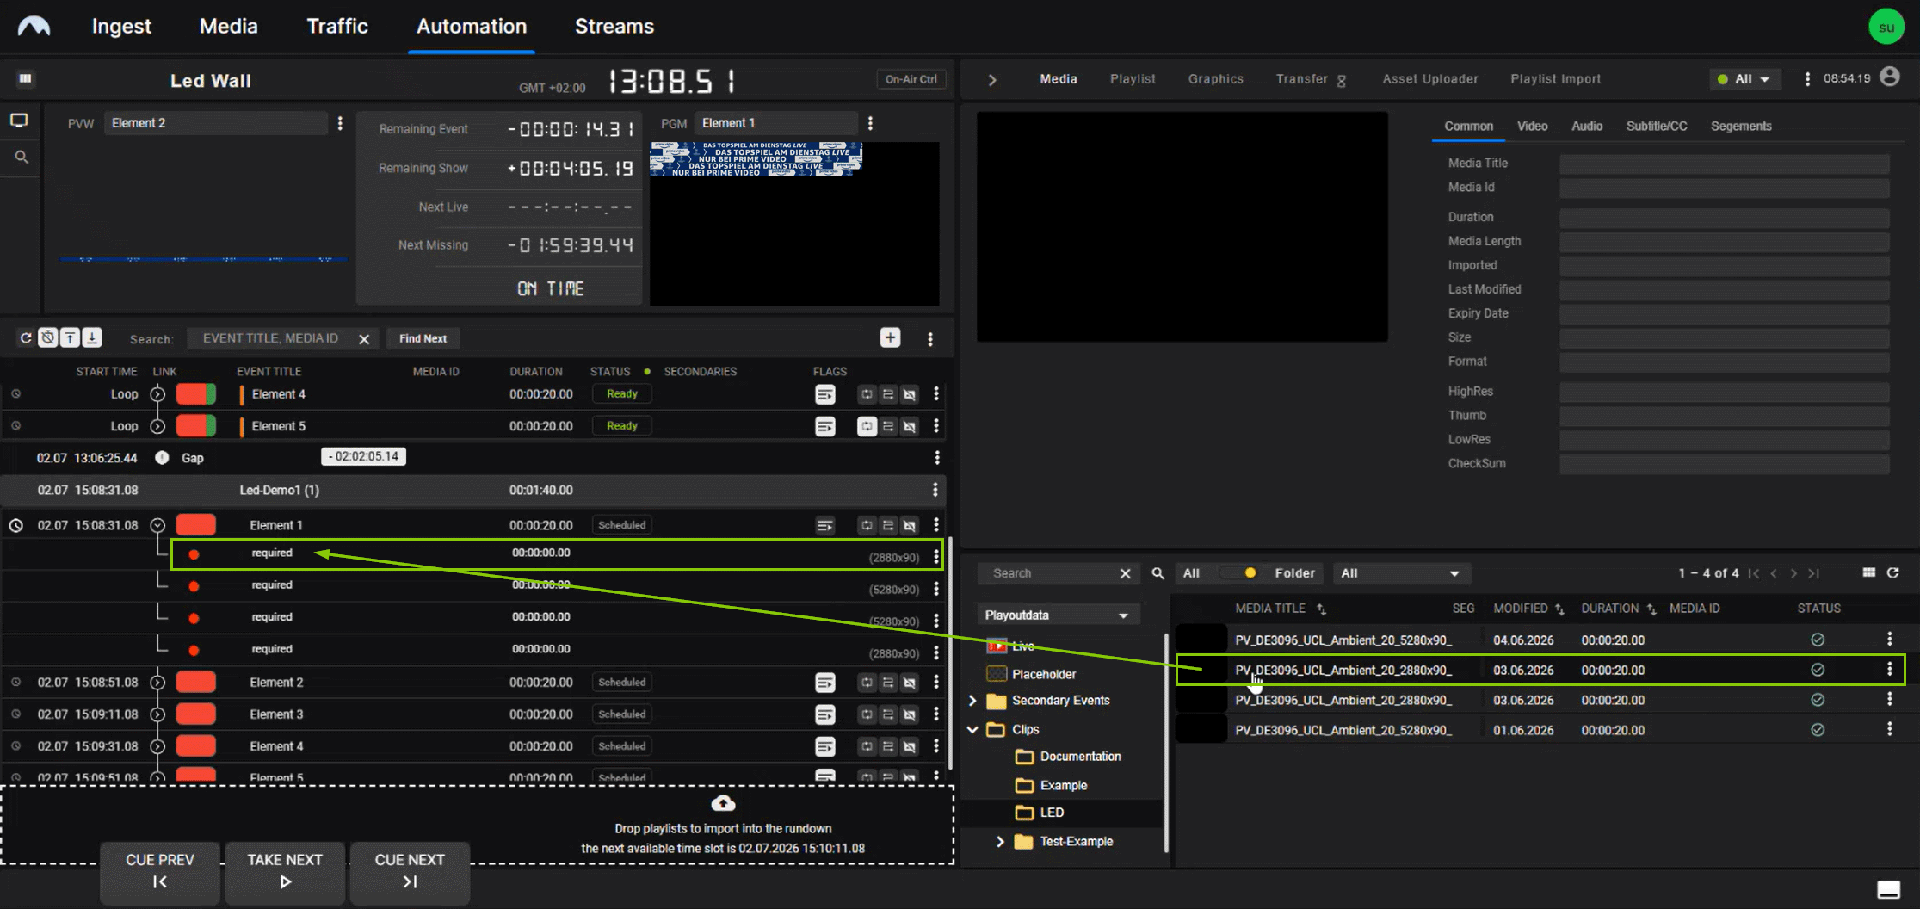
Automation - Assigning an asset to a clip element The asset is assigned. The clip element is highlighted with a green dot and the progress indicator of the clip is updated accordingly.
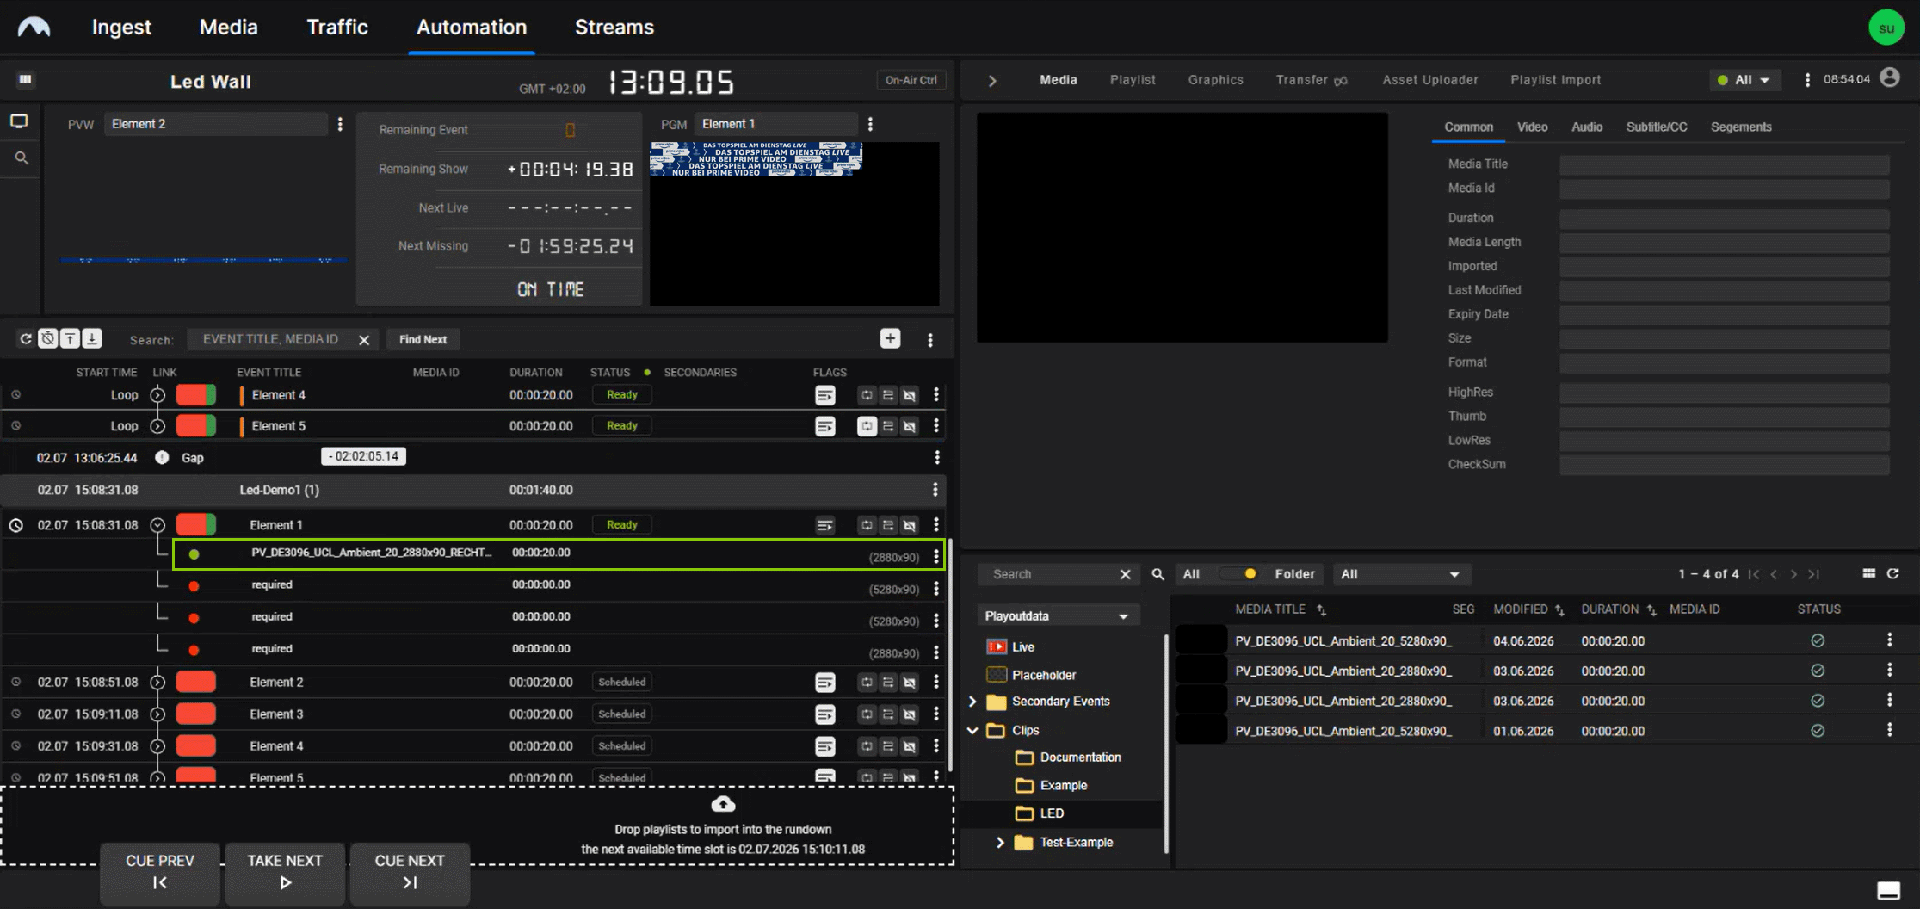
Automation - Asset assigned to a clip element -
Repeat step 2 until you have assigned an asset to each element of the clip.
The assignment of assets to clip elements is complete. All clip elements are highlighted with a green dot and the progress indicator of the clip is updated accordingly.
To play the clip and control the playback, follow the steps described under Controlling the rundown playback.
Removing an assigned asset from a clip element
To remove an assigned asset from a clip element:
-
In the rundown, expand a clip, by clicking the Expand icon
in the Link column.All included clip elements are listed below.
-
Click the Options icon
 of the corresponding clip element and select Delete mapping.
The assigned asset is removed. The clip element is again highlighted as empty with a red dot and listed as "required".
Editing a playlist
To add a clip to a playlist:
-
To add a clip after an existing clip, click the Options icon
of a clip in the rundown and select Add clip.The Create clip menu opens.
-
Select the clip Duration, either by using one of the available presets or by selecting Individual and setting a custom duration.
-
Click Create.
A new clip with the selected duration is added after the existing clip.
Tip
If you instead want to add a clip as the last element of a show, click the Options icon of the corresponding show and select Add element at the end.
To remove a clip from a playlist:
-
In the rundown, expand the show that includes the clip to be removed.
-
Click the Options icon
of the clip and select Delete clip.
The clip is removed.
Saving a playlist
To save a playlist:
-
In the rundown, click the Options icon
of the playlist and select Save or Save as.The New playlist menu opens.
-
Enter a Title for the playlist.
-
Click Apply.
The playlist is saved and can be reused by dragging it from the Playlist tab into the rundown.